Groups Guide: Create, View, and Manage Content Groups
The Groups screen is used to define and manage host-based groupings for organizing content across different environments such as preview and production.
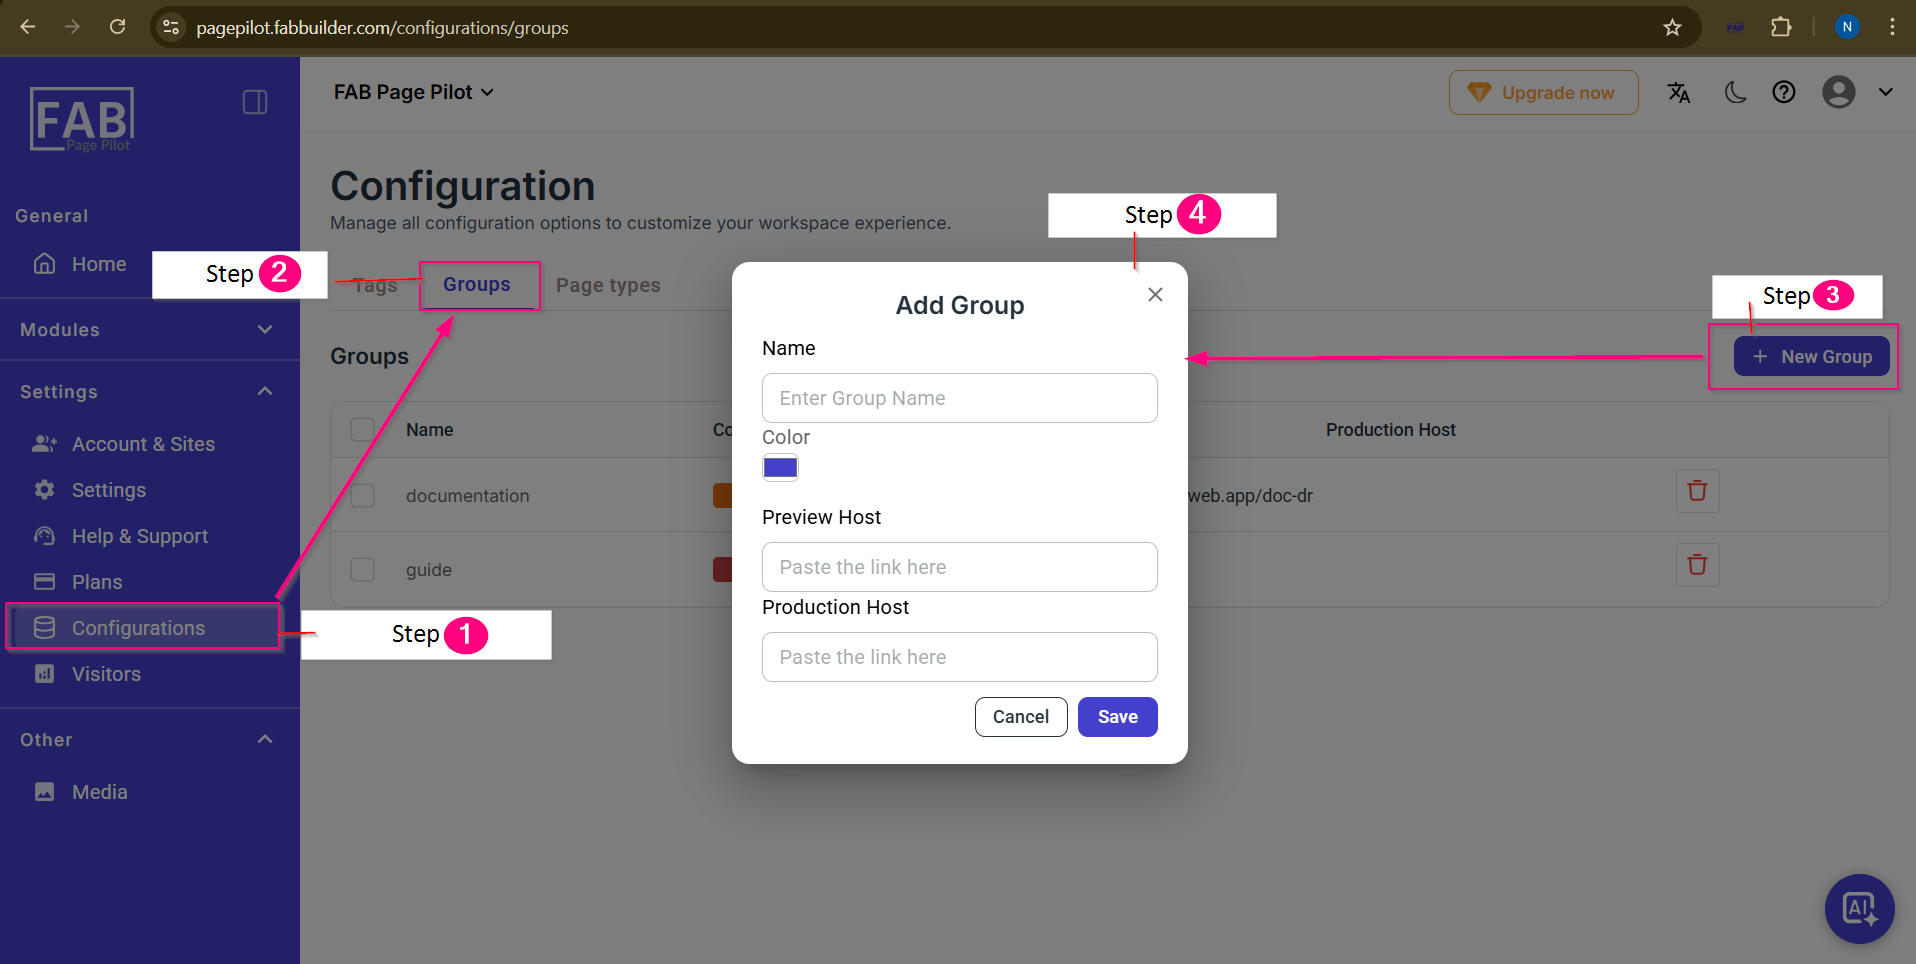
Screen- Add Group
Step-by-Step Explanation
Step 1: Open Configurations
From the left sidebar, go to Settings → Configurations.
This opens the configuration management section.
Step 2: Select Groups Tab
Click on the Groups tab within the Configuration page.
This displays all existing groups.
Step 3: Add a New Group
Click the + New Group button at the top-right corner.
The Add Group dialog opens.
Step 4: Create Group
In the Add Group popup, provide the following details:
- Name: Enter a meaningful group name (e.g., documentation, guide).
- Color: Choose a color for visual identification.
- Preview Host: Enter the preview or staging environment URL.
- Production Host: Enter the live production environment URL.
Click Save to create the group or Cancel to discard changes.