Steps to Create a Demo
Follow the steps below to create a new demo in PagePilot.
Step 1: Open the Demo Module
Click on the Demo Module from the left navigation panel.
Step 2: Click on Create Demo
Click on the Create Demo button.
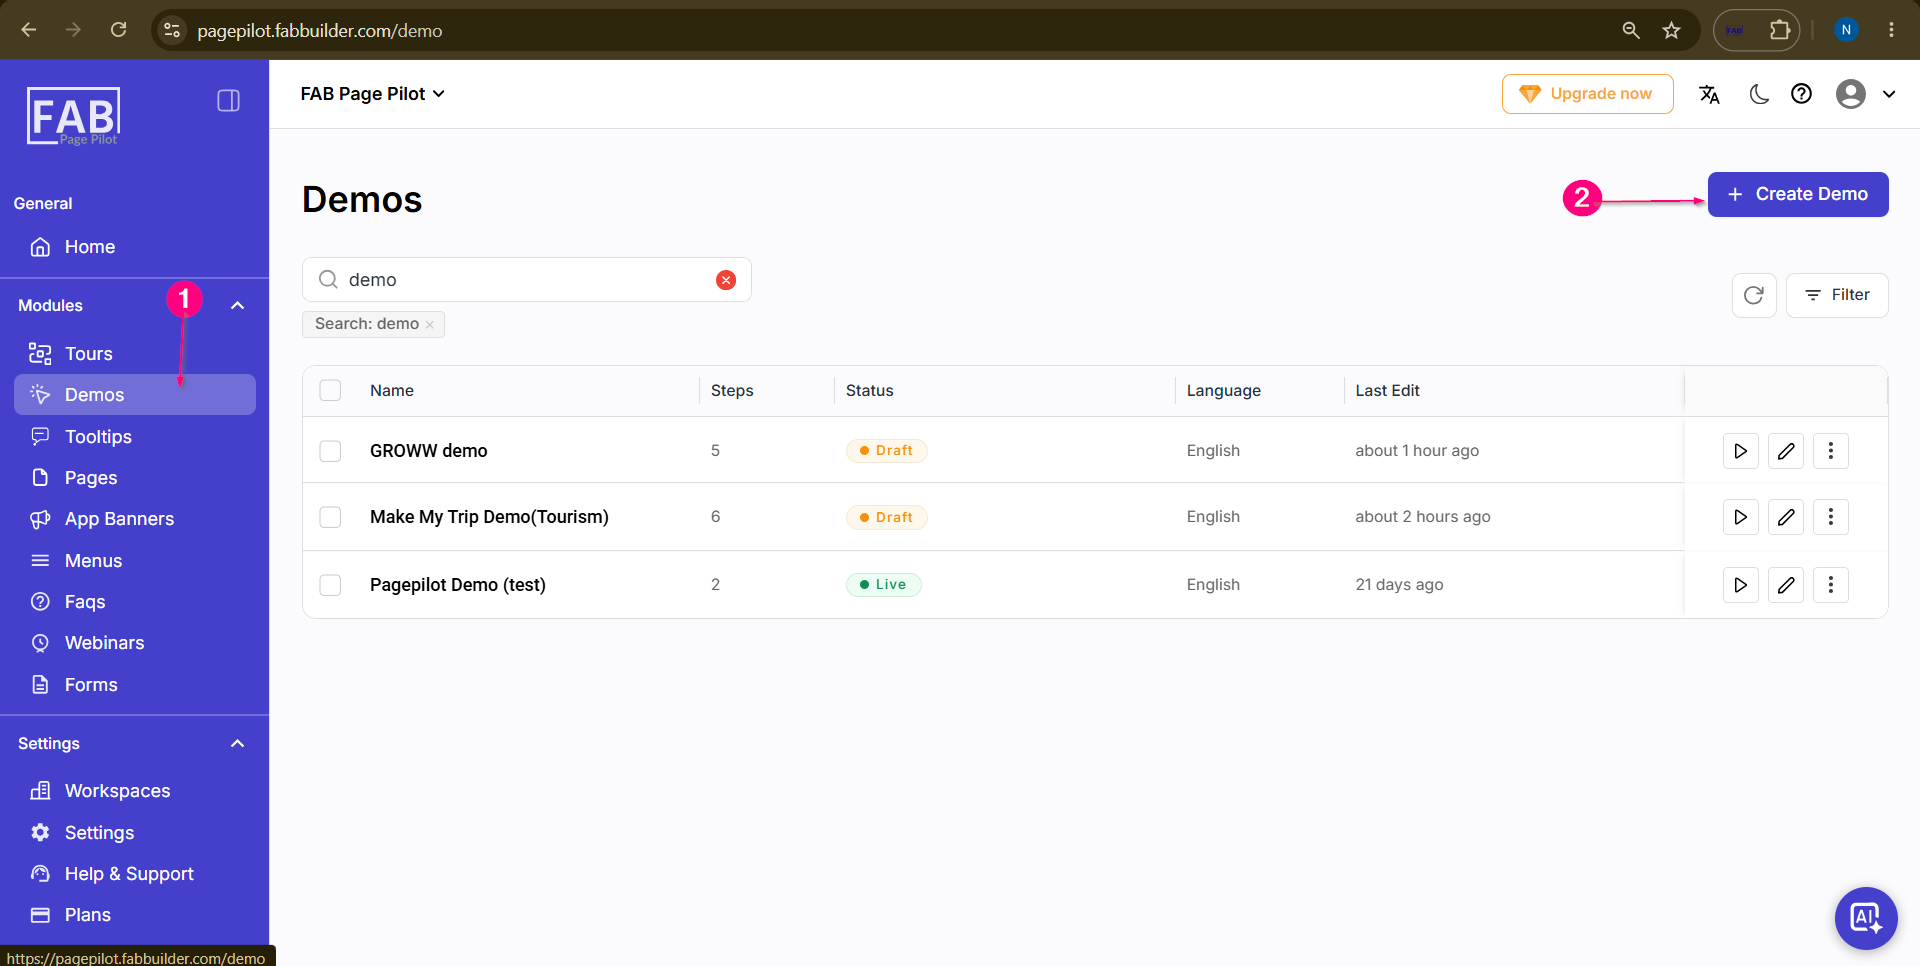 Screen- Create Demo Steps Step 3: Enter Demo Details
Enter the required details such as:
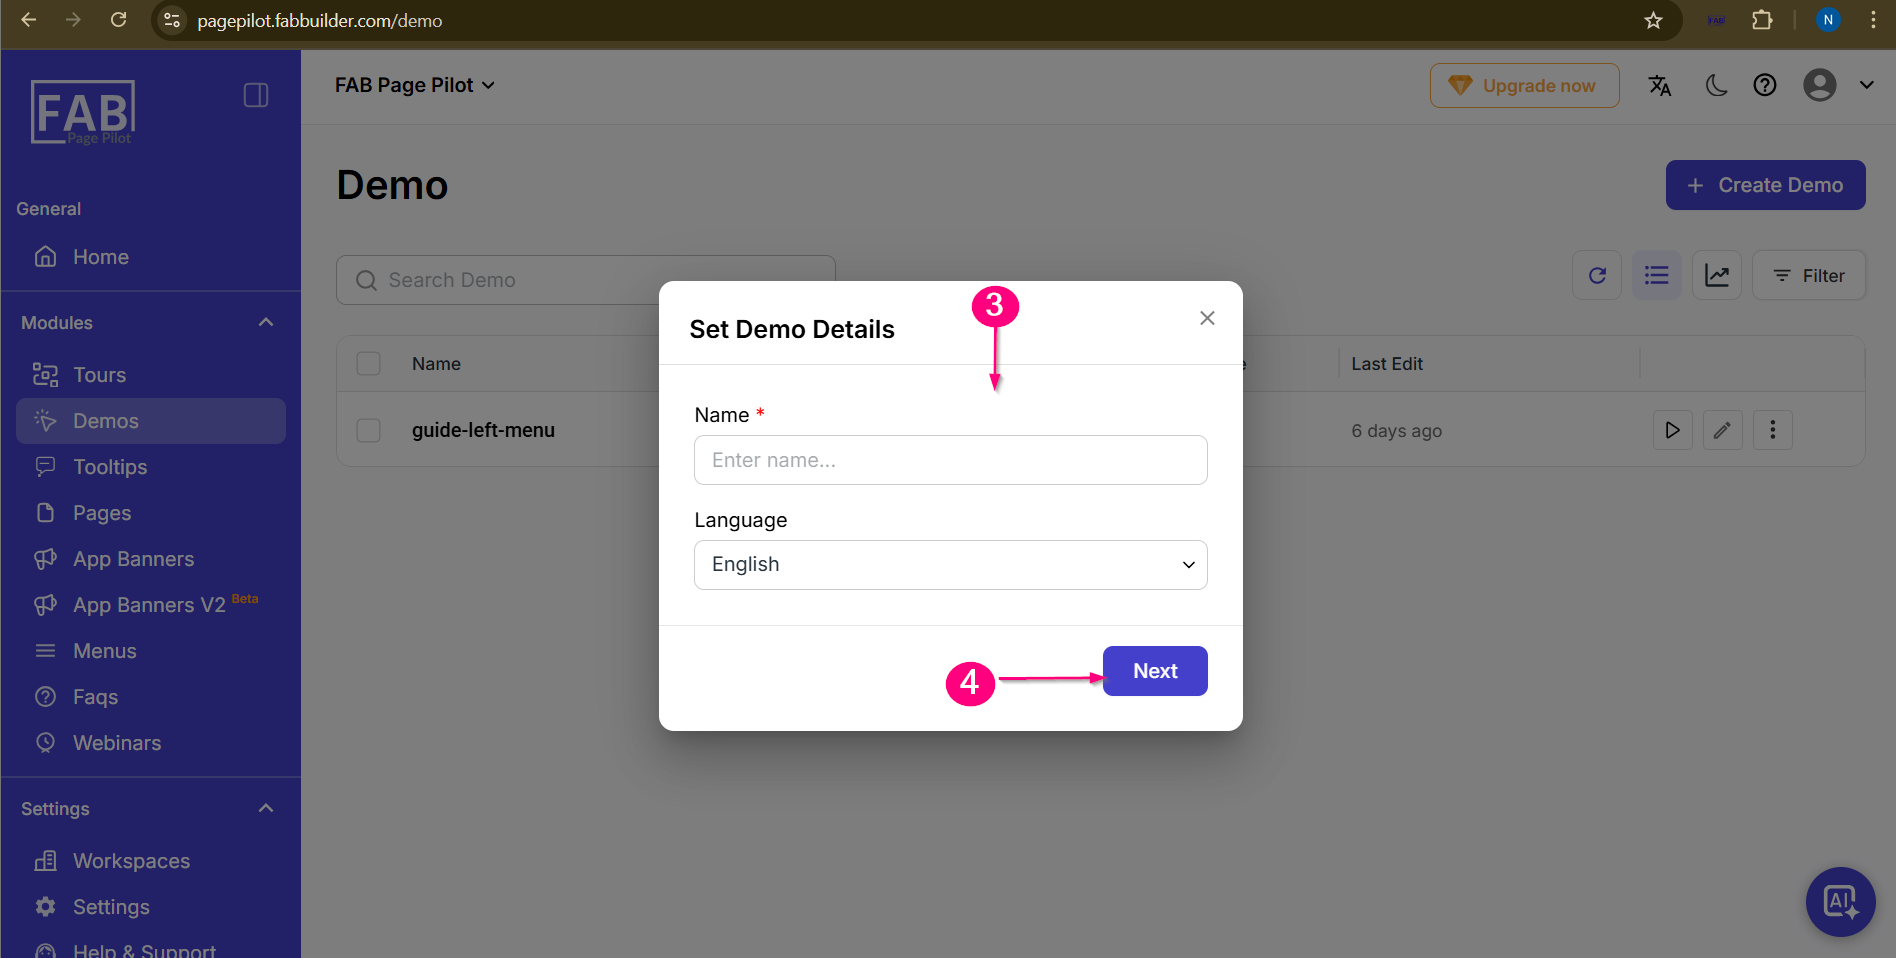 Screen- Add Demos Name and Language Steps
Step 5: Select Method to create demoUser must select the method to create demo between scratch and template
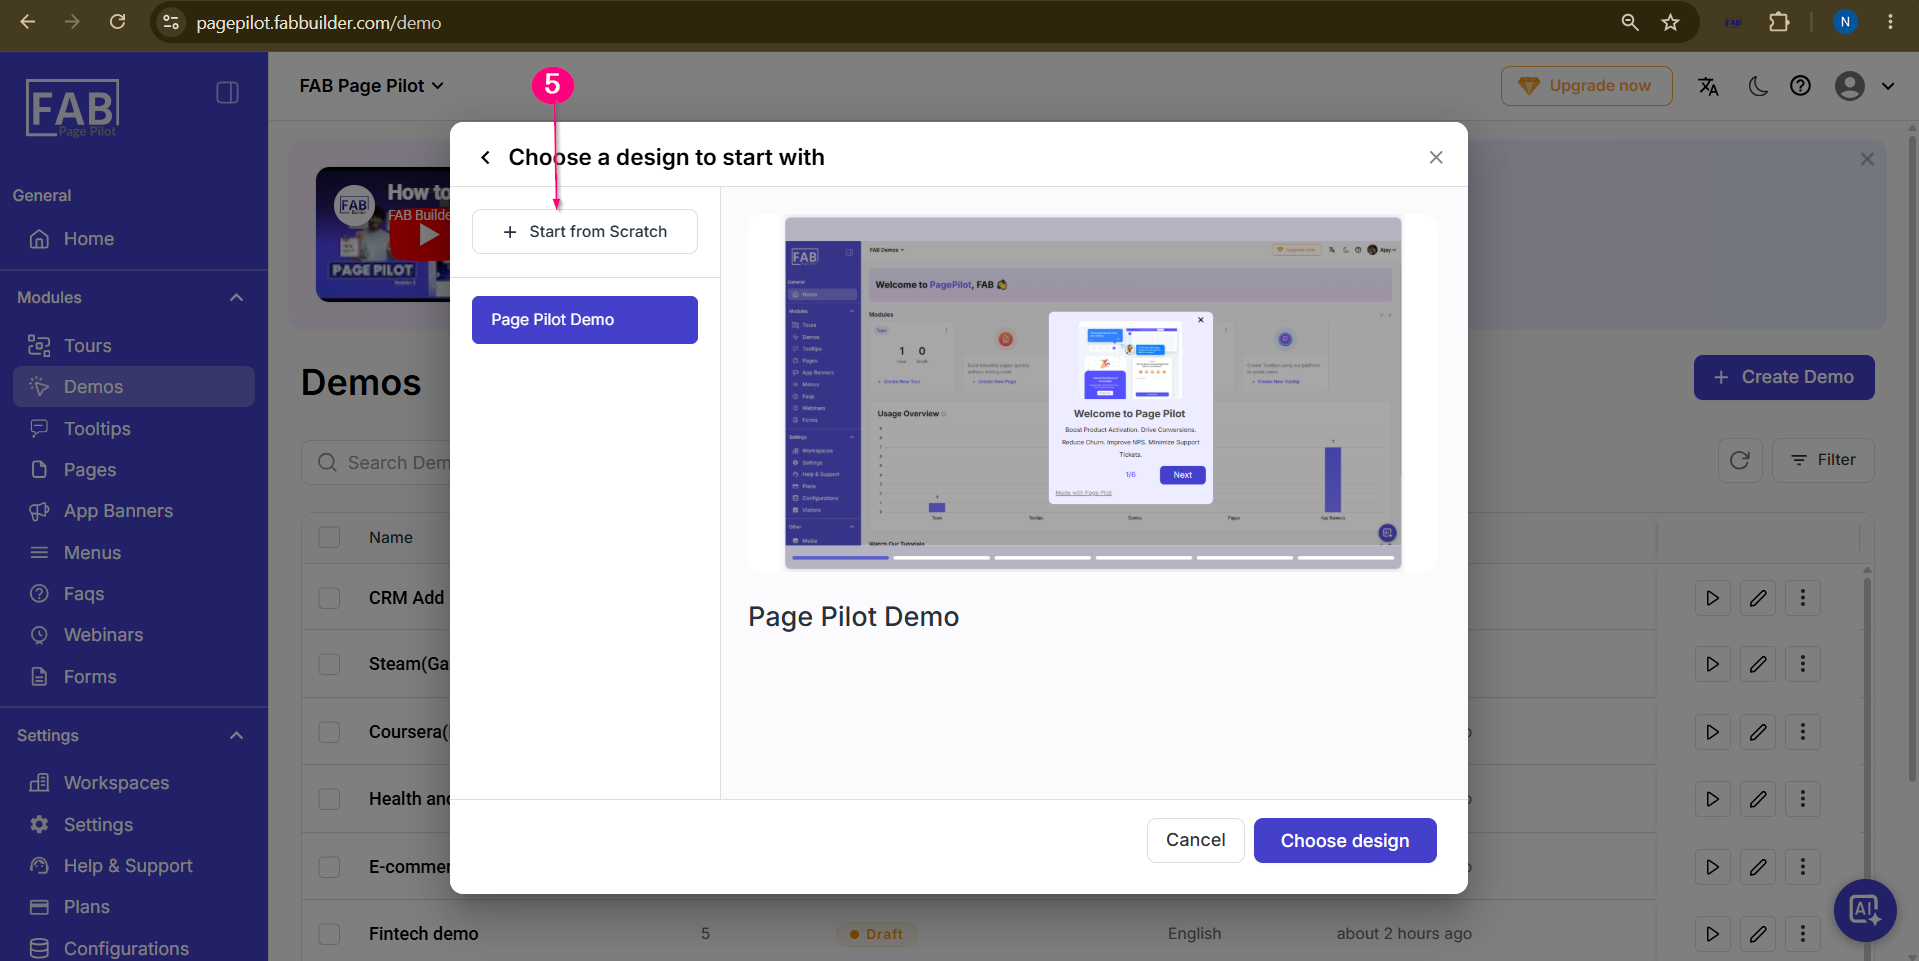
Step 6: Upload Background Media
Click on the Upload Media button to add background media for the demo.
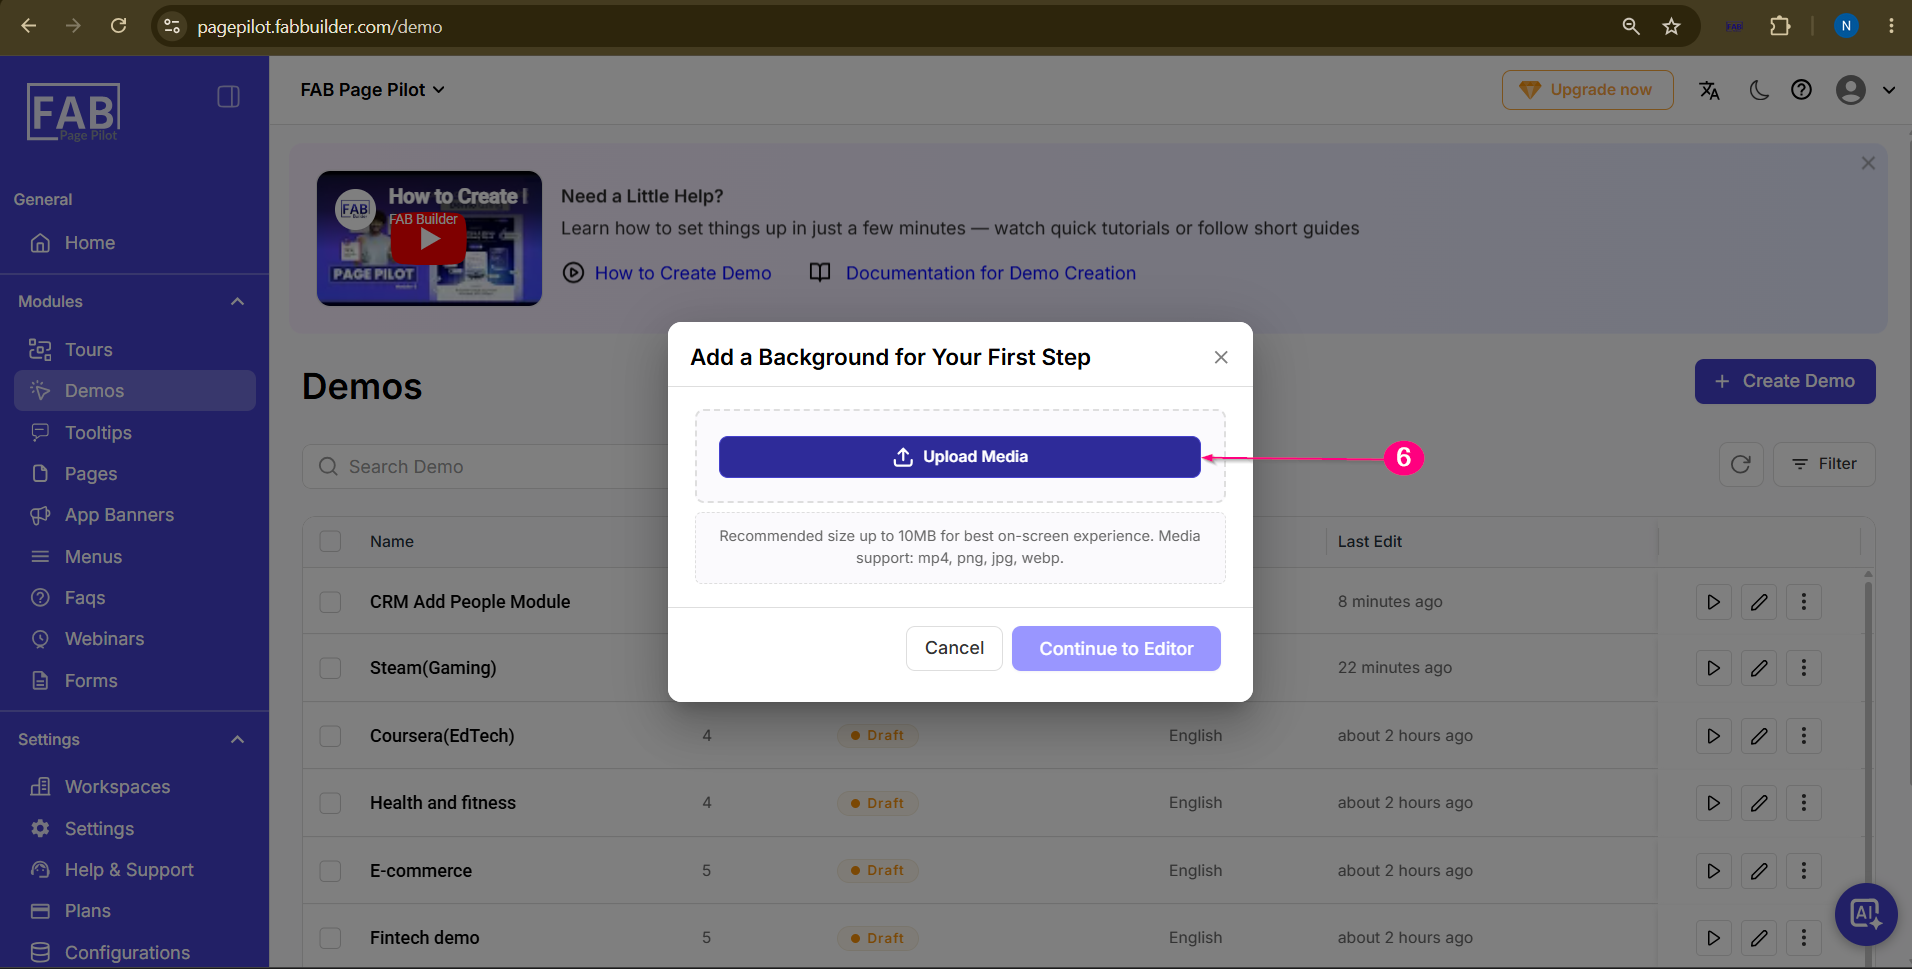 Screen-Upload Media
Step 7: Select Element to Attach tooltip
Select element of background area to attach tooltip.
Step 8: Edit/Add to customise TooltipTo edit or add to click on layout tab. Here select any block to design the customized tooltip. 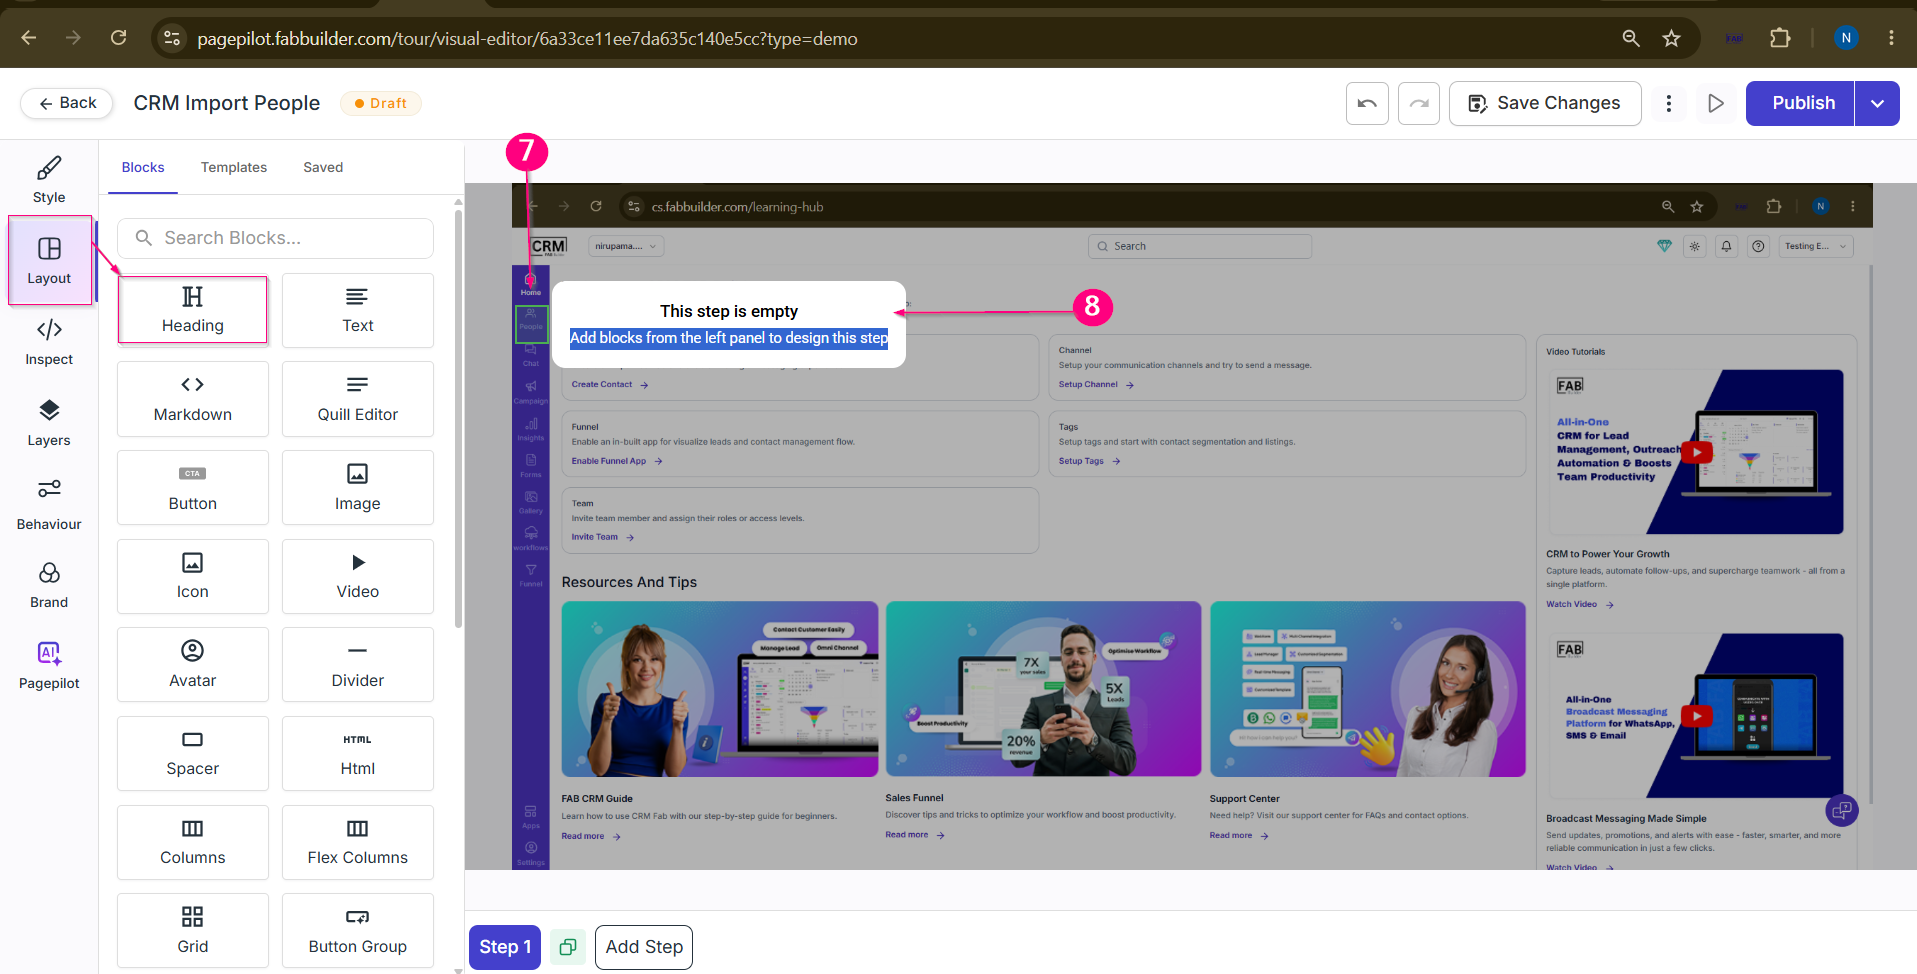
Step 9: Click on save changes Button
Click on save changes button. 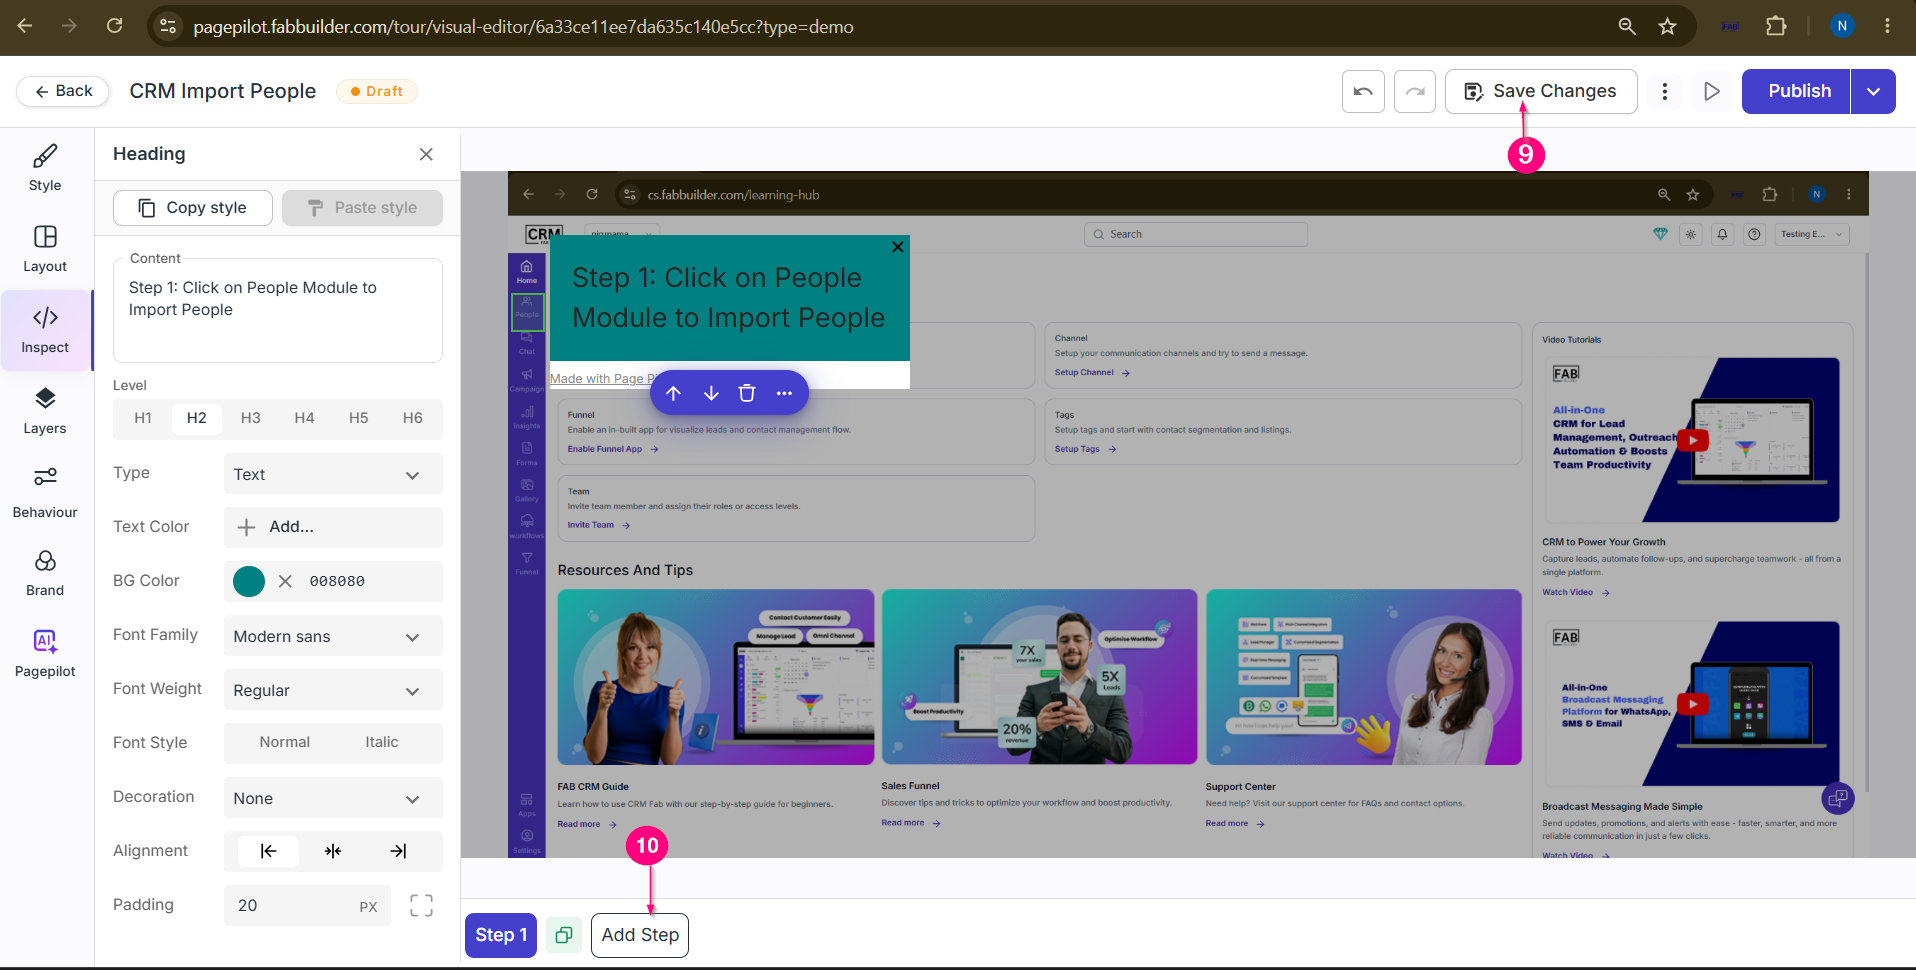
Step 10: Add Additional Steps
Repeat the same process to create additional demo steps.
Step 11: Preview Demo
Click on the Preview button to review the demo flow and functionality.
Step 12: Publish the Demo
Click on the Publish butto
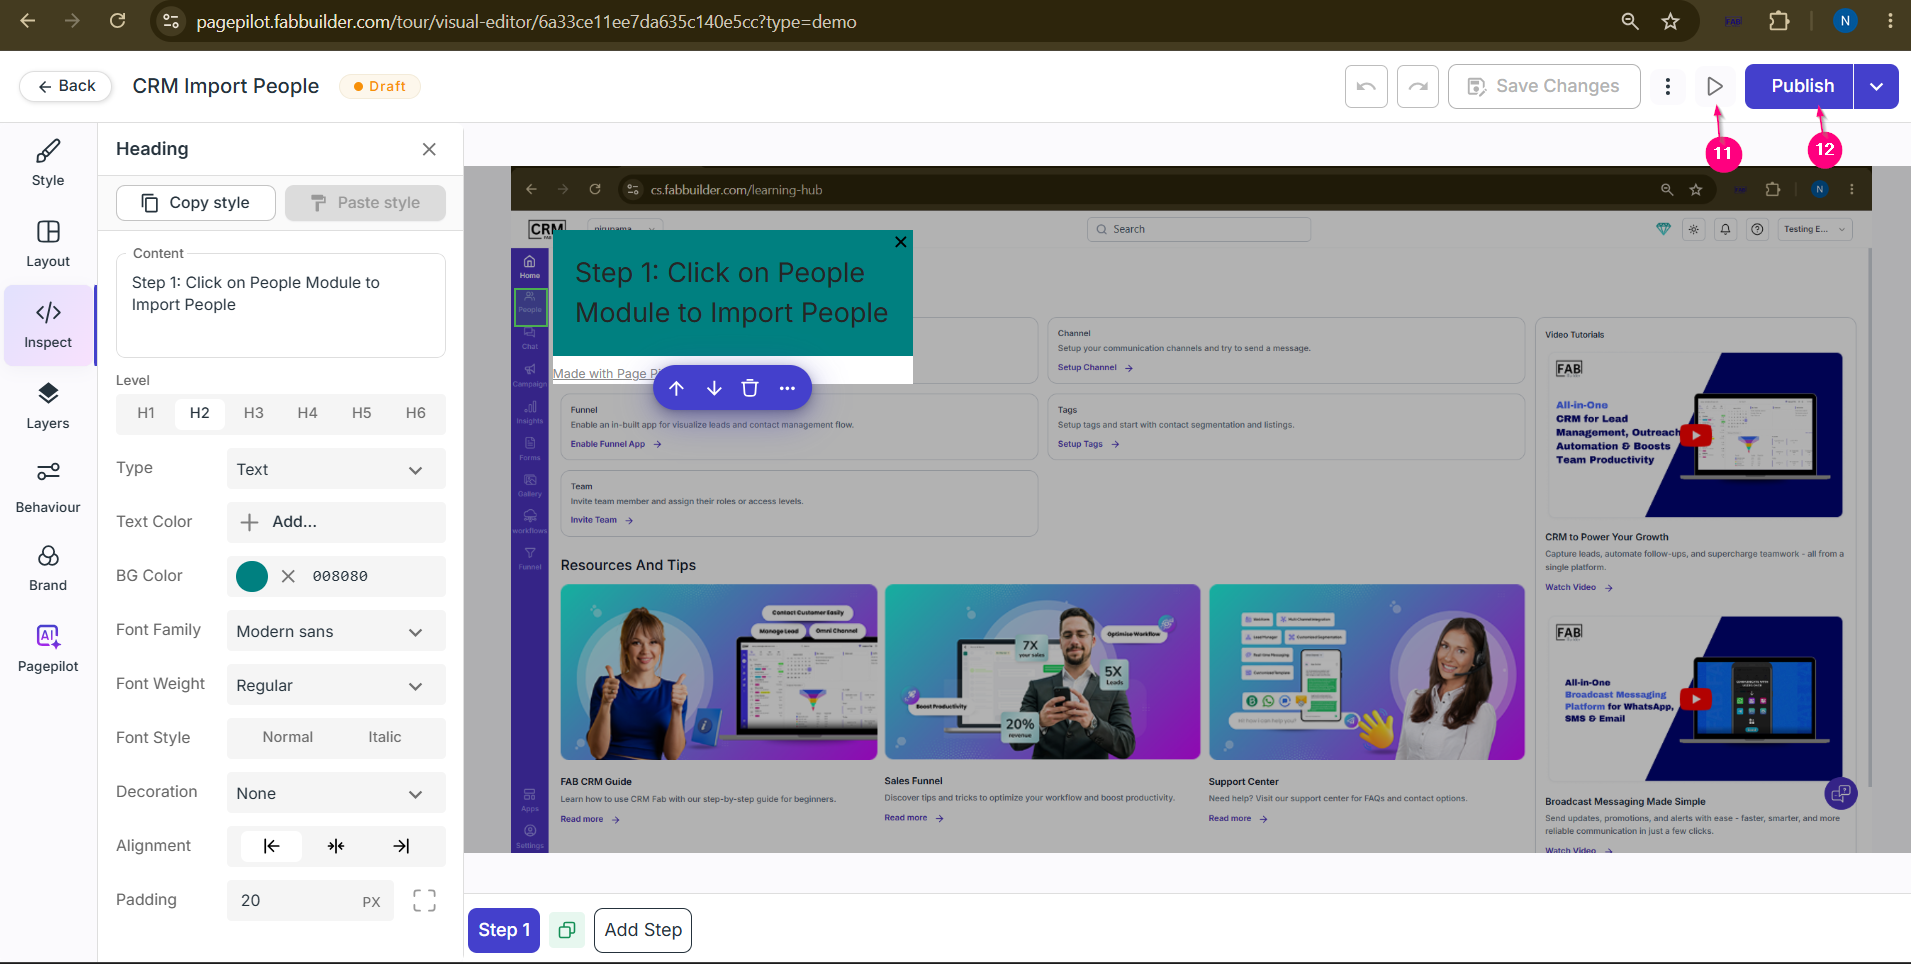 Screen- Preview and Publish
Step 13: Configure Publishing Details and Publish
A popup screen will appear where the user can configure additional publishing details such as:
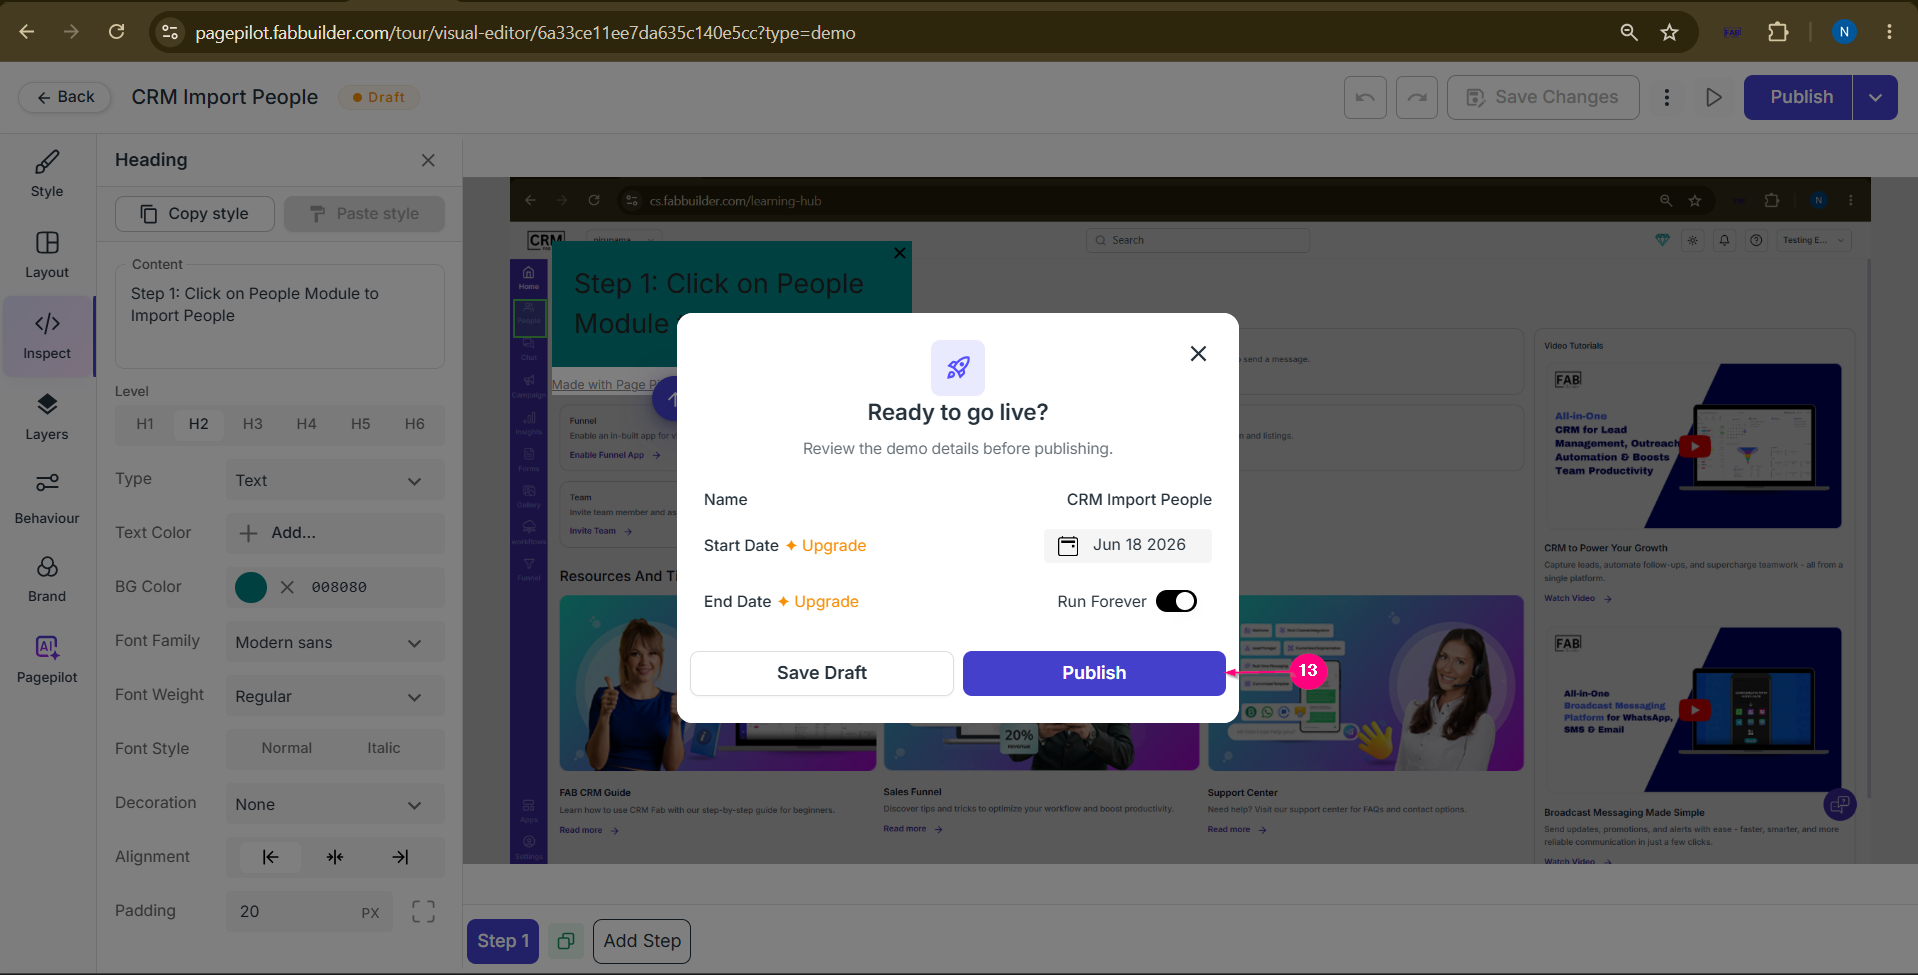 Screen- Configuration and Publish Demos
Step 14: Share the Demo
Once published, the user can share the demo link across different platforms.
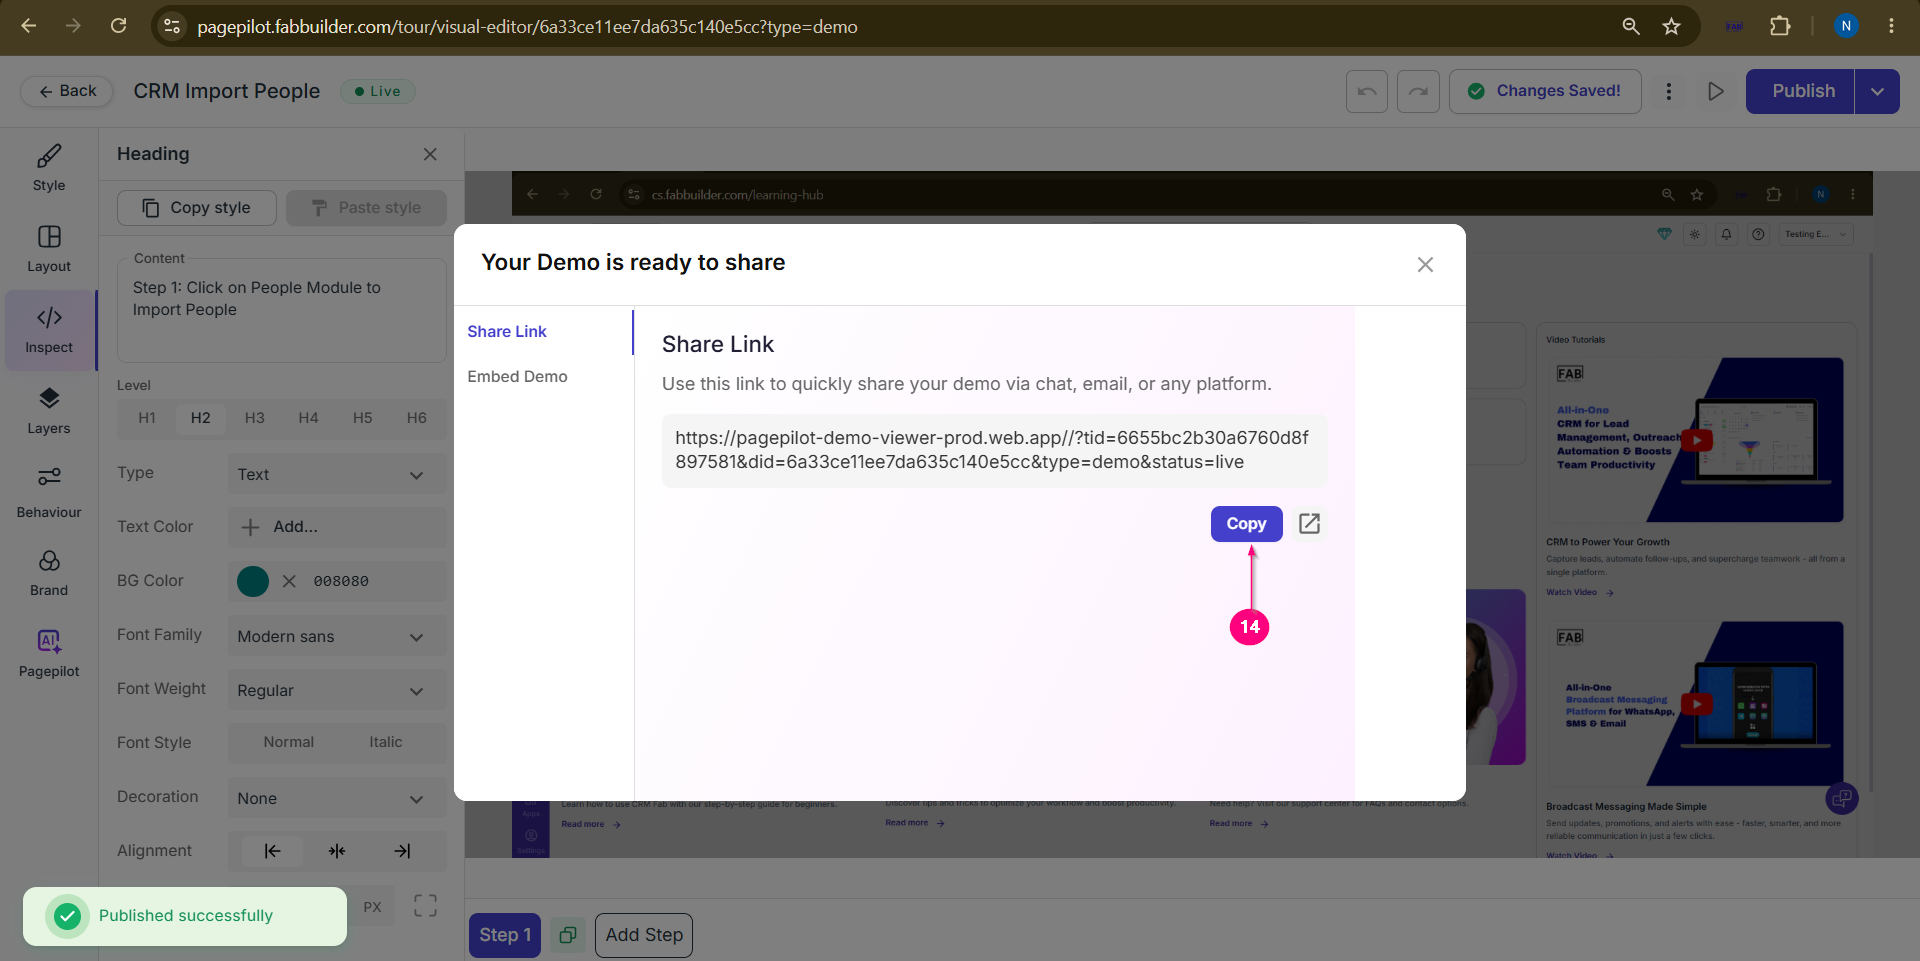 Screen- Share Demo Link |