Create a New Demo by Template
Users can create a new Demo by Template Method by adding interactive content such as text, audio, video, background media, and custom tooltips. The created demos are displayed in the selected workspace.
Steps
Step 1: Open the Demo Module
Click on the Demo Module from the left navigation panel.
Step 2: Click on Create Demo
Click on the Create Demo button.
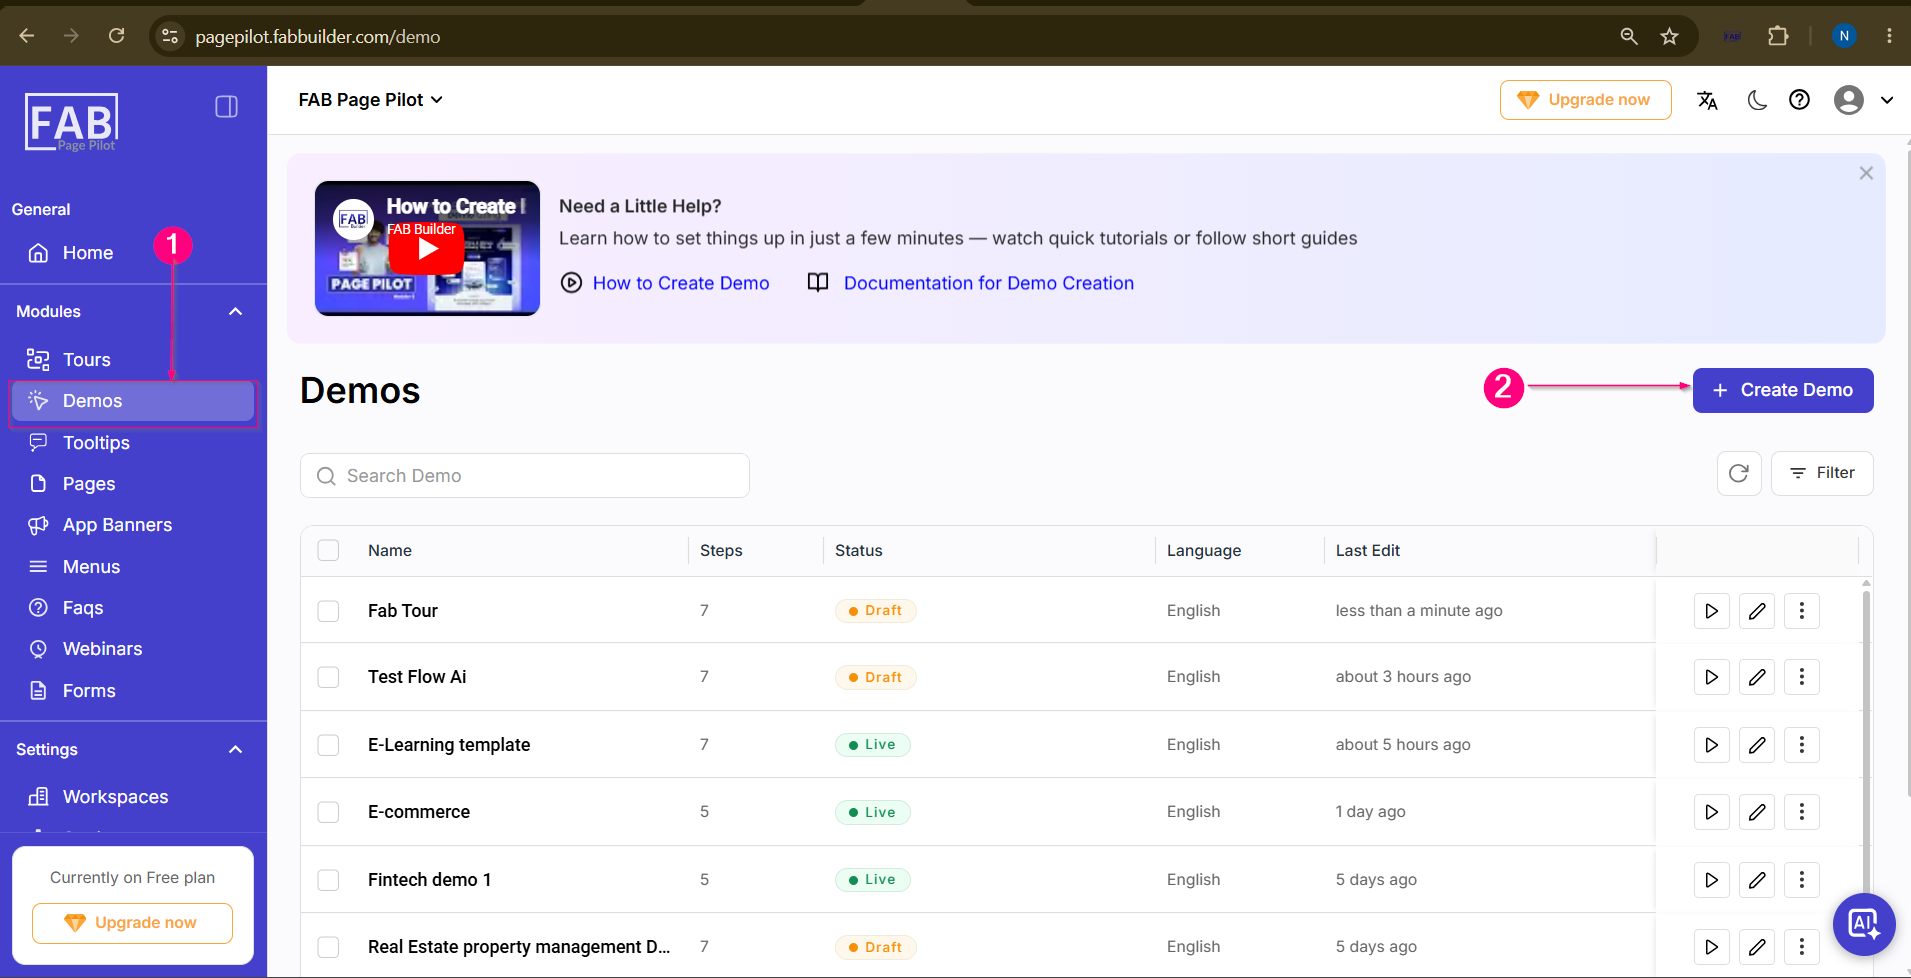 Screen- Create Demo Steps
Step 3: Enter Demo Details
Enter the required details such as:
and Click on Next.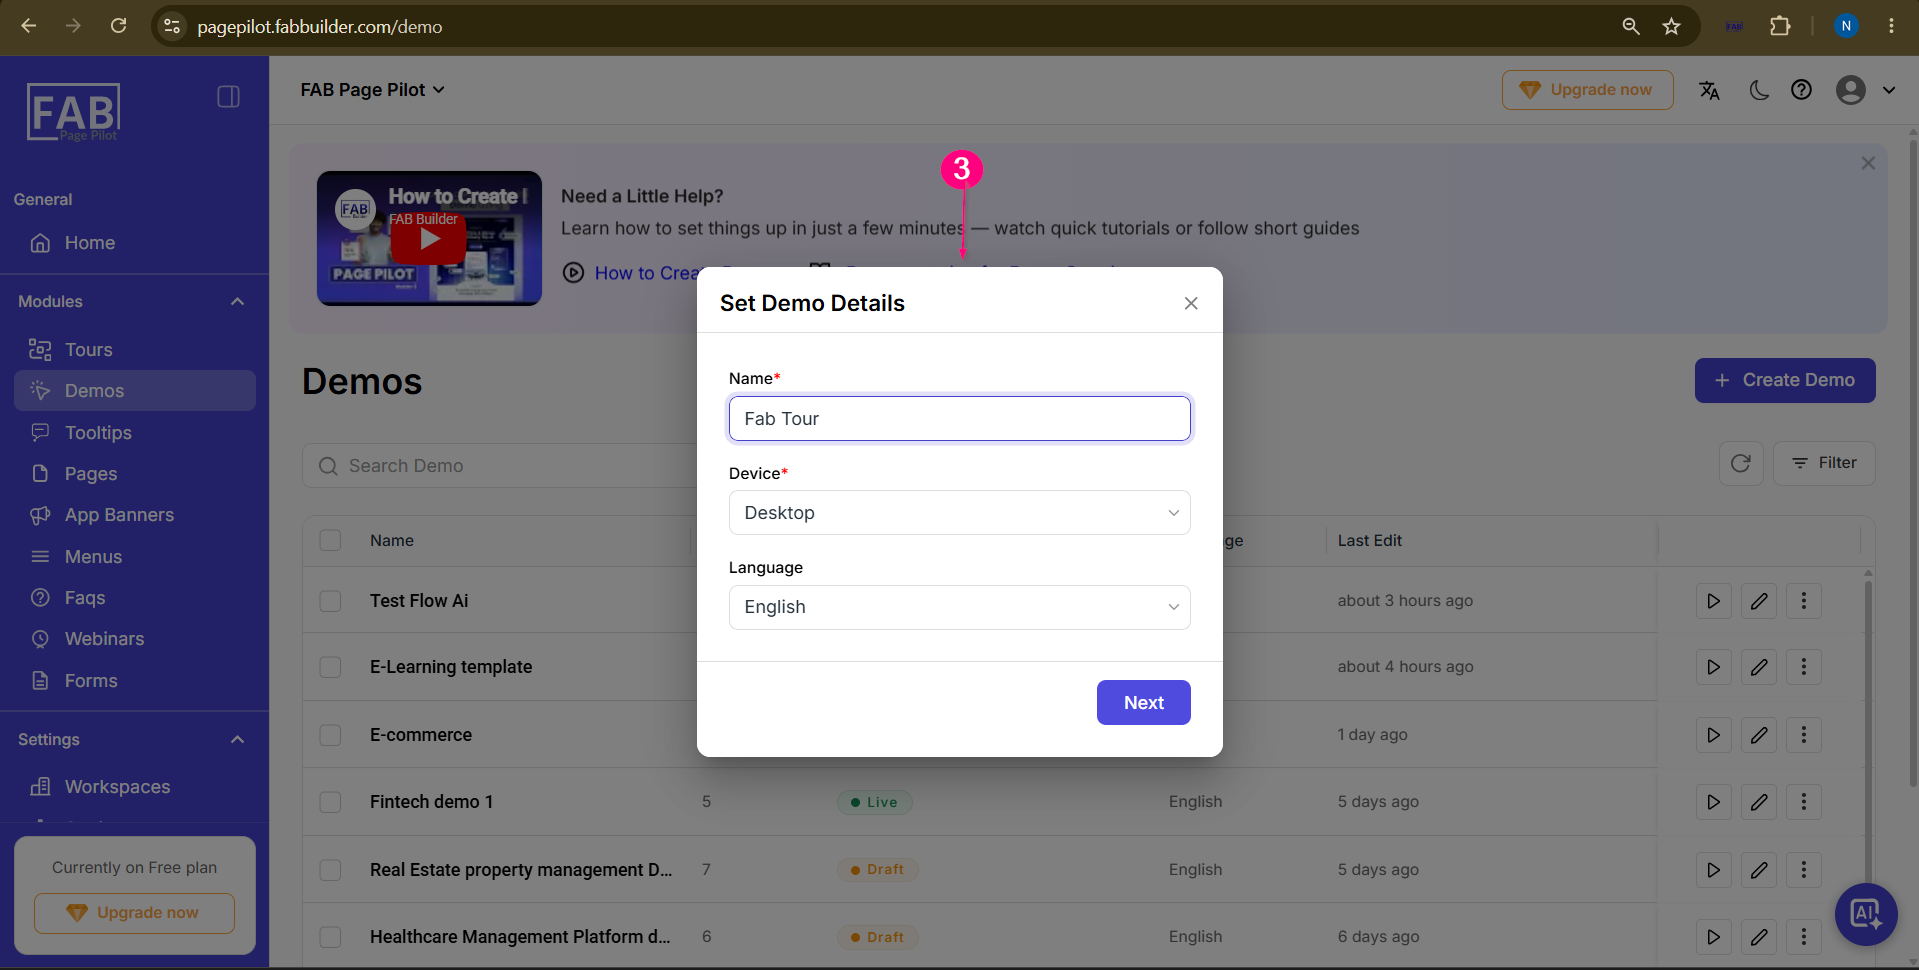
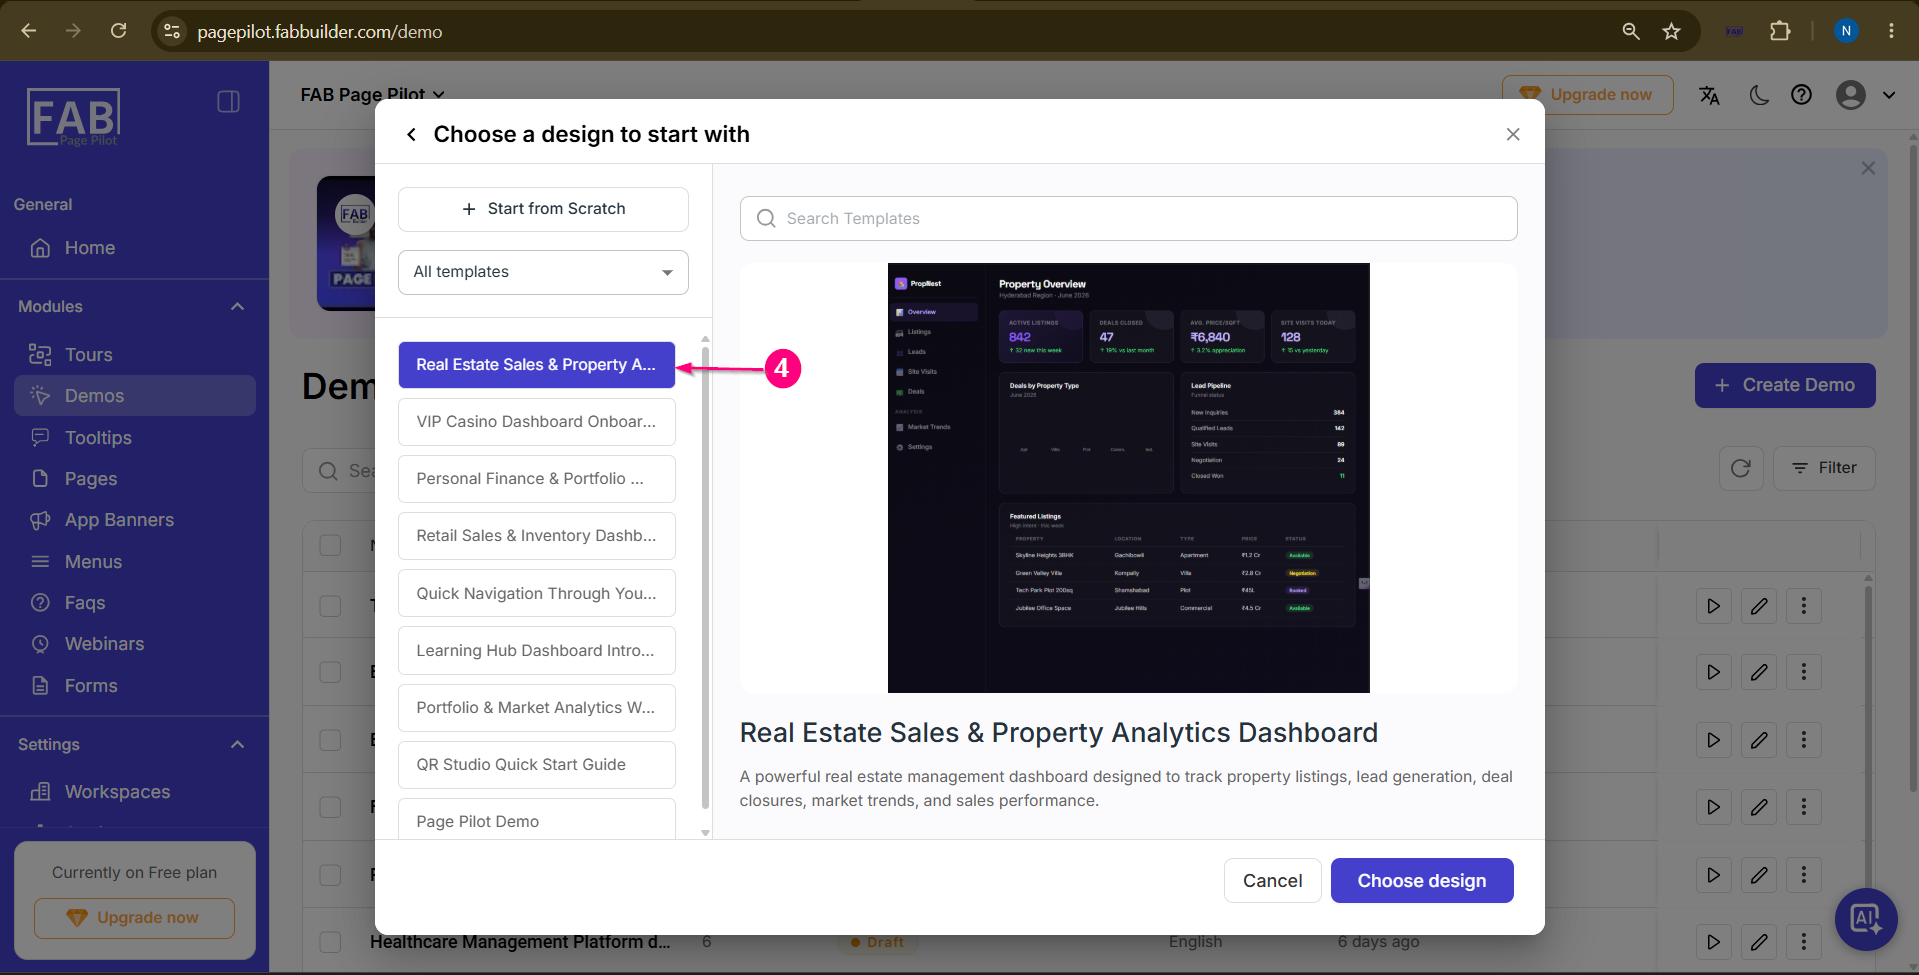
Step 4: Select template
Select the template and click on choose template button.
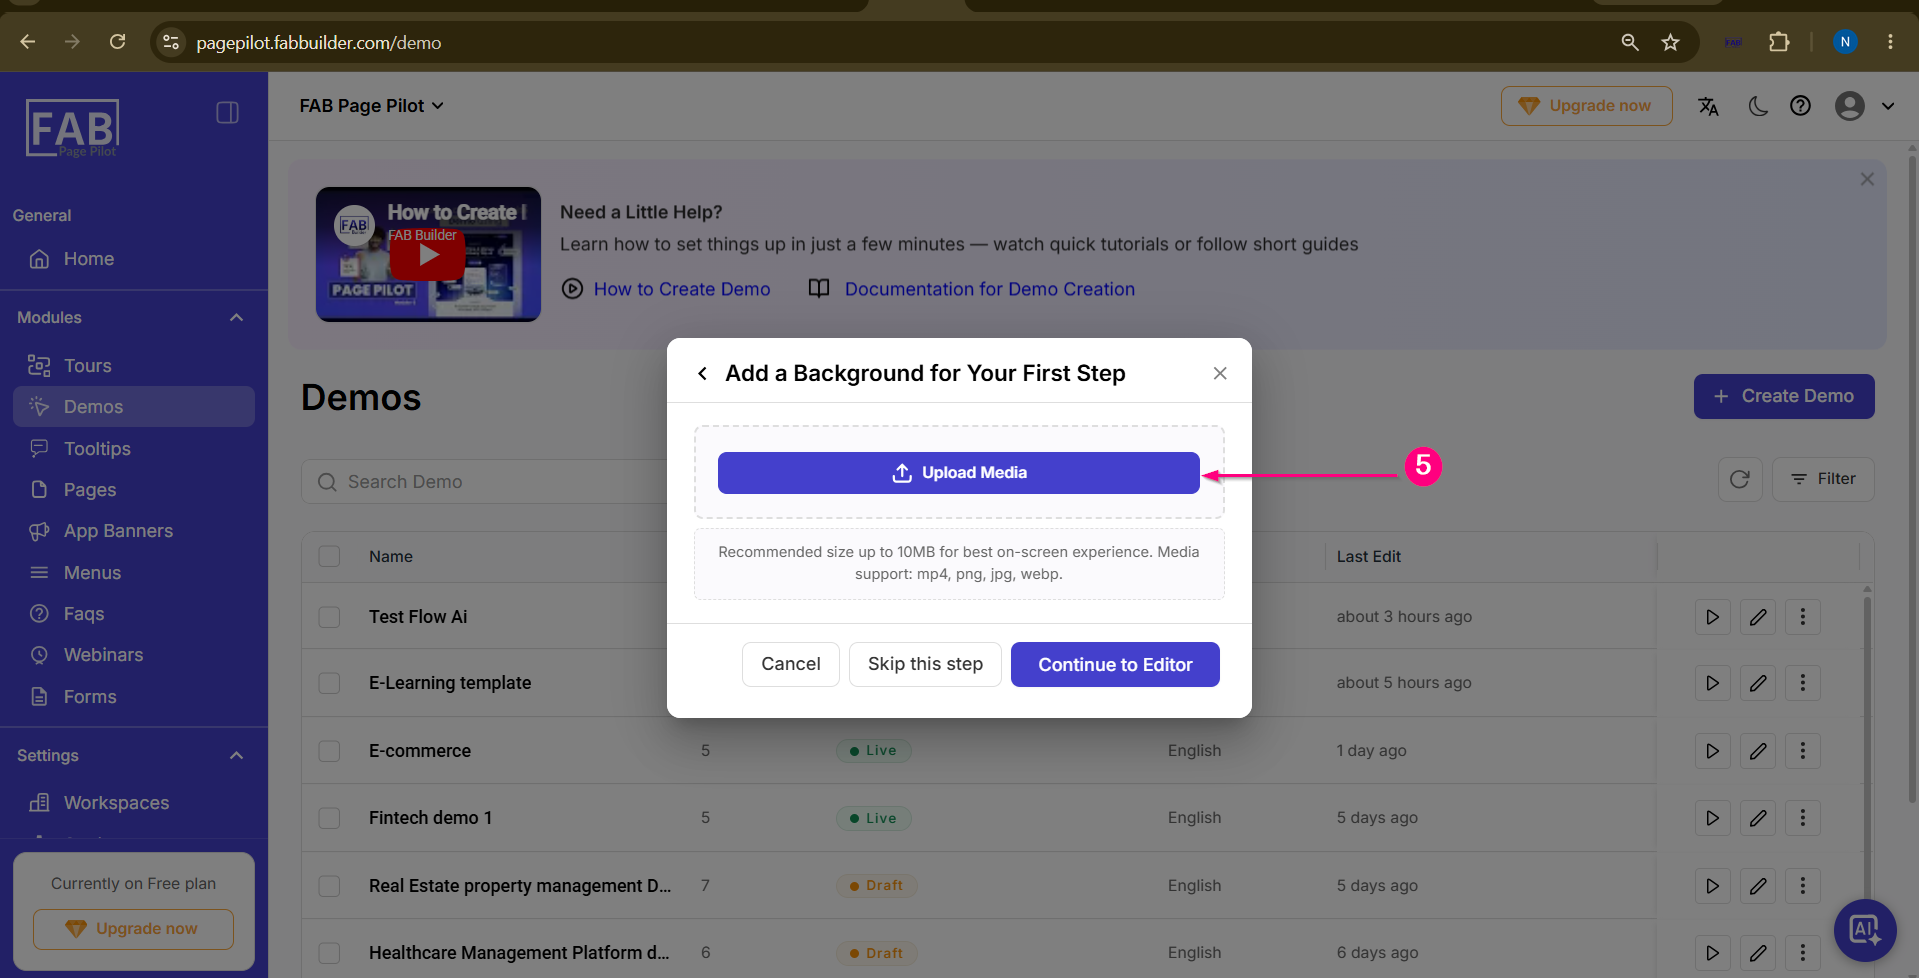
Step 5: Upload Background ImageUpload the background image for create a demo. After uploading next step is redirected to the Demo Visual Editor screen.
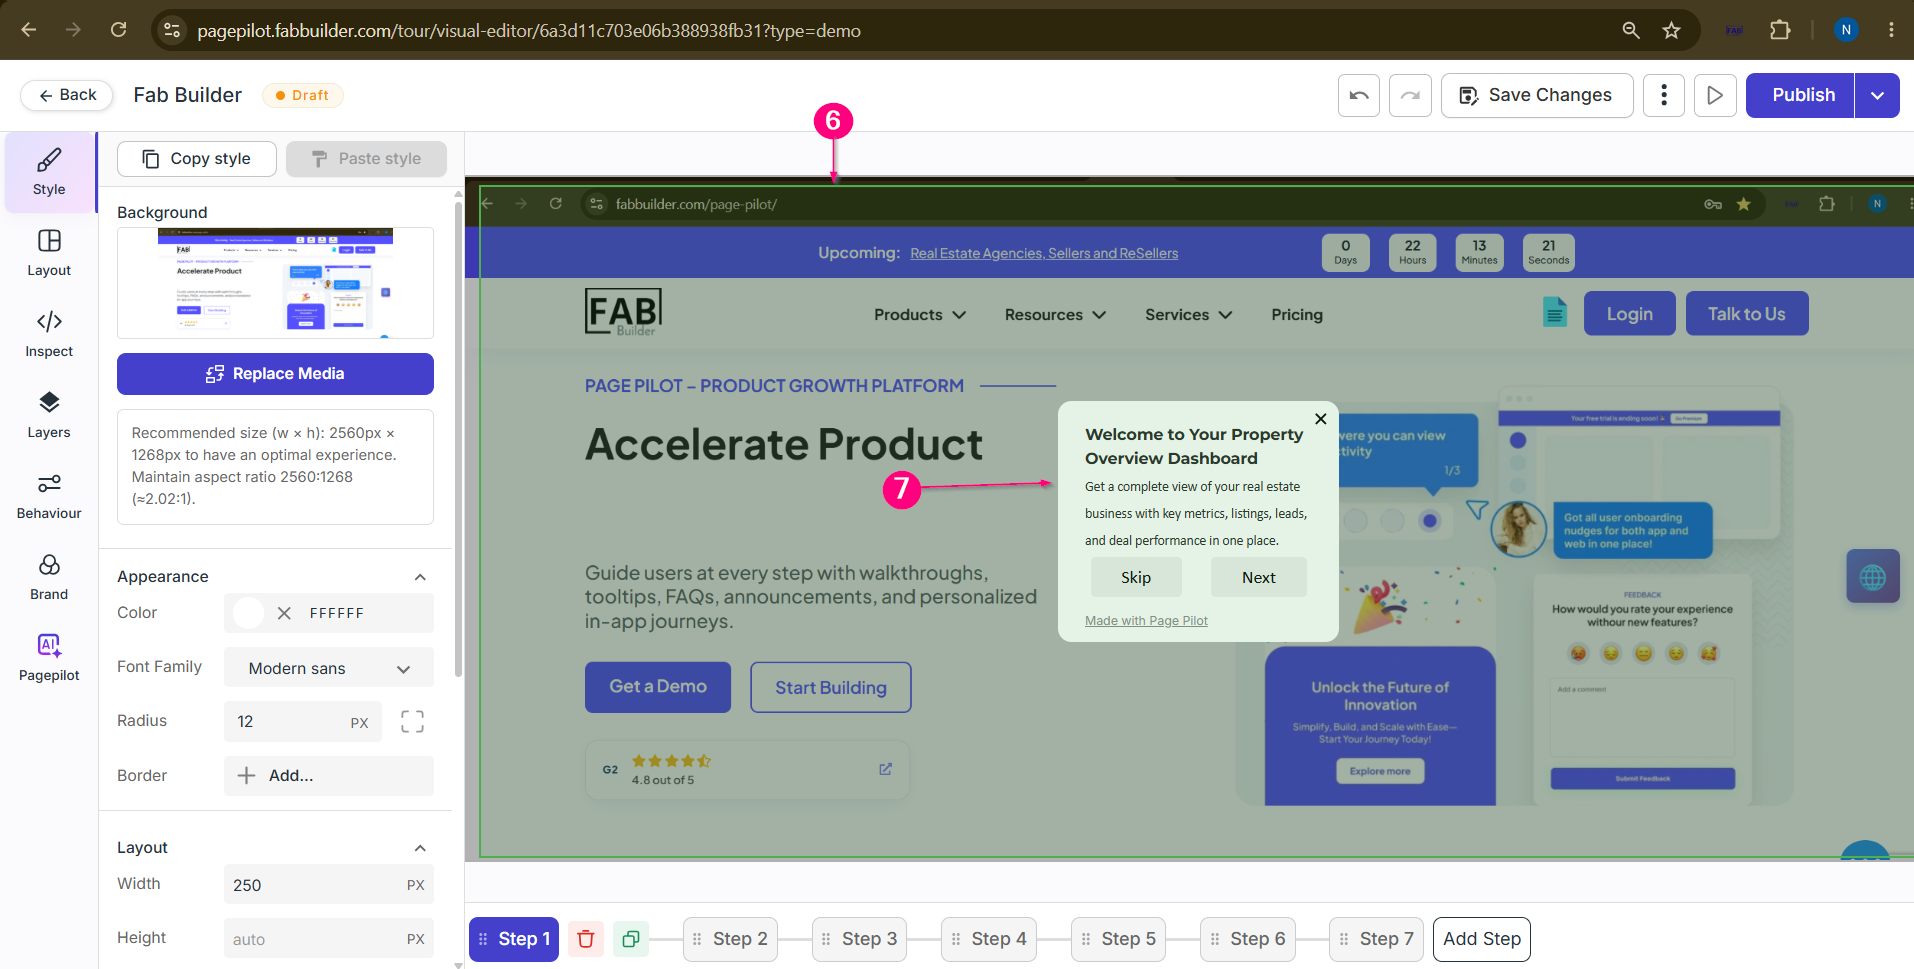
Step 6: Select the Highlight Area of background Image
Select the screen area where the tooltip needs to be highlighted.
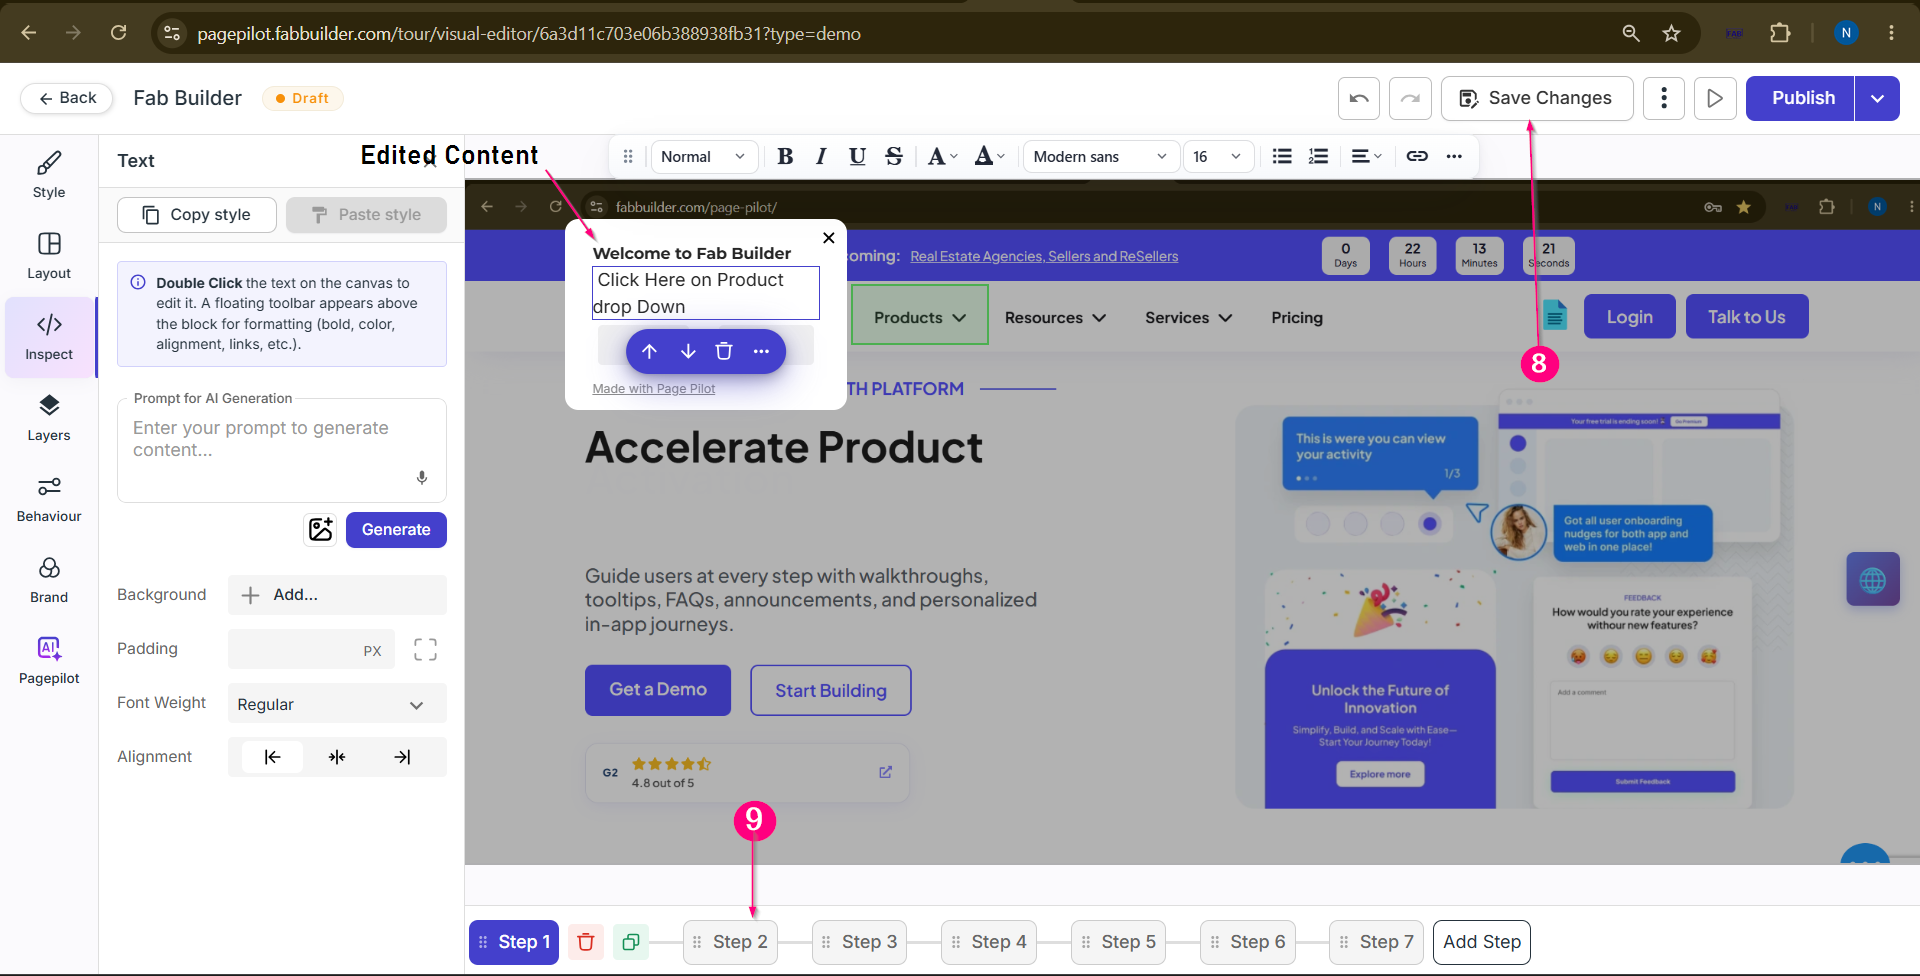
Step 7:Add or Edit Design Blocks to Modify the TemplateOnce area is selected,template can be customized by editing/Adding its design block following ways
Step 8: Save Changes
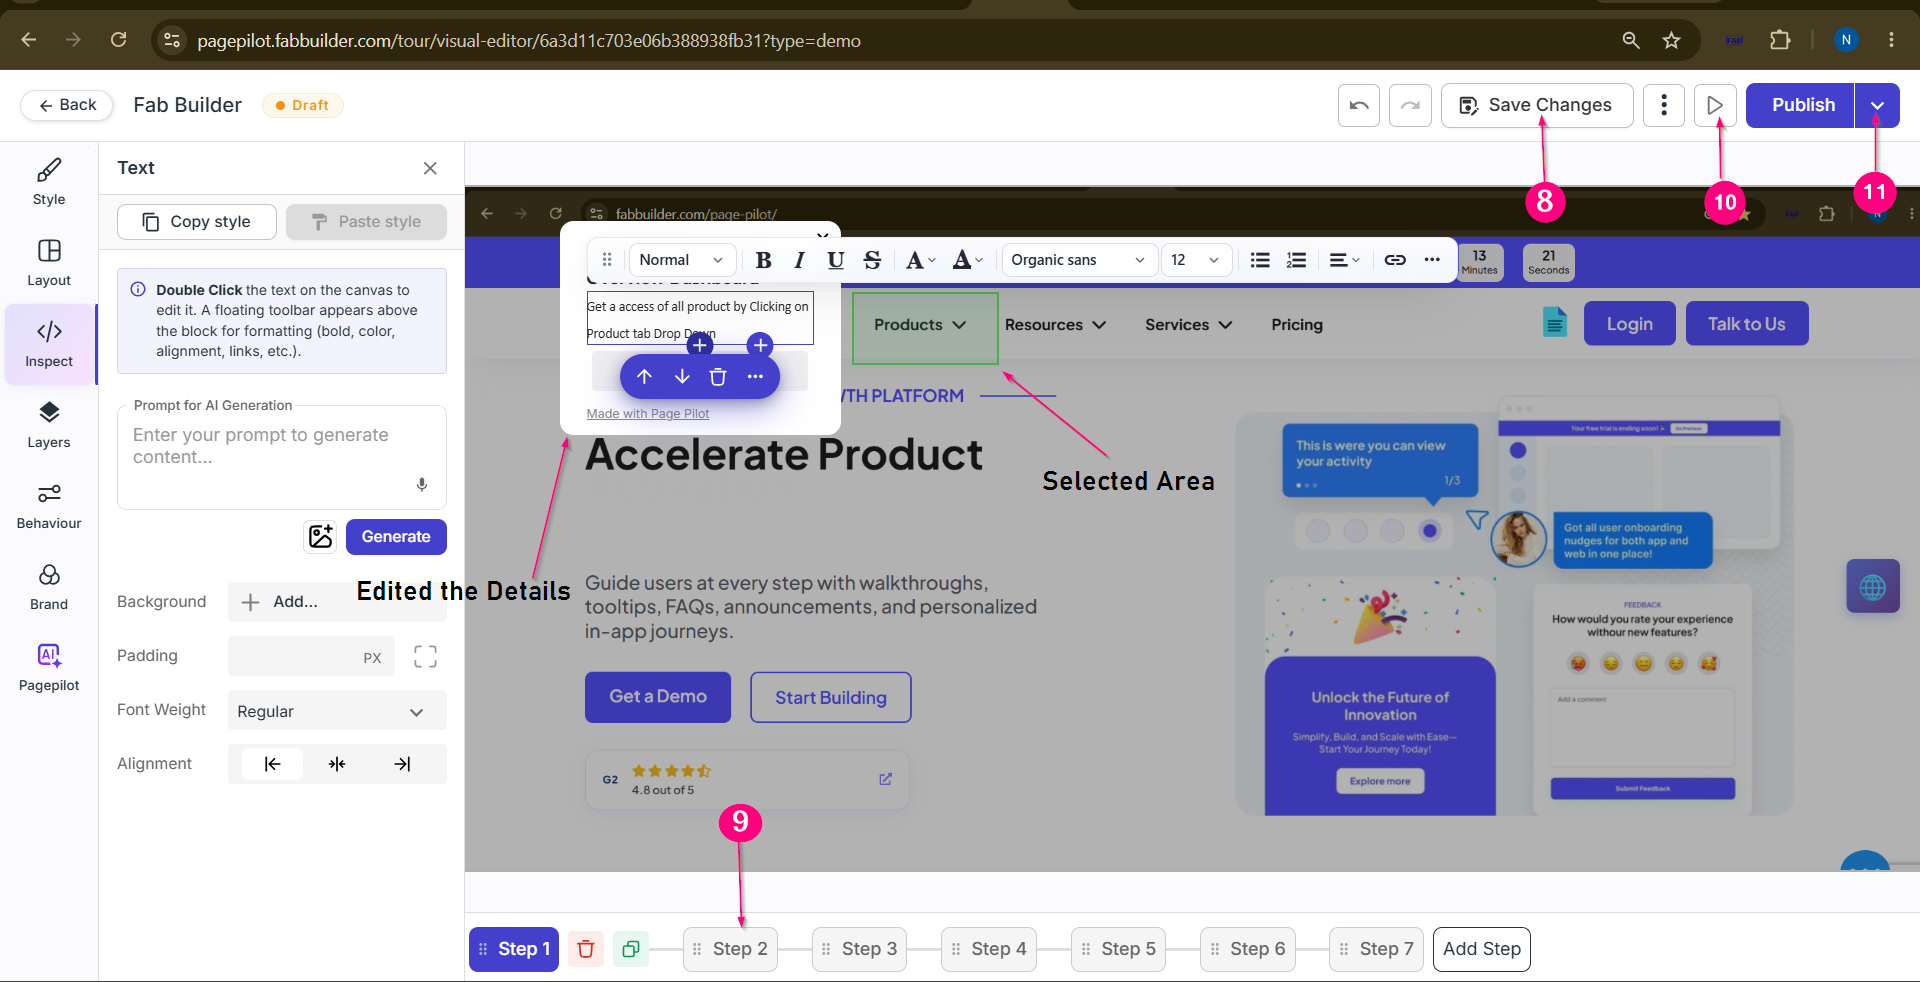
Click on the Save Changes button to save all tooltip content and layout design changes.
Step 9: Add More Steps
Repeat the same process to add additional demo steps.
 Screen- Add steps Step 10: Preview the Demo
Click on the Preview button to review the demo flow and functionality.
Step 11: Publish the Demo
Click on the Publish button.
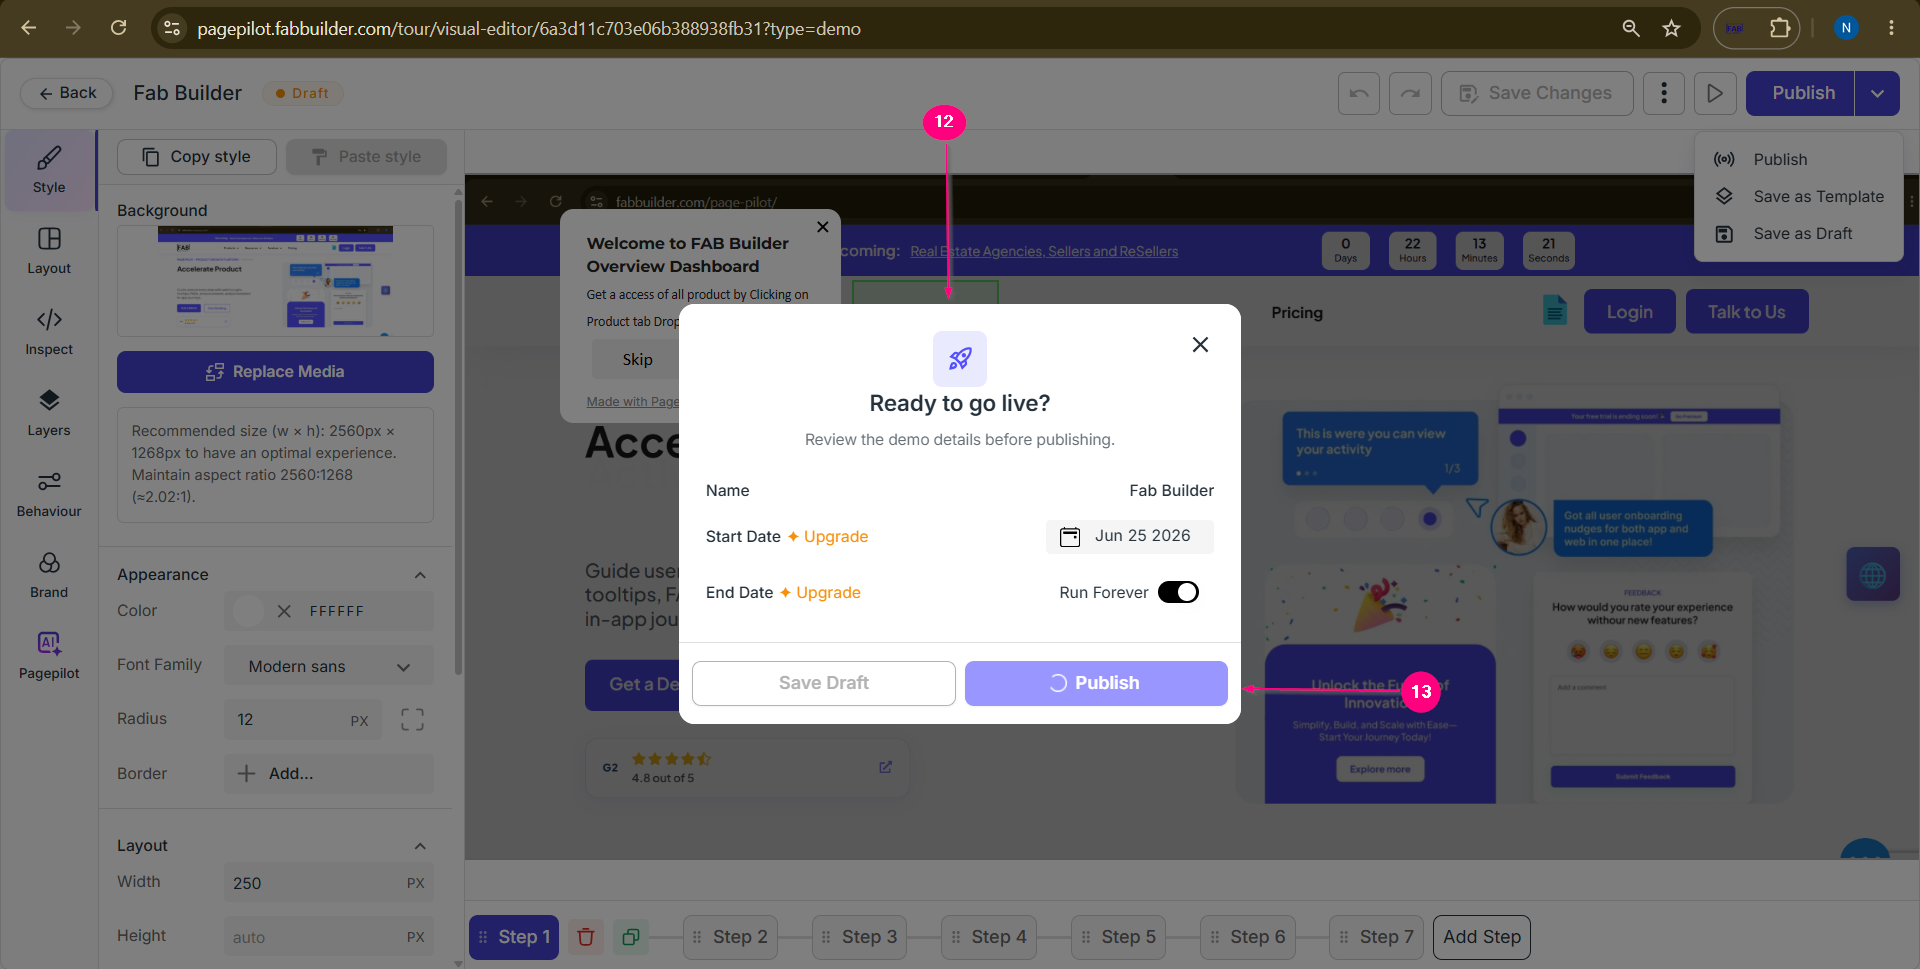
Step 12: Configure Publishing Details
A popup screen will appear where the user can configure additional publishing details such as:
Step 13: Publish or Save as Draft
Click on:
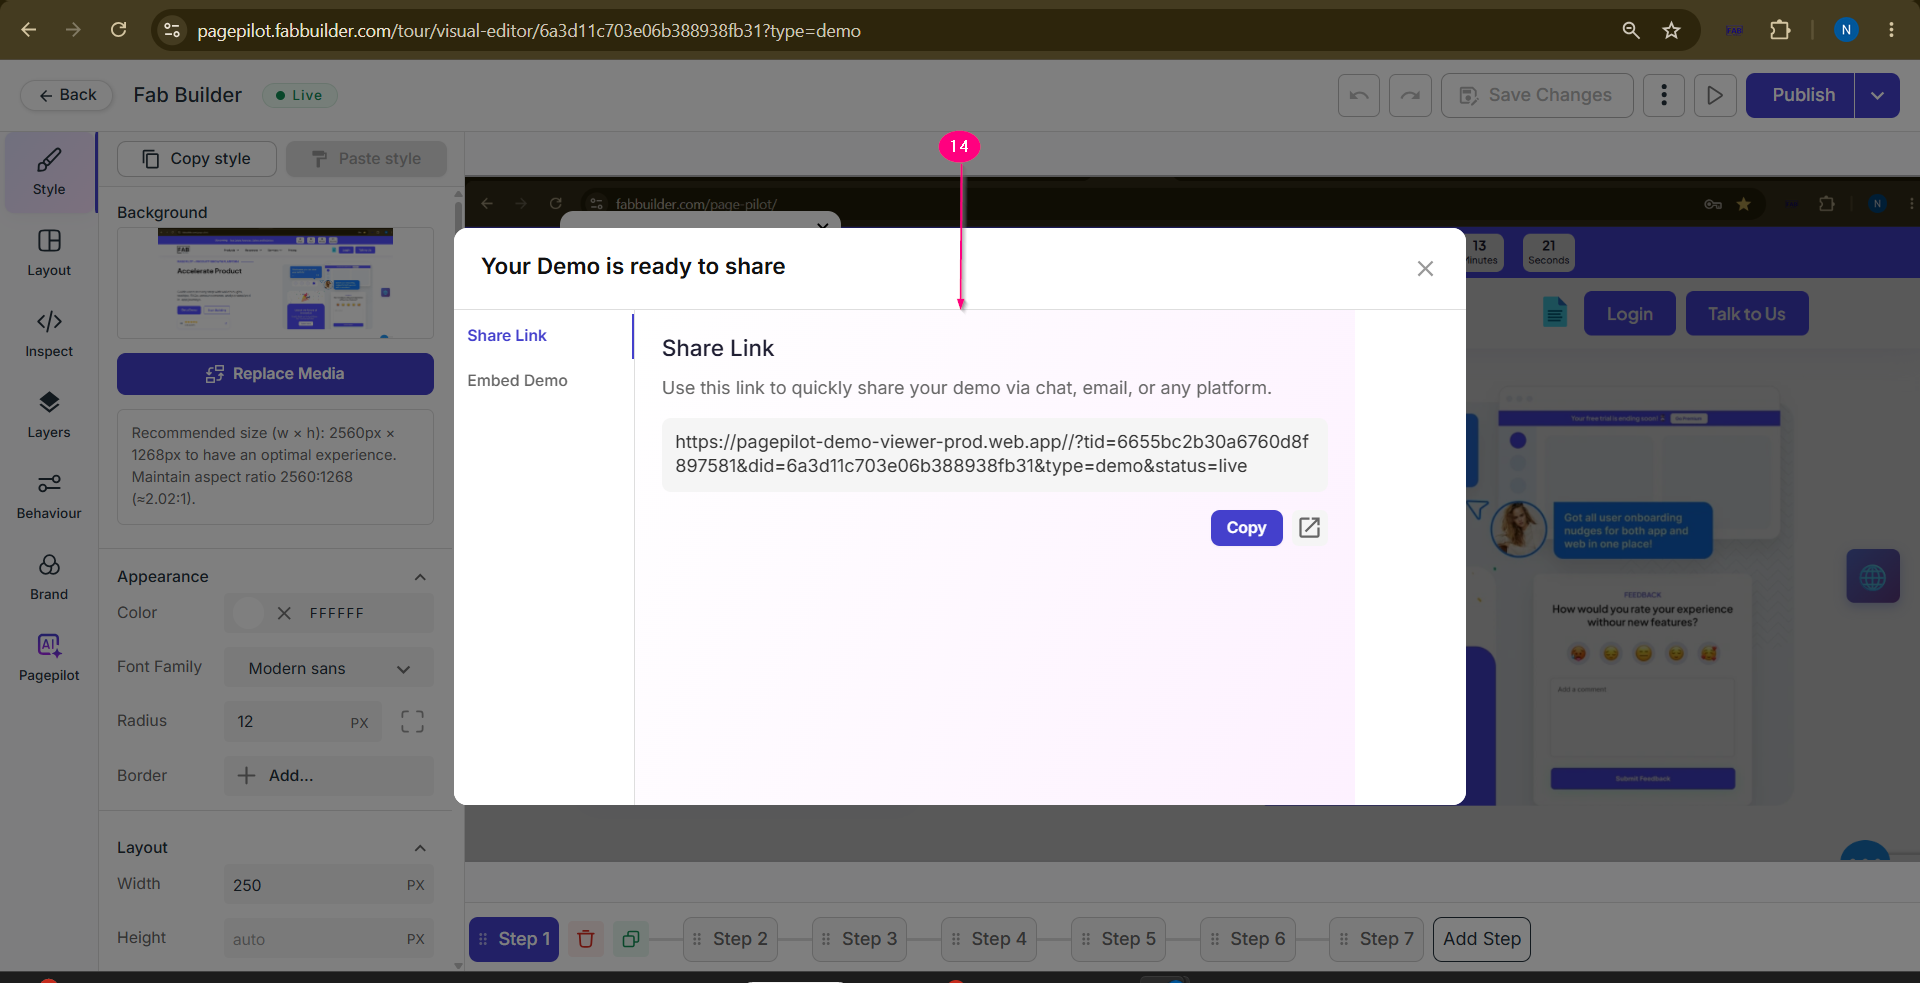
Step 14: Share the Demo
Once published, the user can share the demo by copying the demo link and sharing it across different platforms.
After saving or publishing, the created demo will be available in the demo Dashboard, where users can view and manage it. 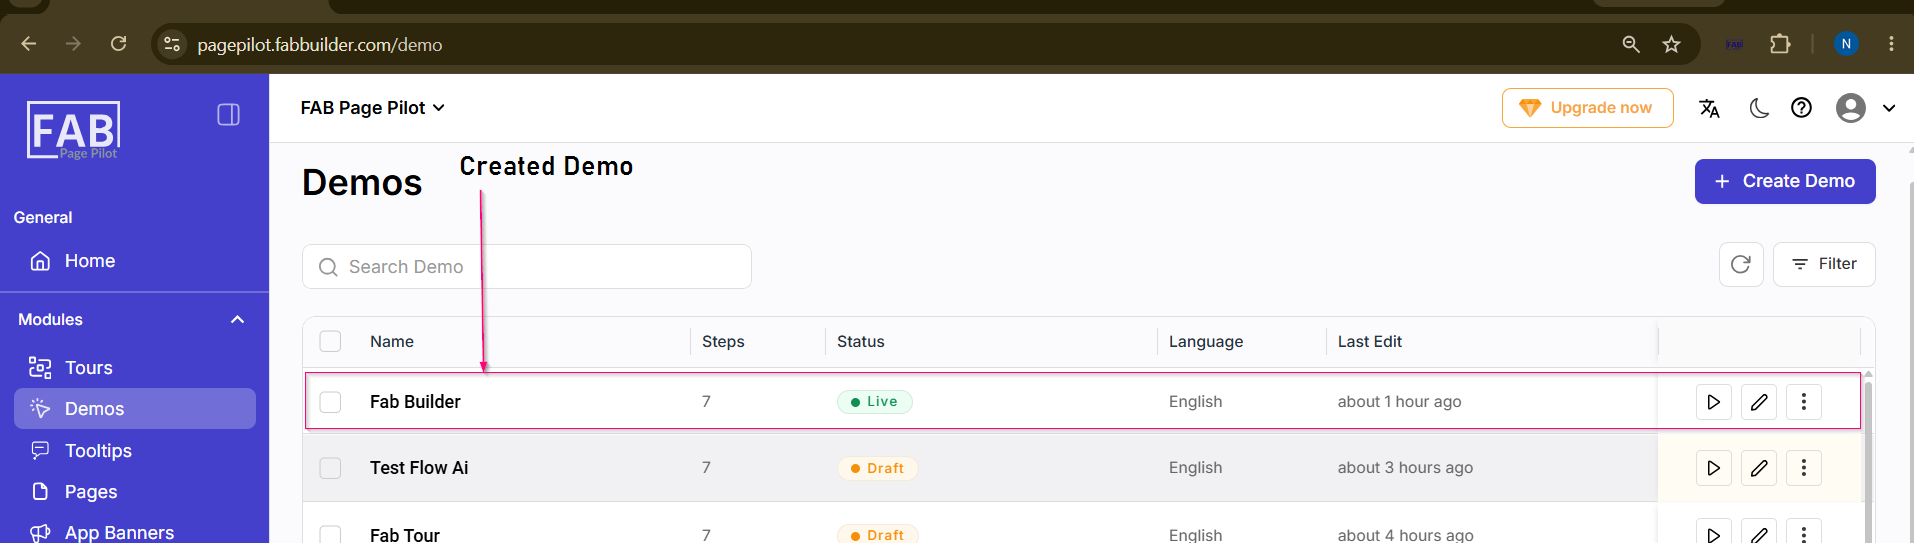 Screen-Created Demo |