Create a Tour Using the Scratch MethodThis documentation describes the process of creating a tour using the From Scratch method in the Tour module. The Scratch method allows users to create fully customized tooltips and guided tours using the Visual Editor. Users can design each tour step manually by adding layouts, headings, text, and other content elements based on their requirements.
The following steps explain how to create, configure, design, save, and publish a tour successfully
Create a Tour
After successfully logging in to the application, follow the steps below to create a tour.
Step 1: Navigate to the Tours Module
Go to the Tours module from the navigation menu.
Step 2: Click Create Tour
Click the Create Tour button.
Step 3: Enter Tour Details
A Create Tour popup window will open. Enter the required details:
Step 4: Proceed to the Next Step
Click the Next button to continue with the tour creation process.
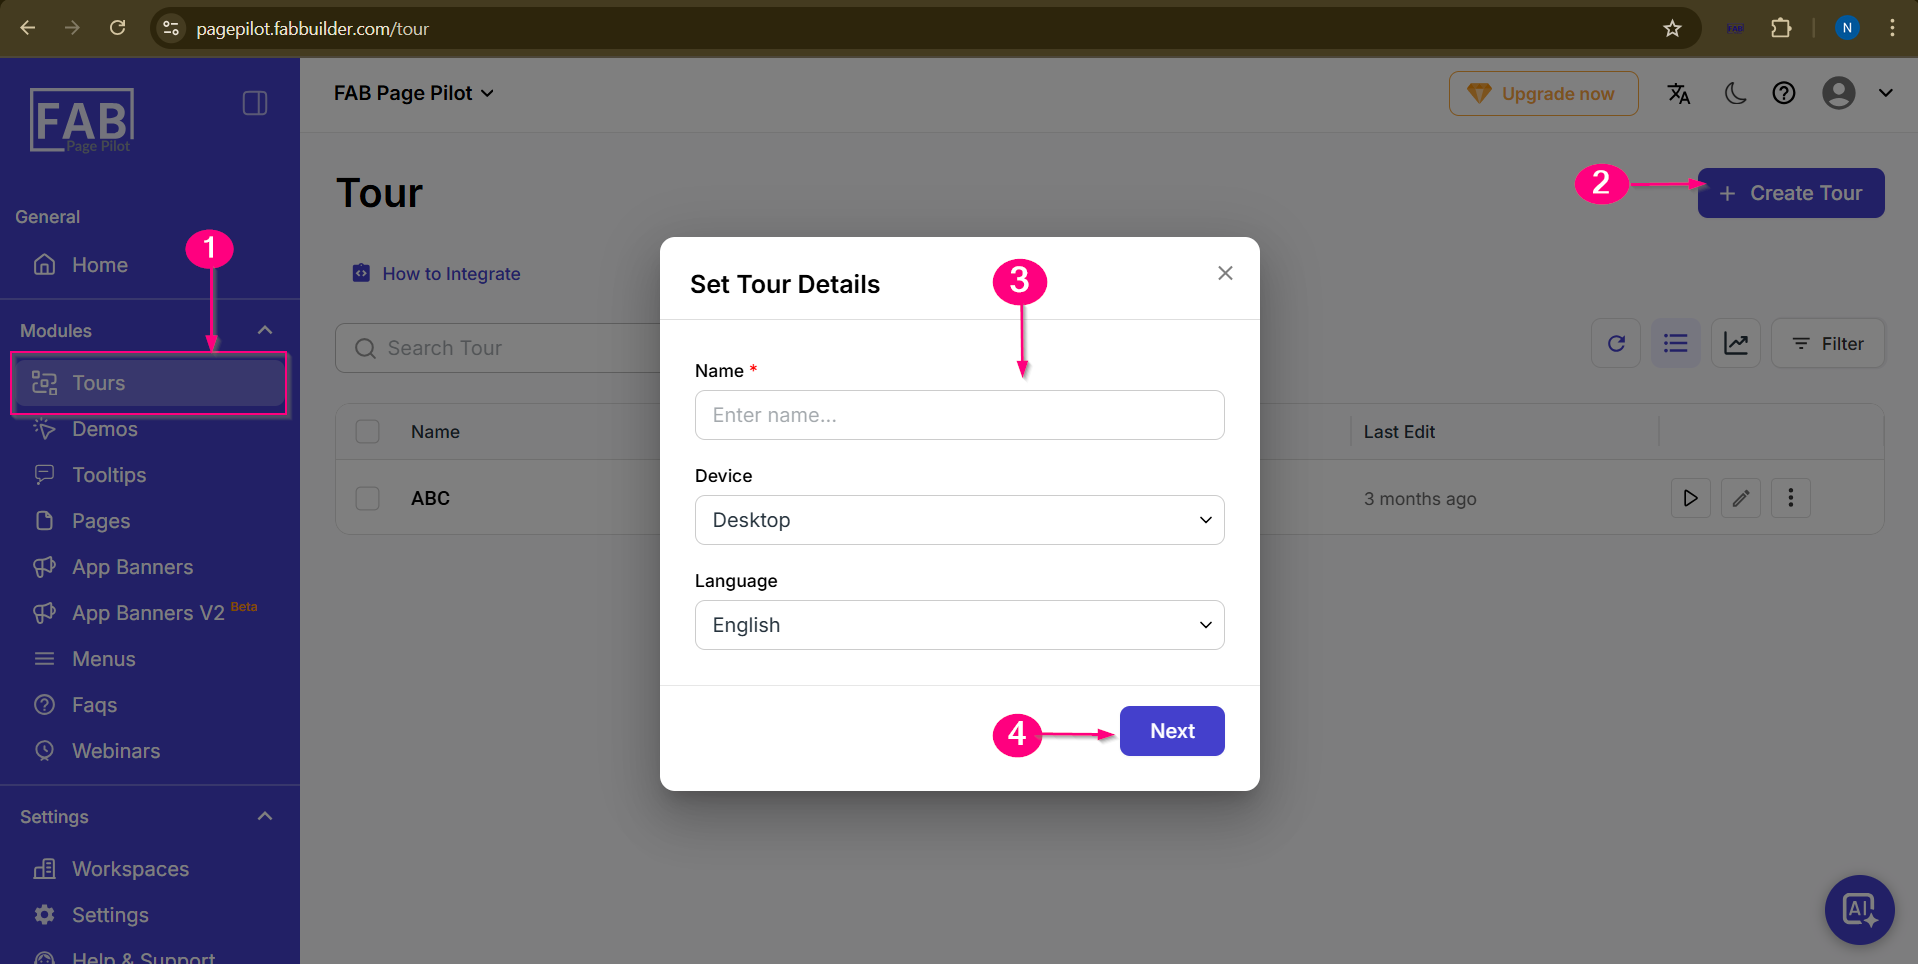 Screen- Add Tour Details 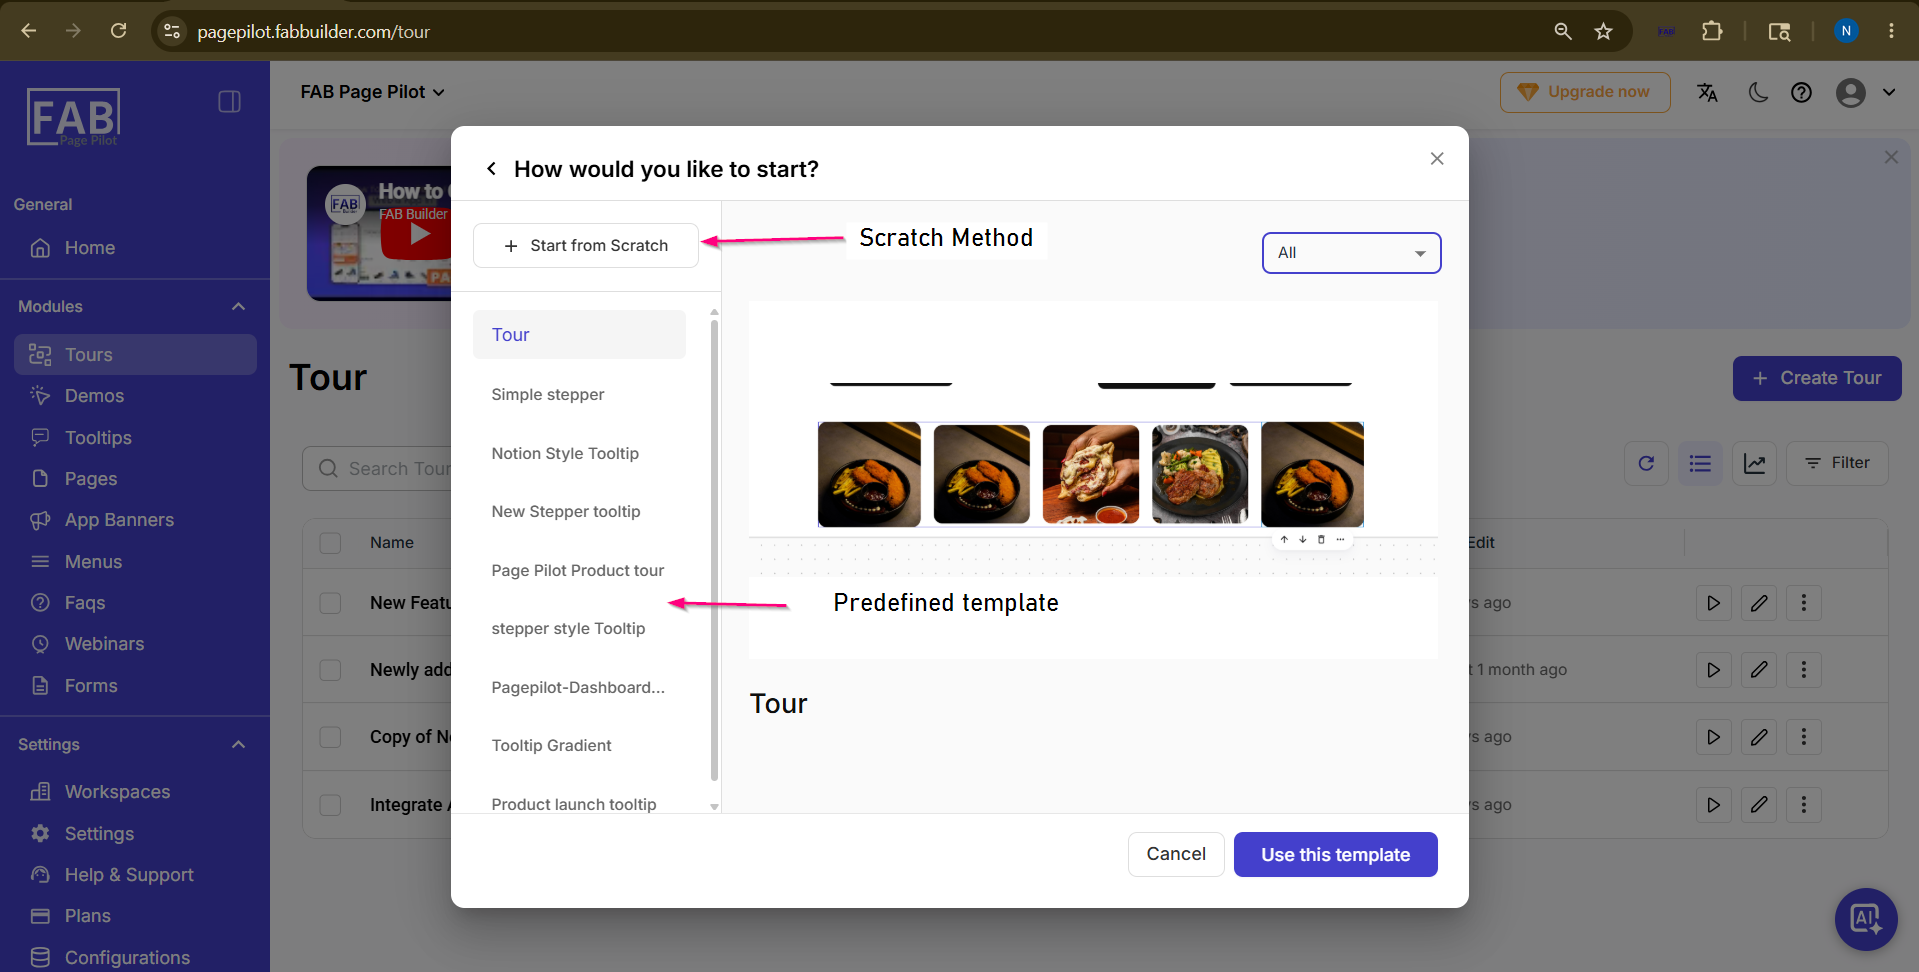 Screen- Method To Create Tour
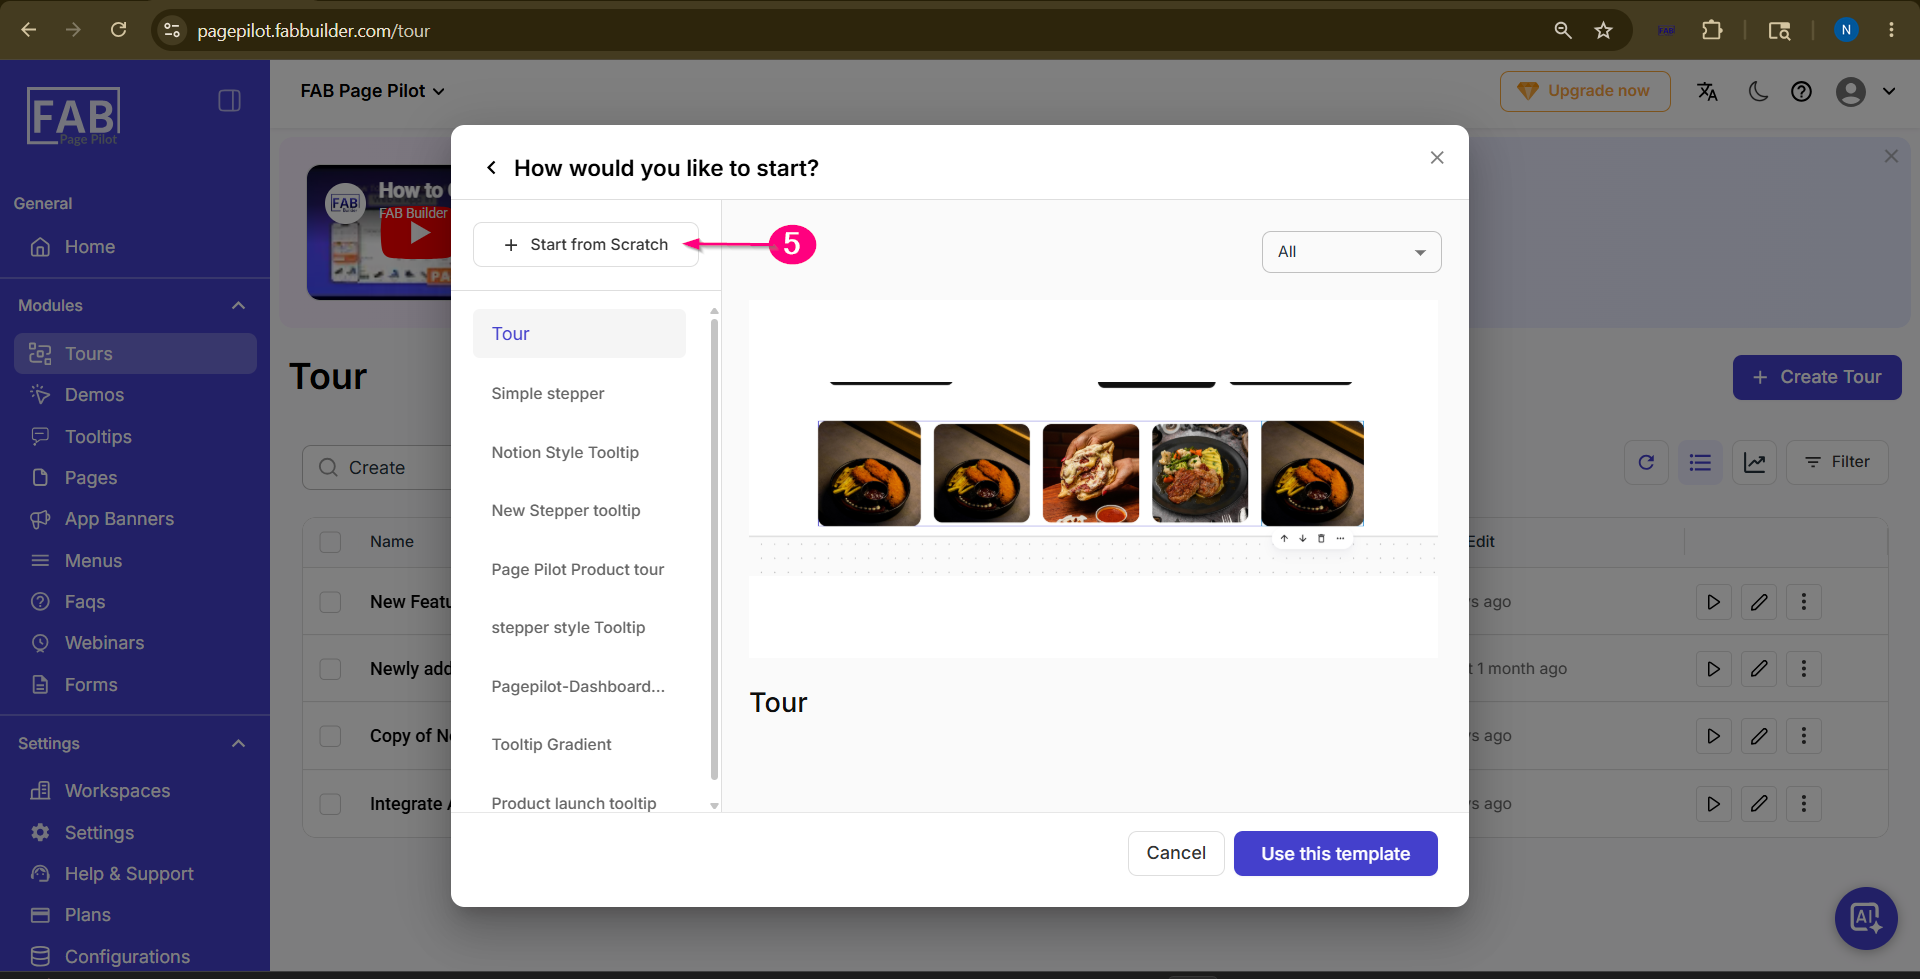 Screen- Selection of Scratch Method
Step 6: Open the Visual EditorSelect the From Scratch method. The user will be redirected to the Visual Editor, where the tooltip can be created and configured. To add a tooltip block,
or
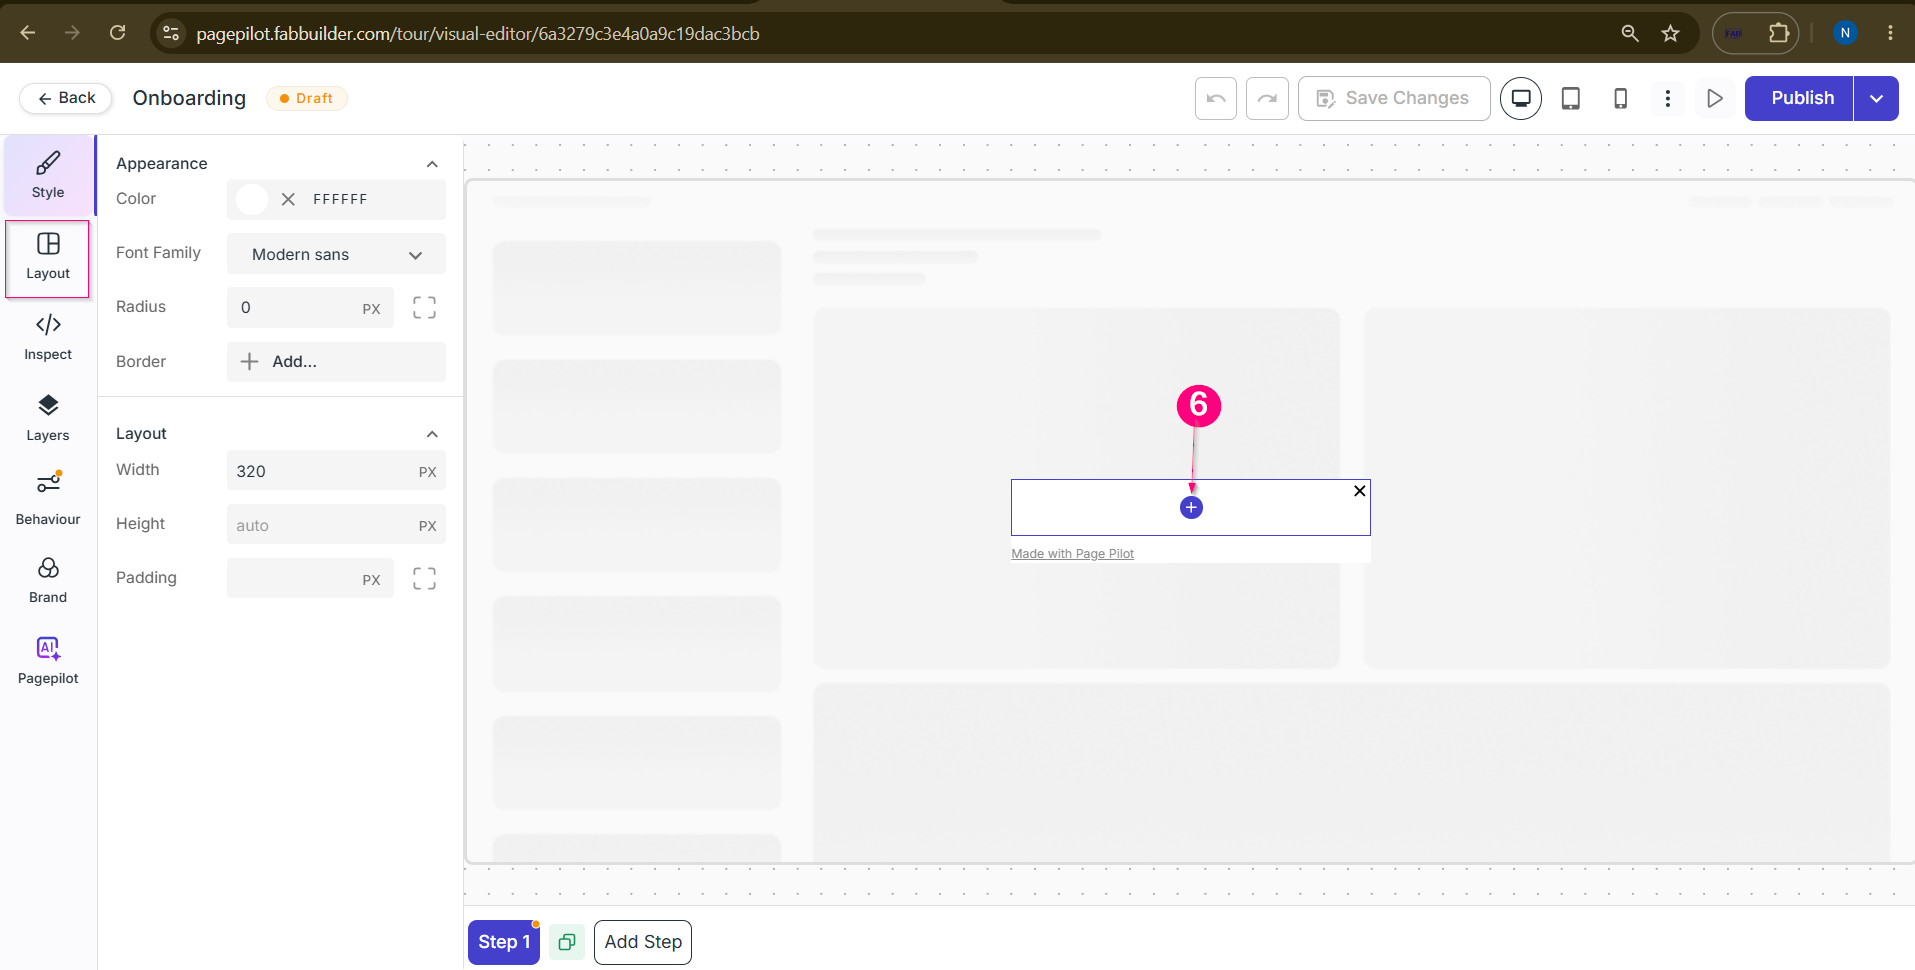 Screen-Visual Editor
Step 7: Select Design BlockSelect required design elements to the tooltip, such as:
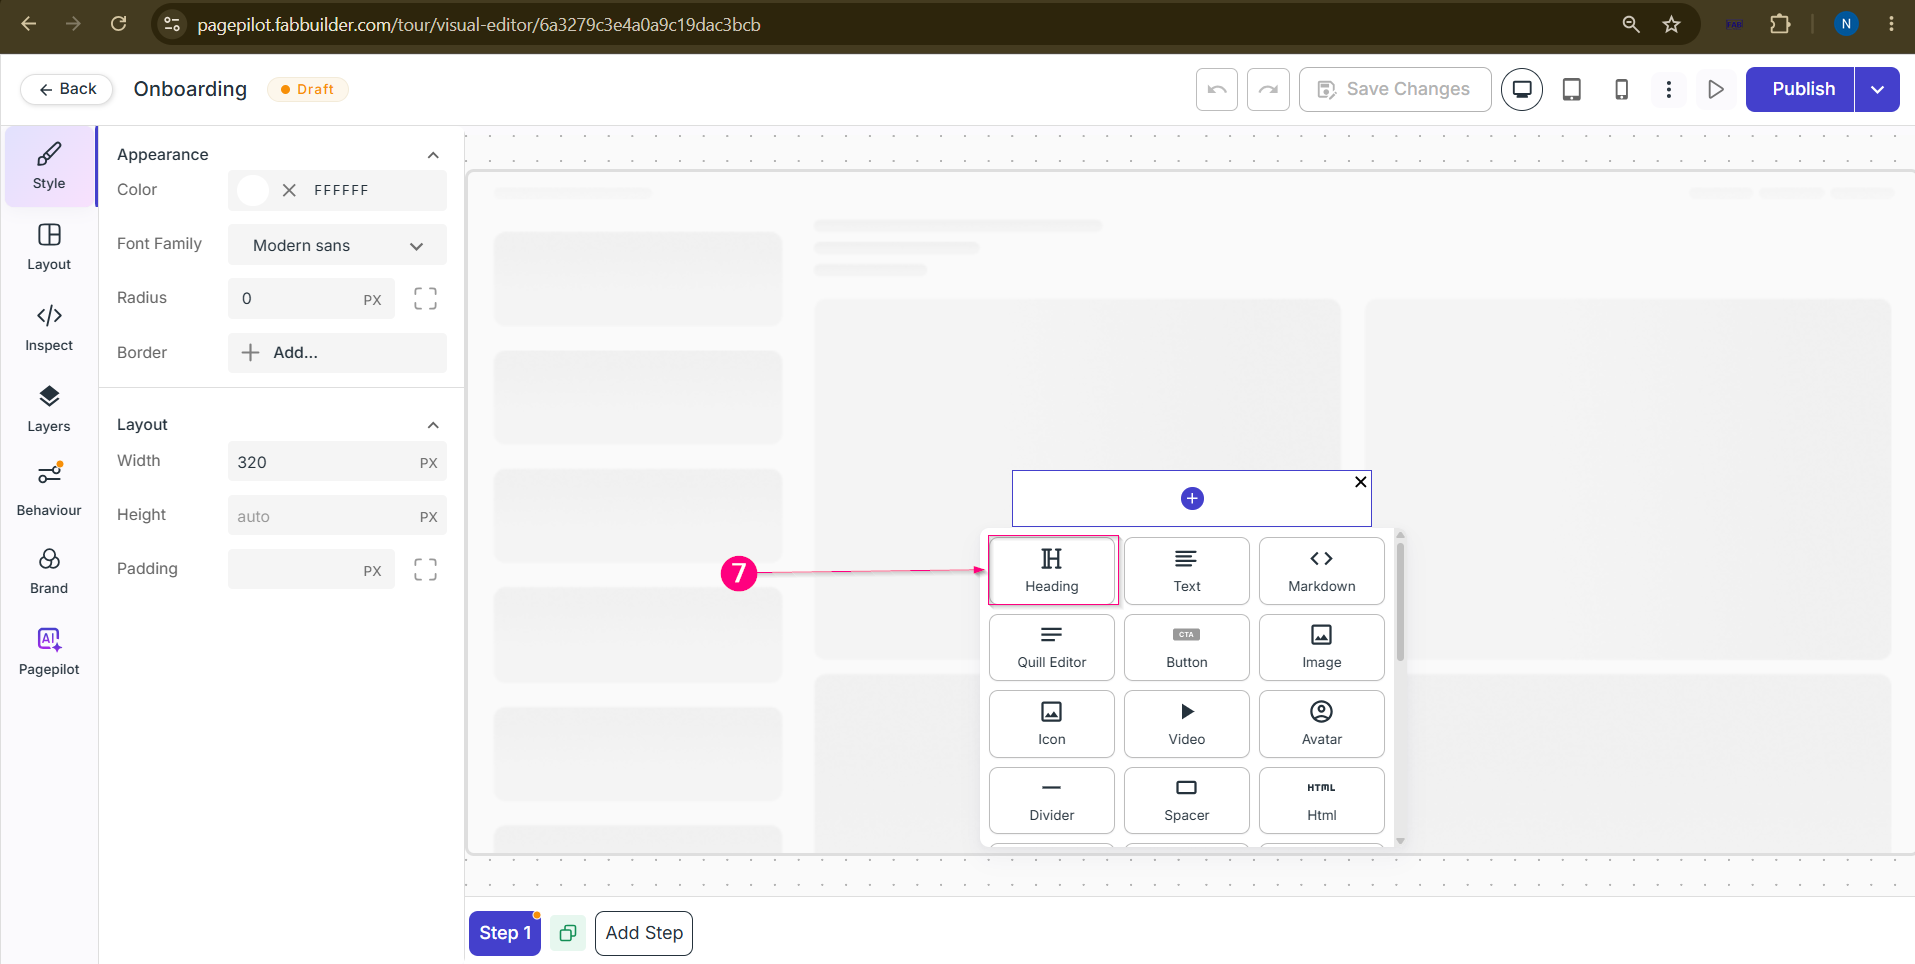 Screen- Select Element
Step 8: Add/Edit ContentAdd or edit the content on canvas or by clciking on inspect tab. 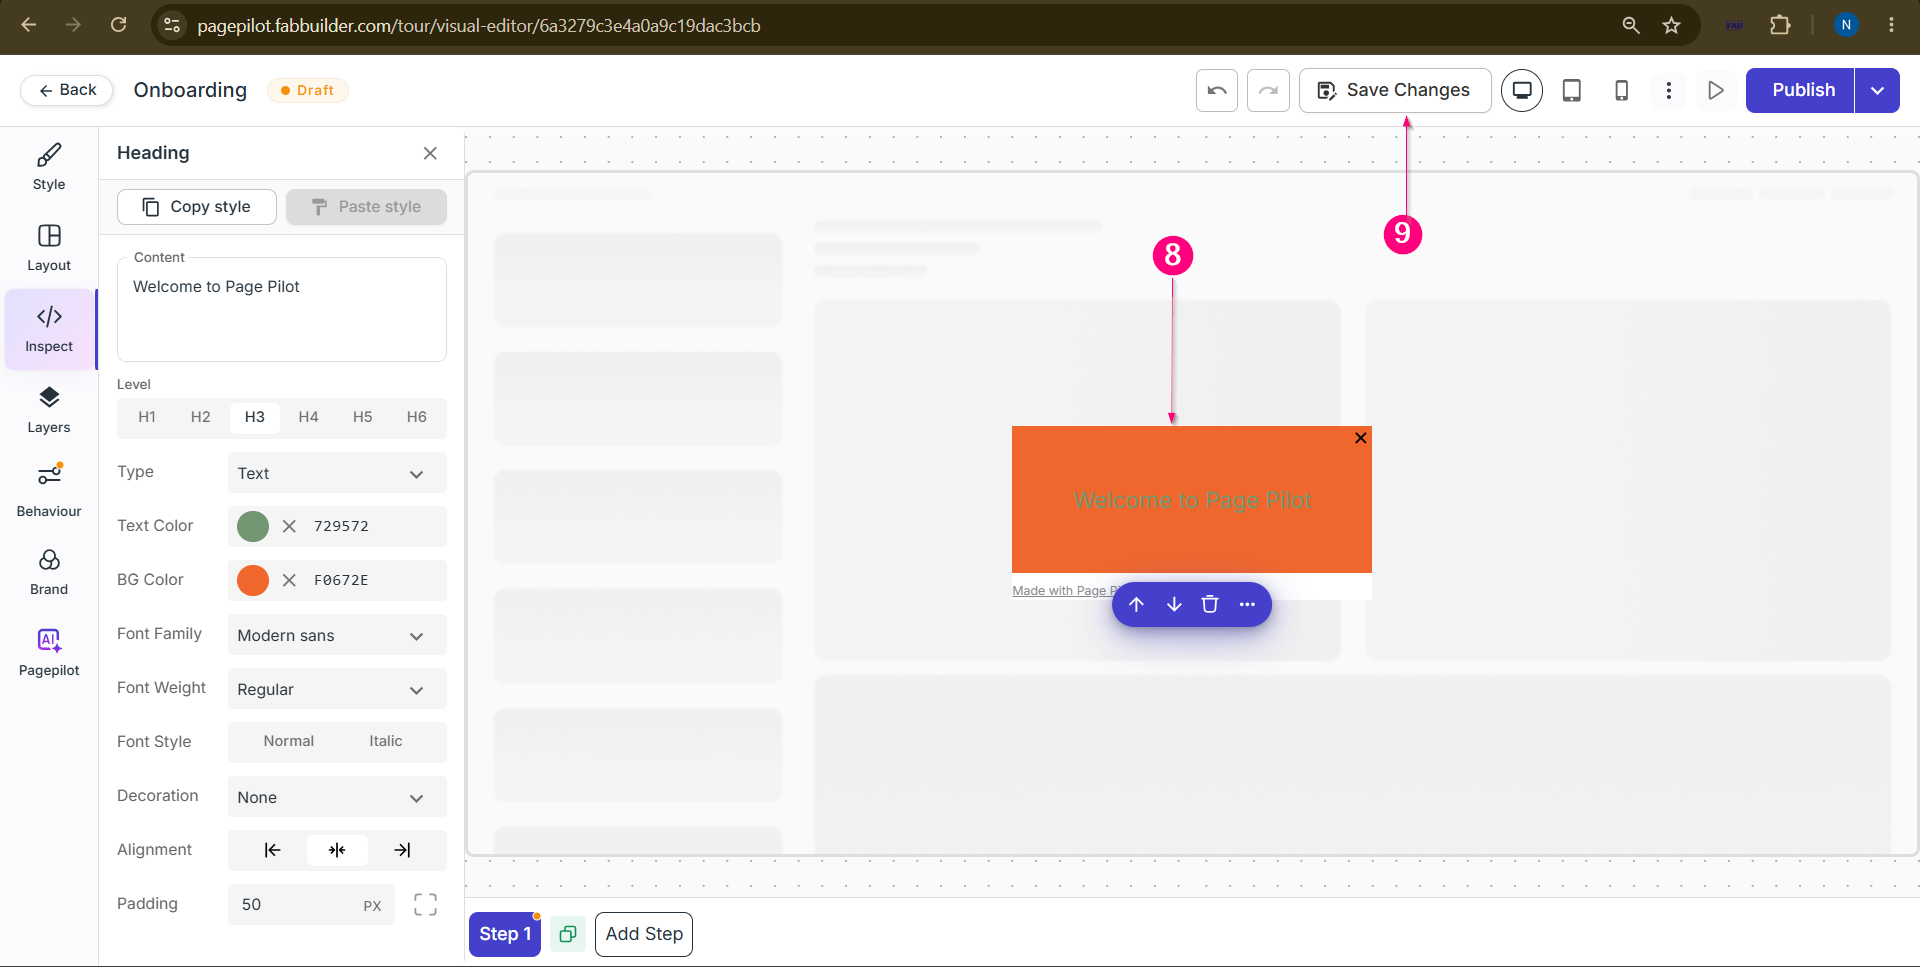 Screen-Add /Edit content
Step 9: Save the TourClick the Save button to save
Step 10: Configure Element ID and Placement Settings
Navigate to the Behaviour tab and configure the Element ID and related placement settings.
Note: Initialize the Element ID with the # symbol in the field box (for example, #login-button).
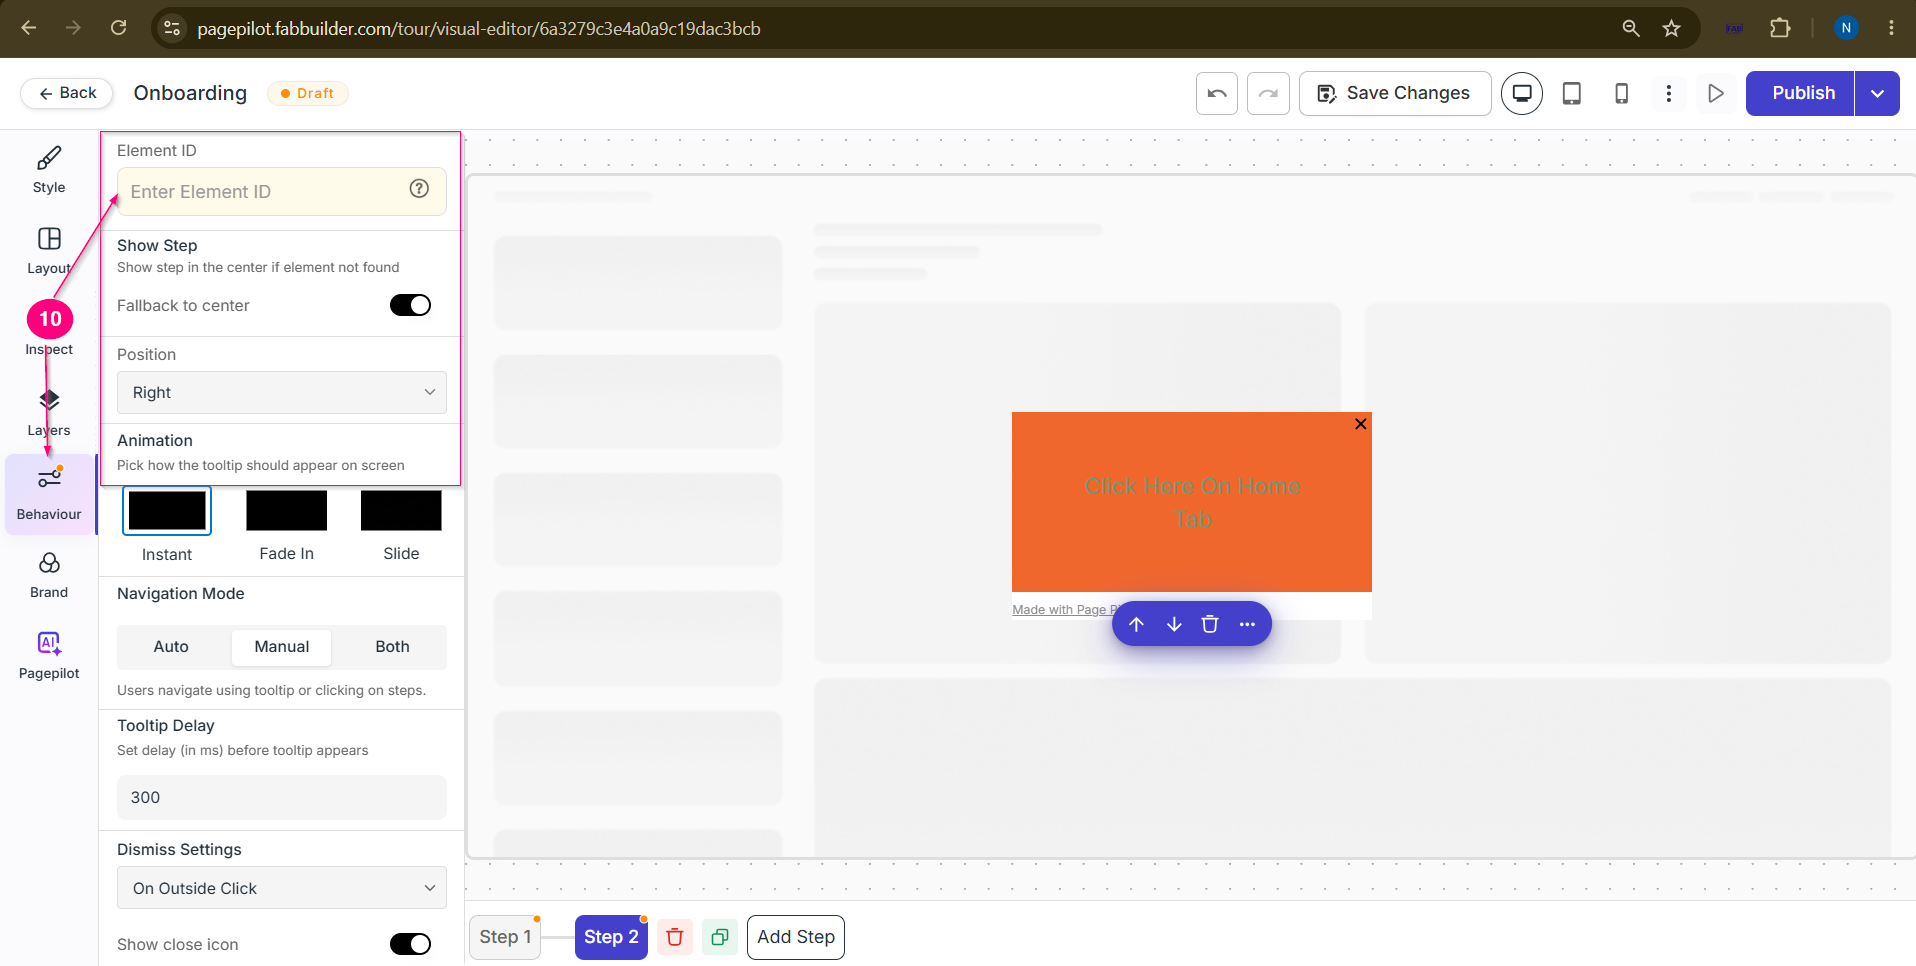 Screen- Add Element ID
Step 11: Add Additional Tour Steps 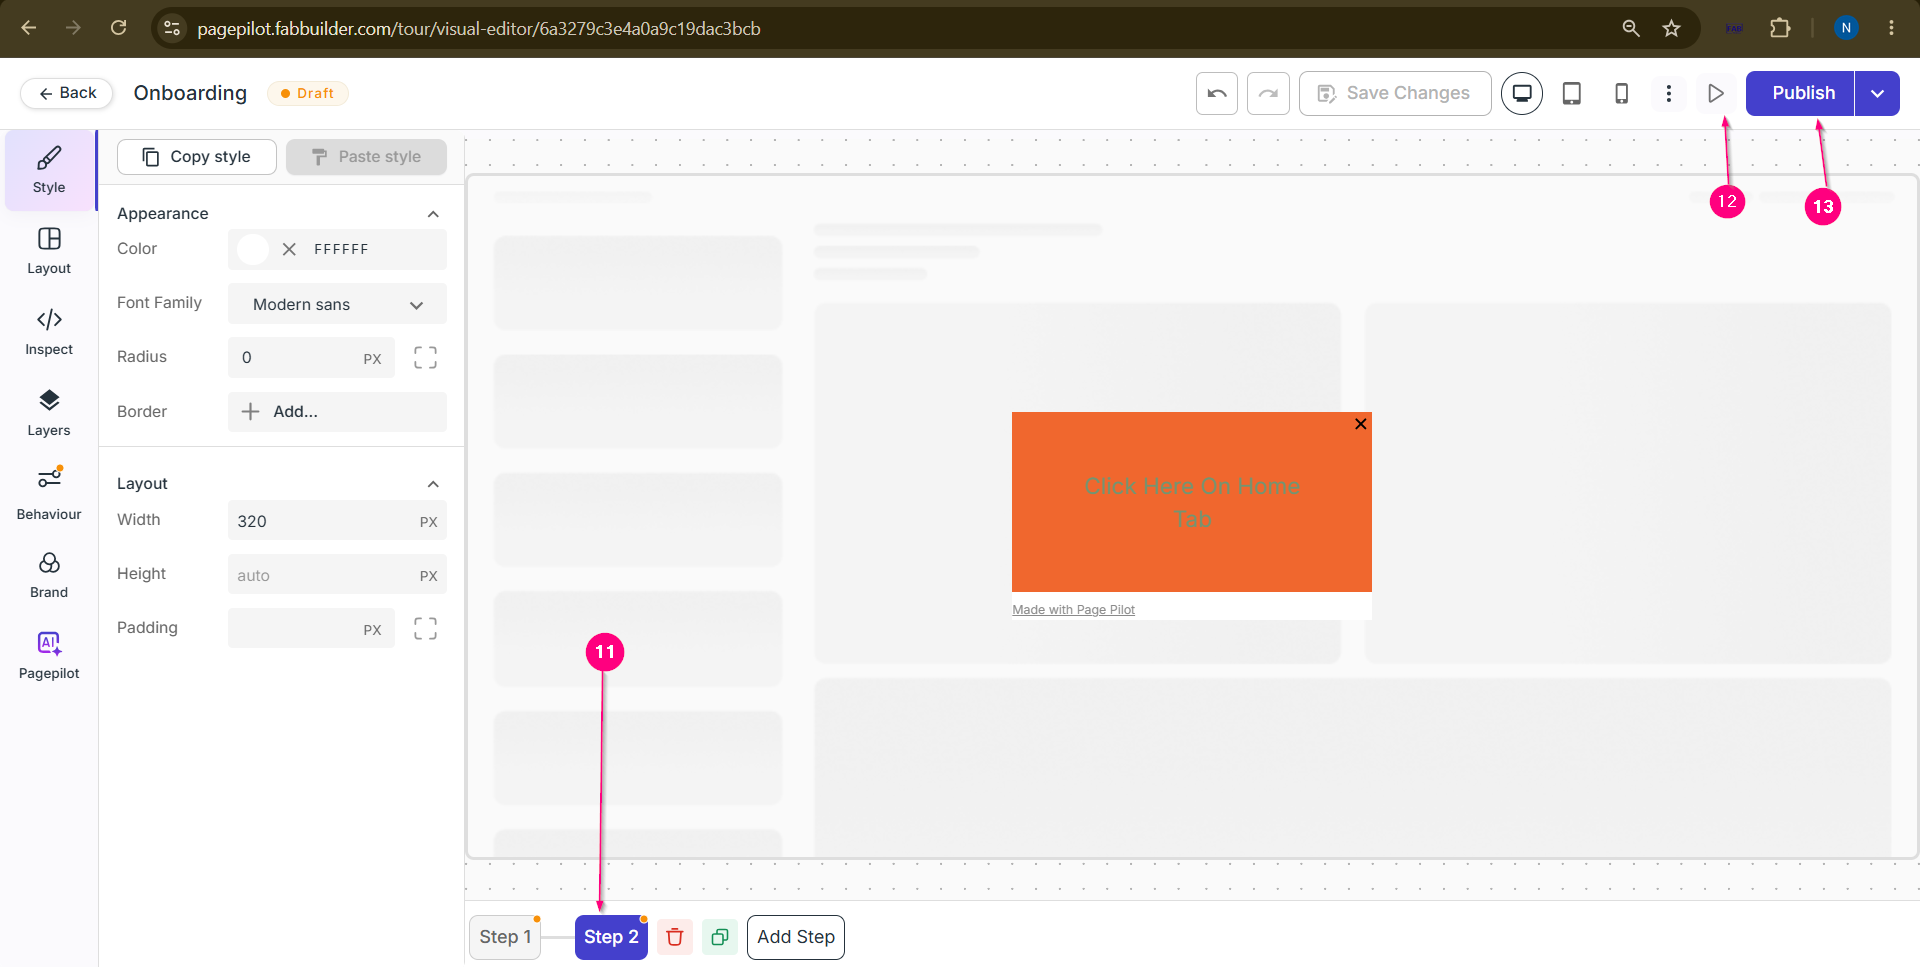 Screen-Add Step
Step 12: Preview the TourClick the Preview button to review the tour and verify that all steps, content, and navigation behave as expected before publishing. Screen- Preview Button Access
Step 13: Publish the TourClick on Publish Tour
Step 14: Review Before Going LiveBefore making the tour live, review and configure the publishing settings:
Step 15: Publish the TourAfter verifying all settings, click the Publish button to make the tour live.
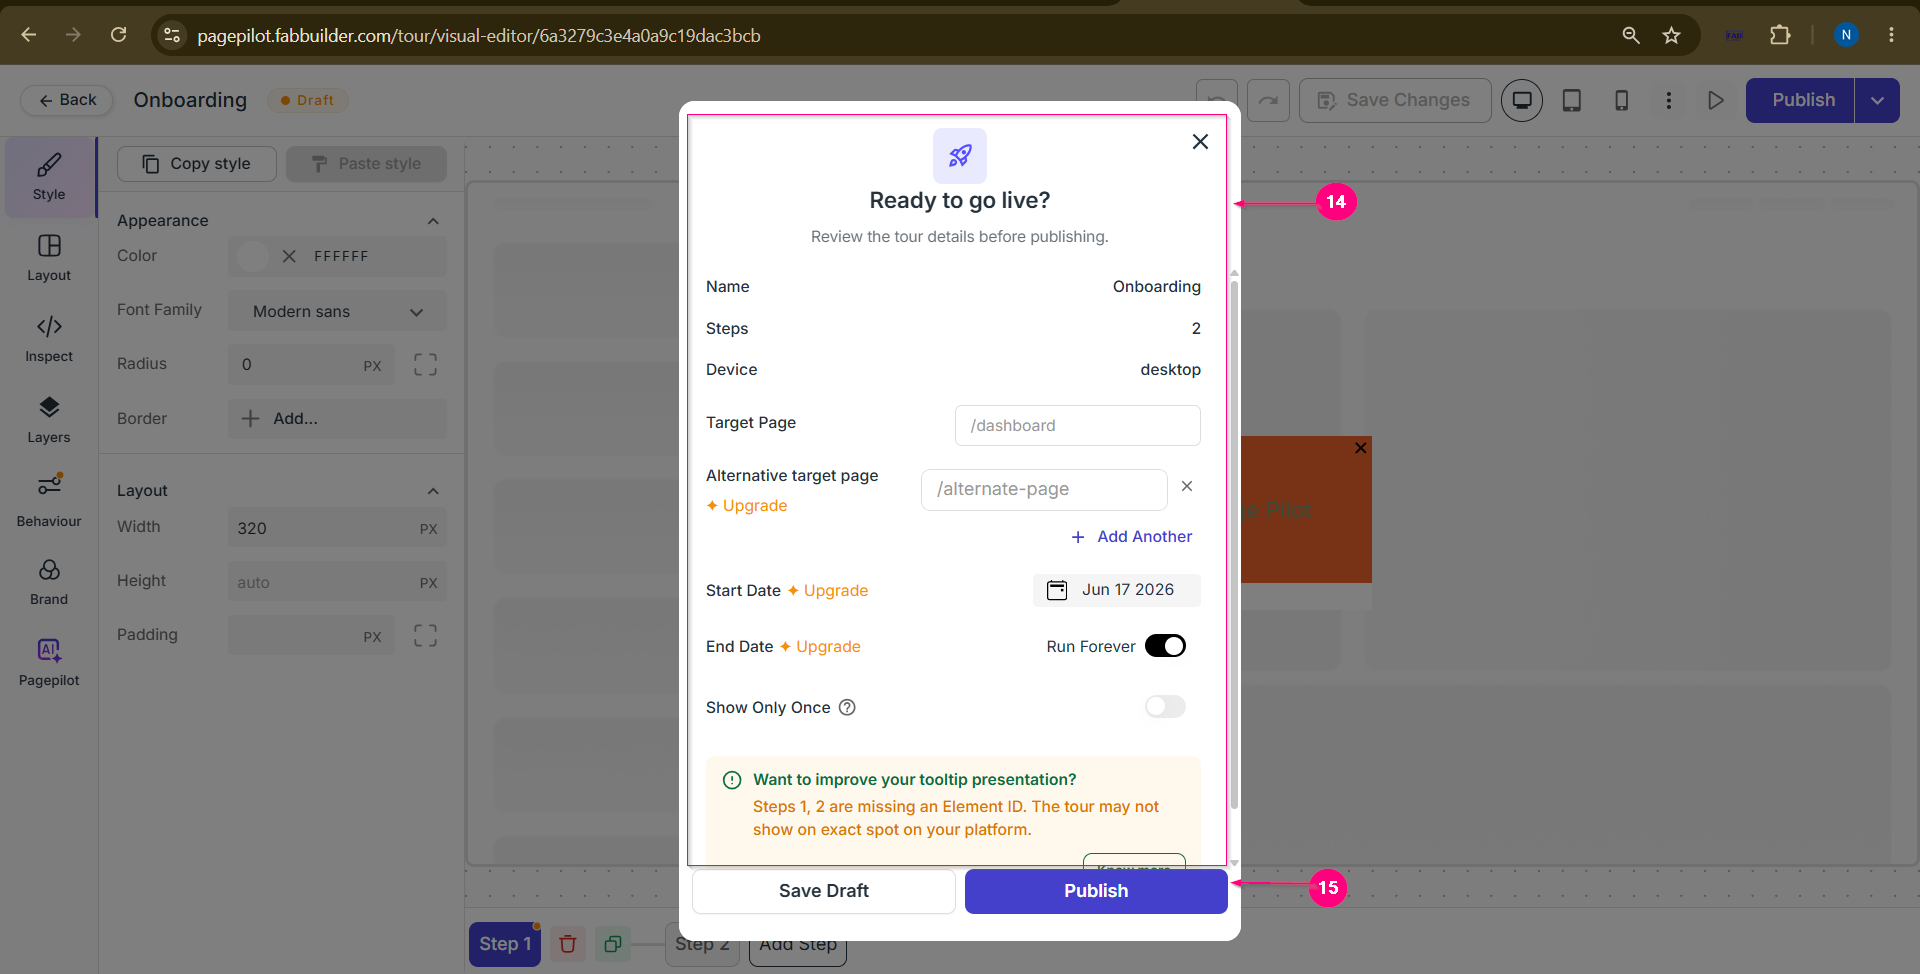 Screen-Review and Publish After successful publishing, the published tour will be visible in the Tour Dashboard List. 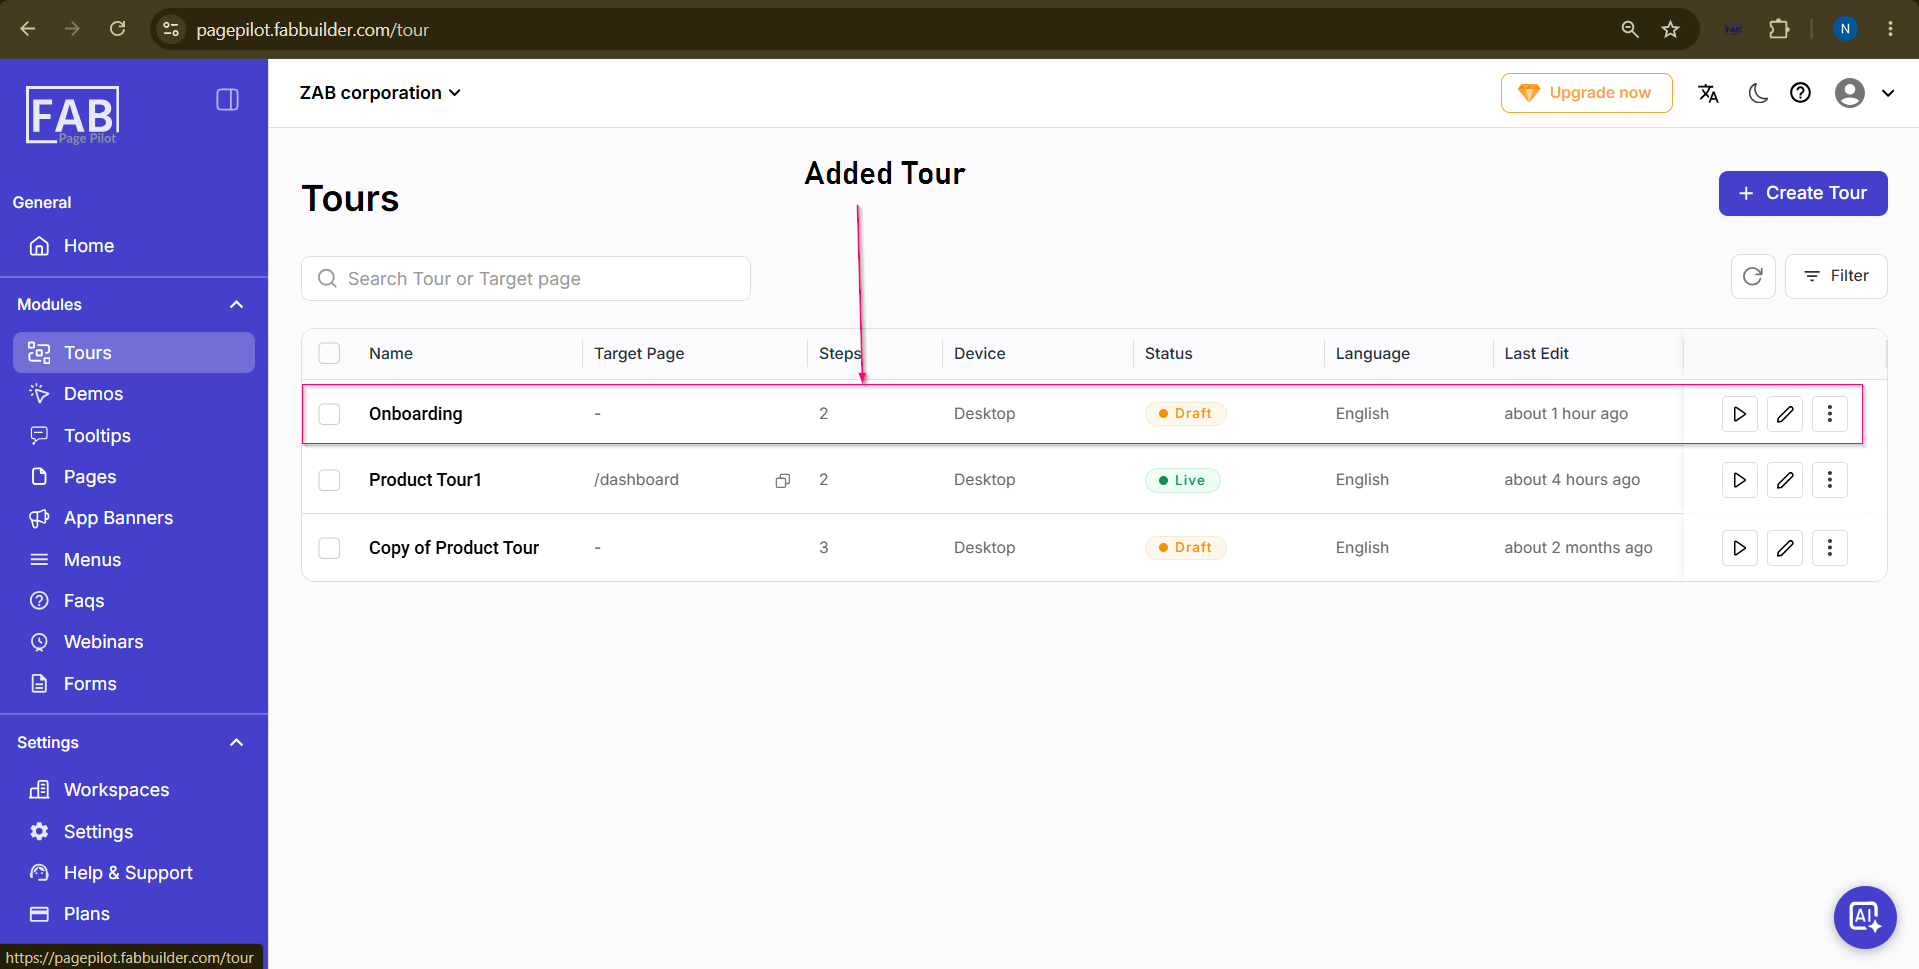 Screen-Added tour |