Create a Page by scratchThe Pages module is used to create and manage webpages for the website or application. Users can configure page details, assign slugs, organize pages into groups, and publish content that is reflected on the integrated website. PrerequisitesBefore creating a page, ensure the following prerequisites are completed:
Steps
Step 1: Open Pages ModuleNavigate to the Pages module from the left navigation panel. Step 2: Click Create PageClick the Create Page button. A Create Page popup window will appear.
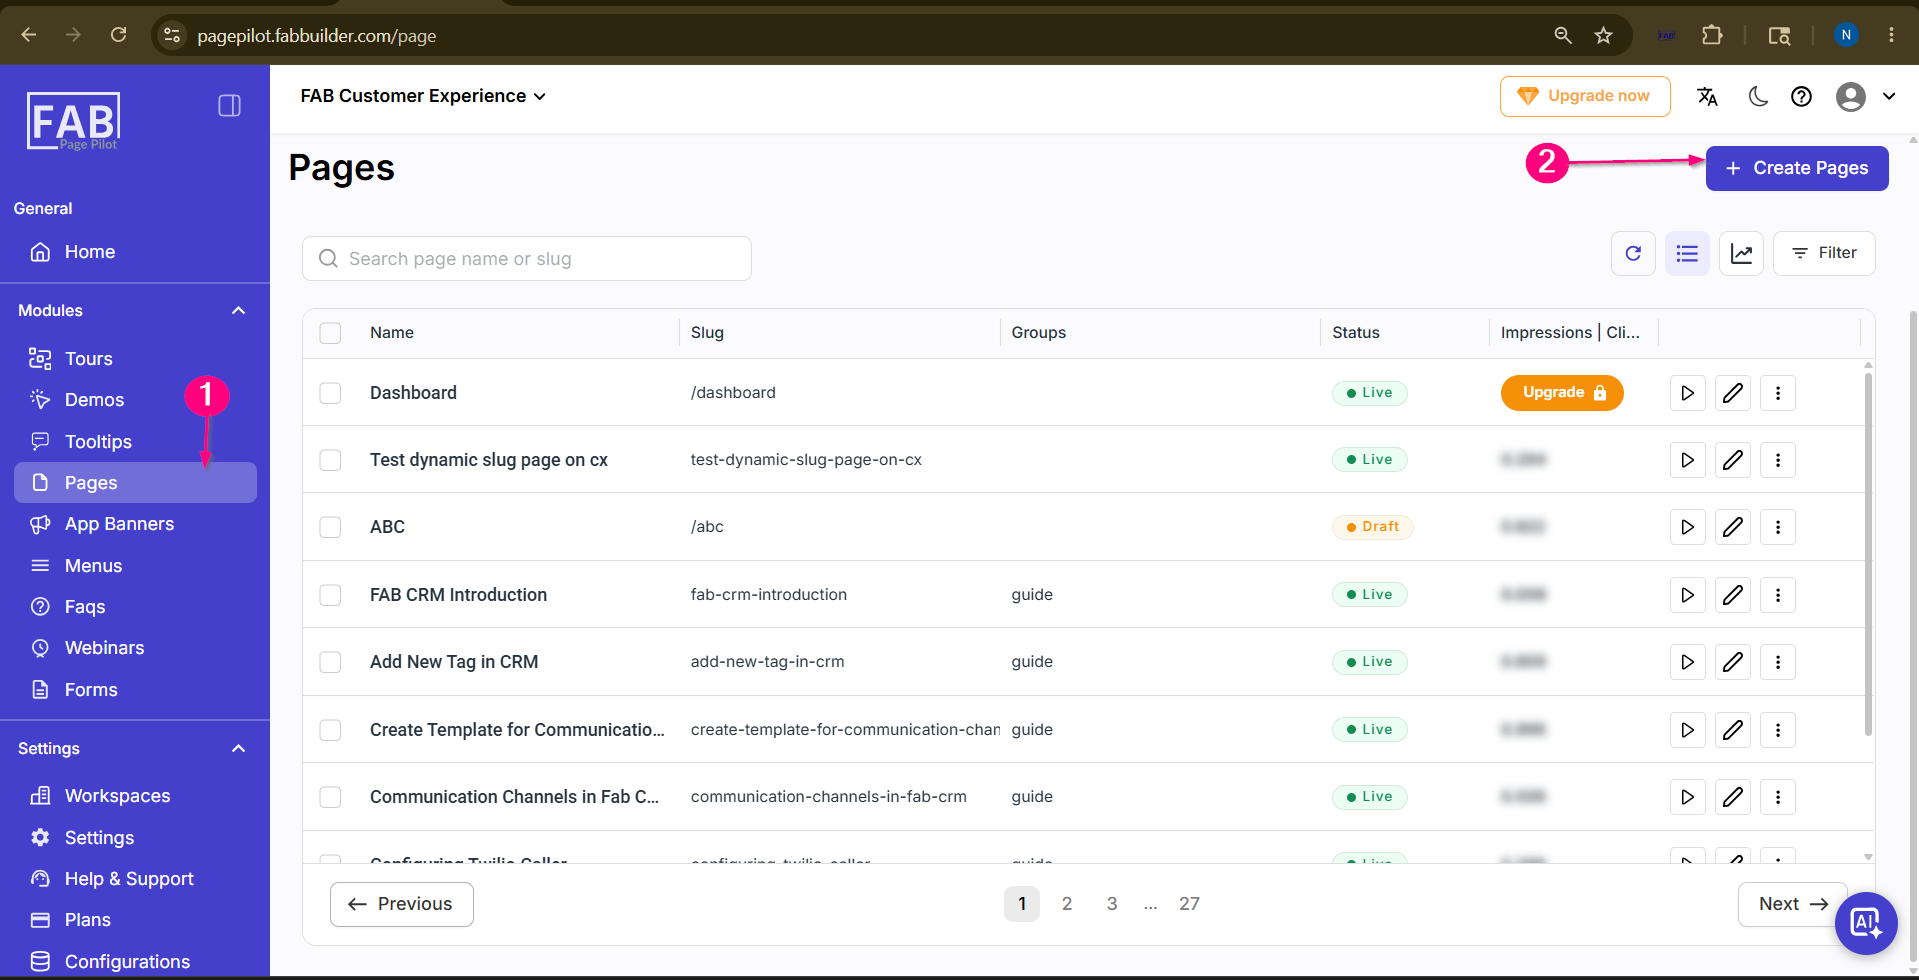 Screen-Create Page
Step 3: Enter Page DetailsEnter the required page details such as Name, Slug, Assign, and Group in the Set Page Click the Next button to continue with page creation and configuration.
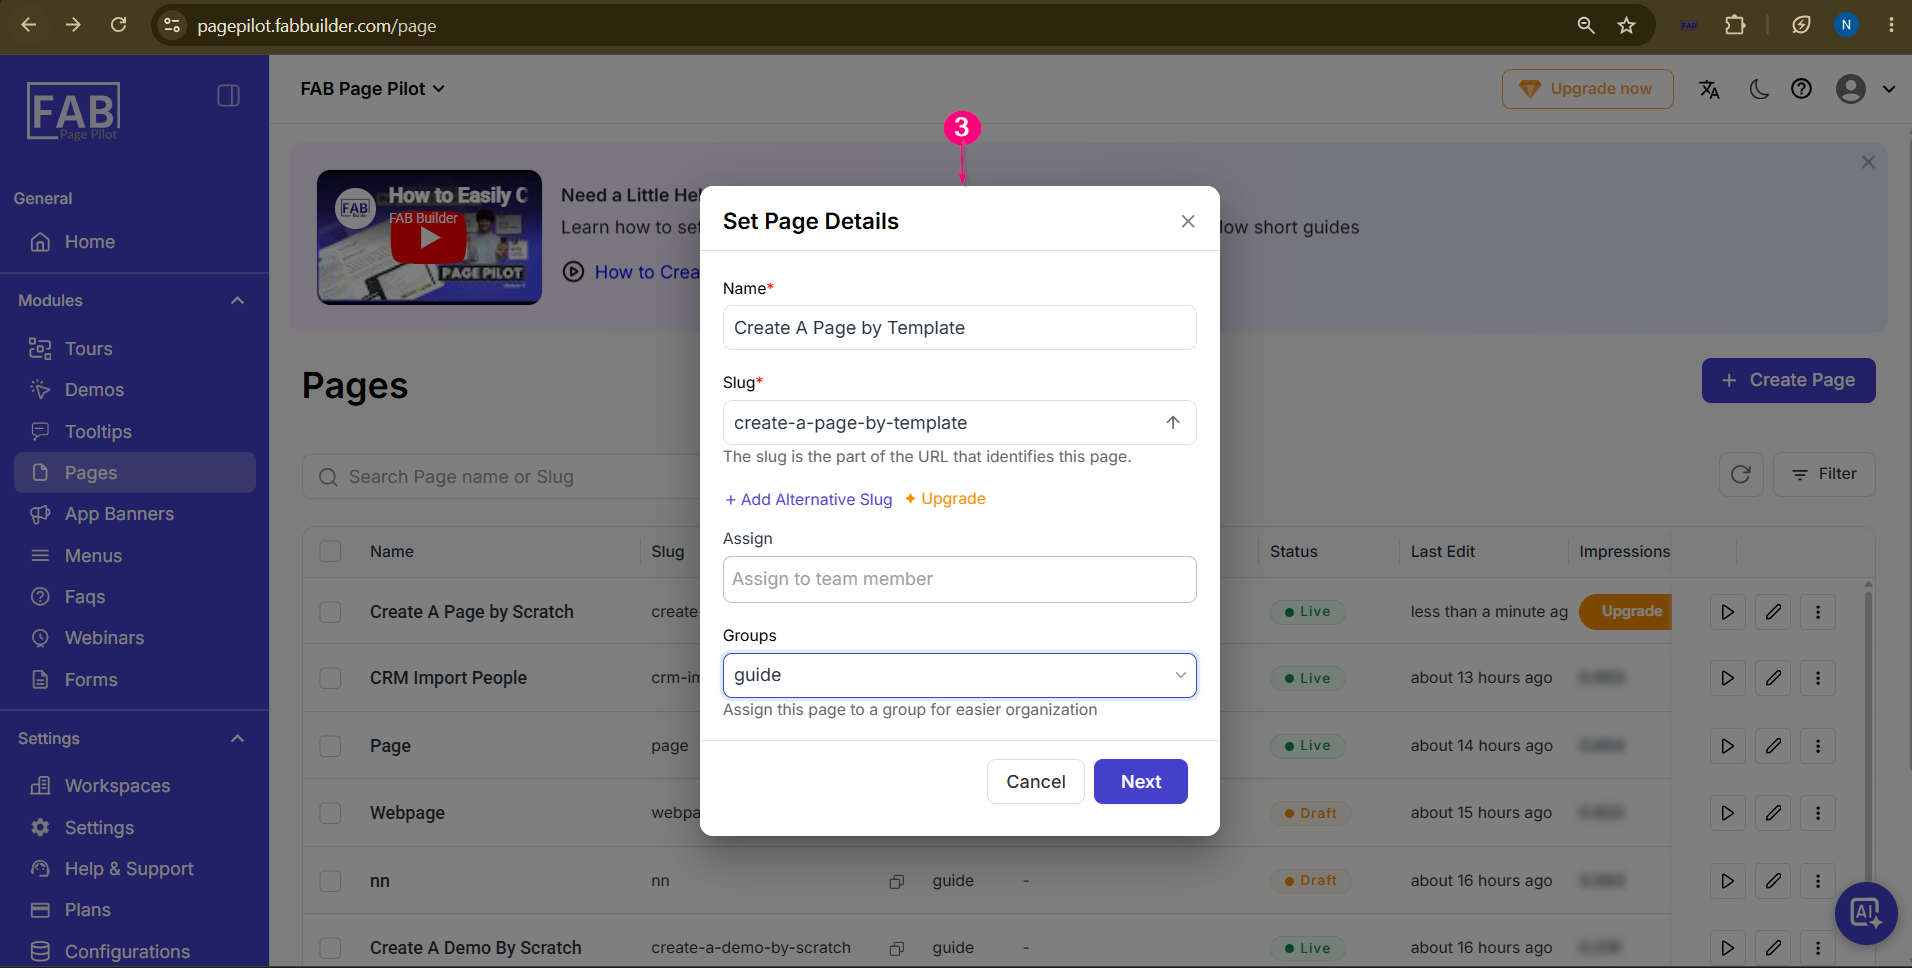 Screen- Enter page Details
Step 4: Select Method to Create a Page
Select a page creation method: Template or Scratch.
In this example, the Template method is selected. The user will be redirected to the Visual Editor to build and customize the page from scratch.
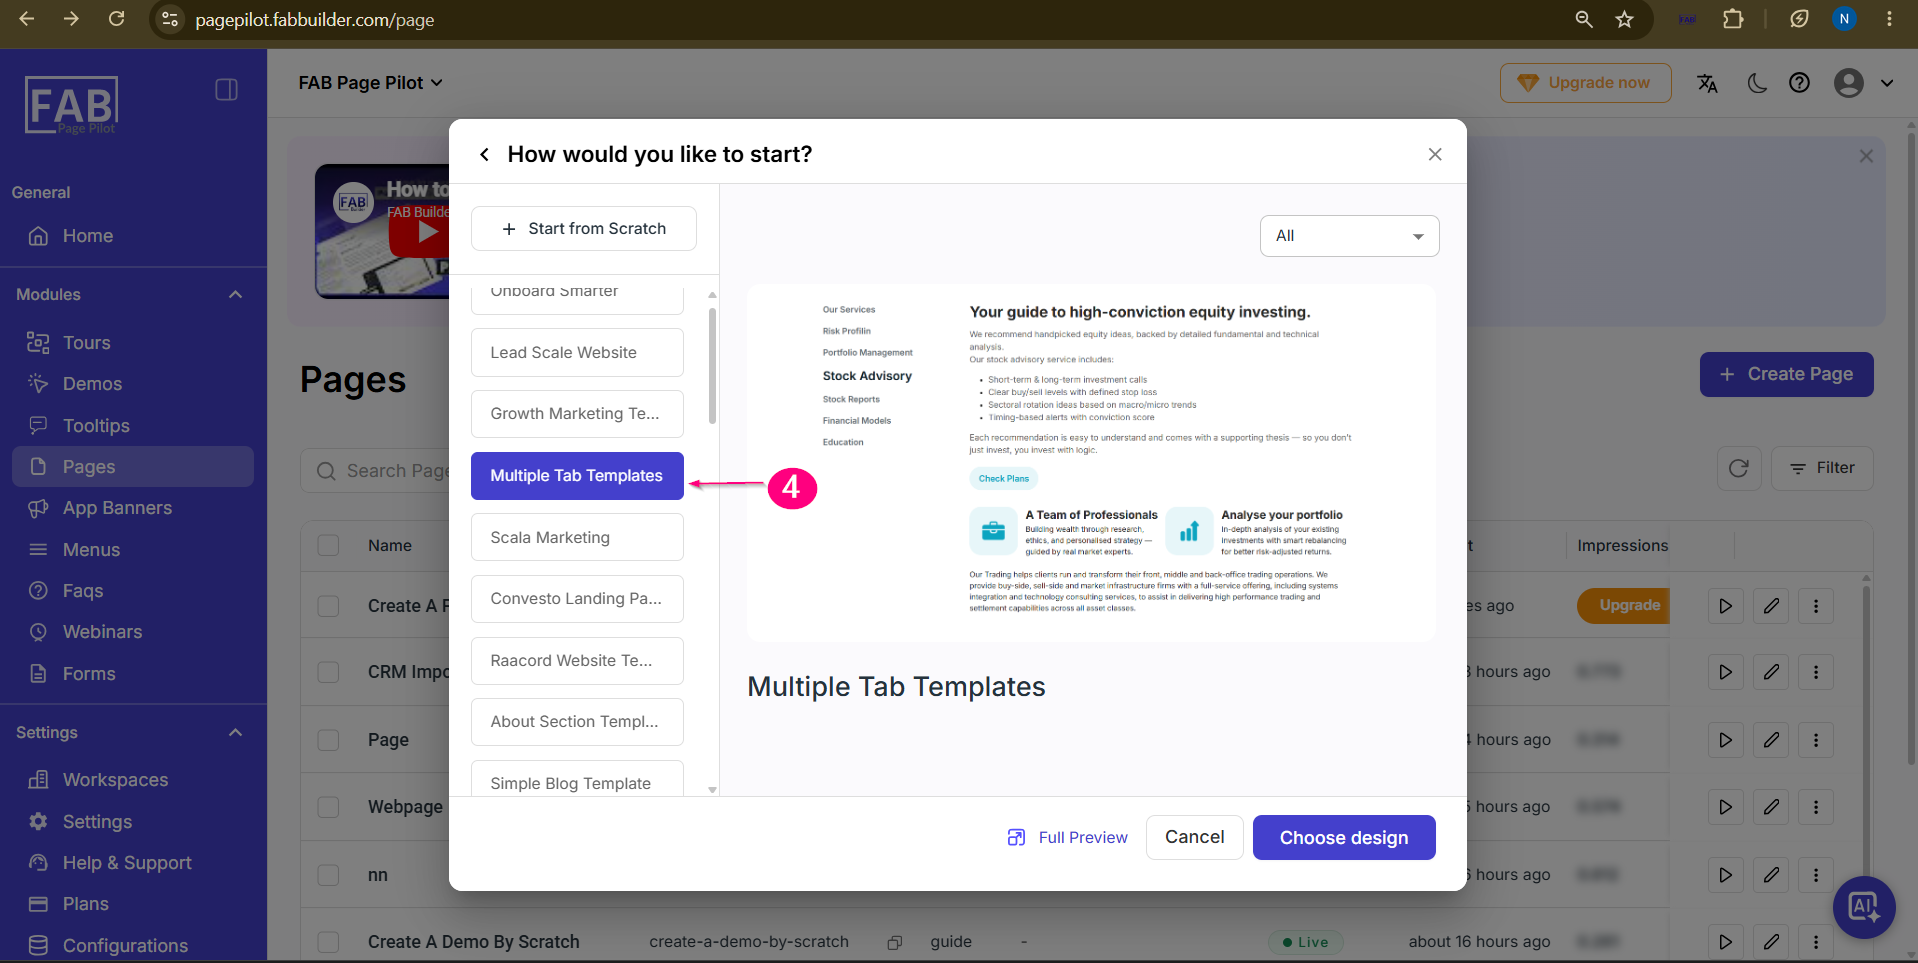 Screen- Select Page Creation Method
Step 5: Add or Edit Content Blocks To Add Blocks Click the Layout tab or the Plus (+) icon on the canvas to open the Block Panel. Then, select and add the required content block. To Edit Content Double-click the desired section within the selected template to modify its content. You can add or update elements such as Heading, Text, Image, Button, and other available content blocks to customize the page.
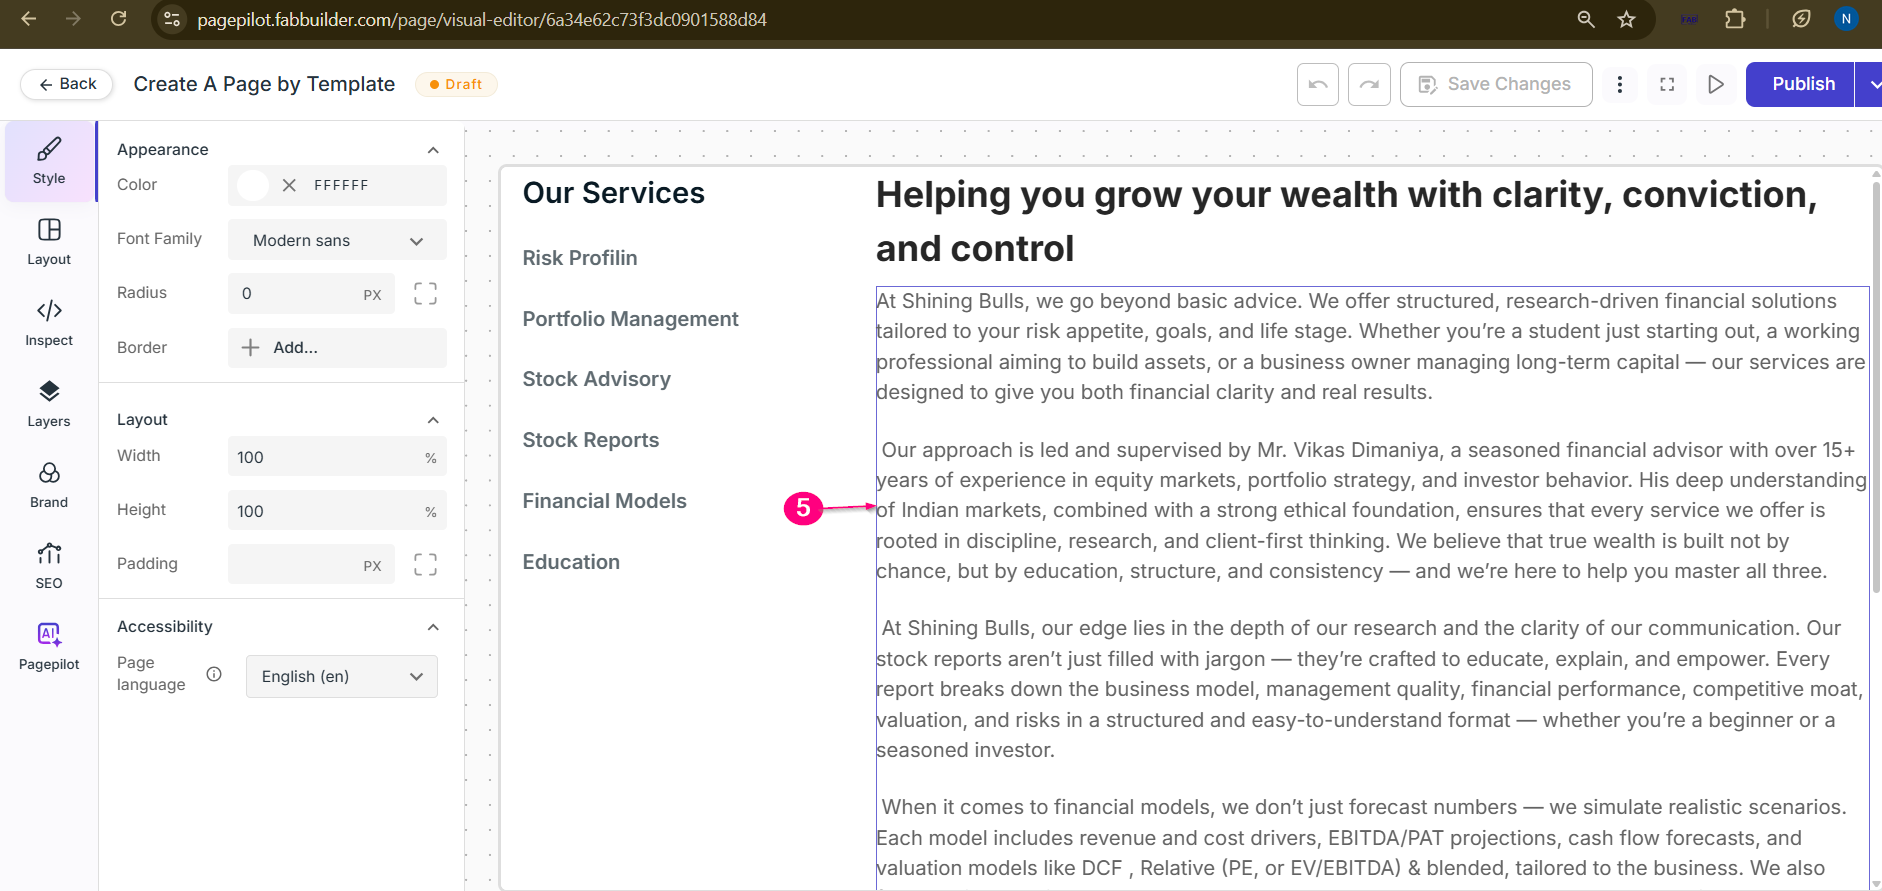 Screen- Edit the Template content Step 6: Click on save changes Click on save changes
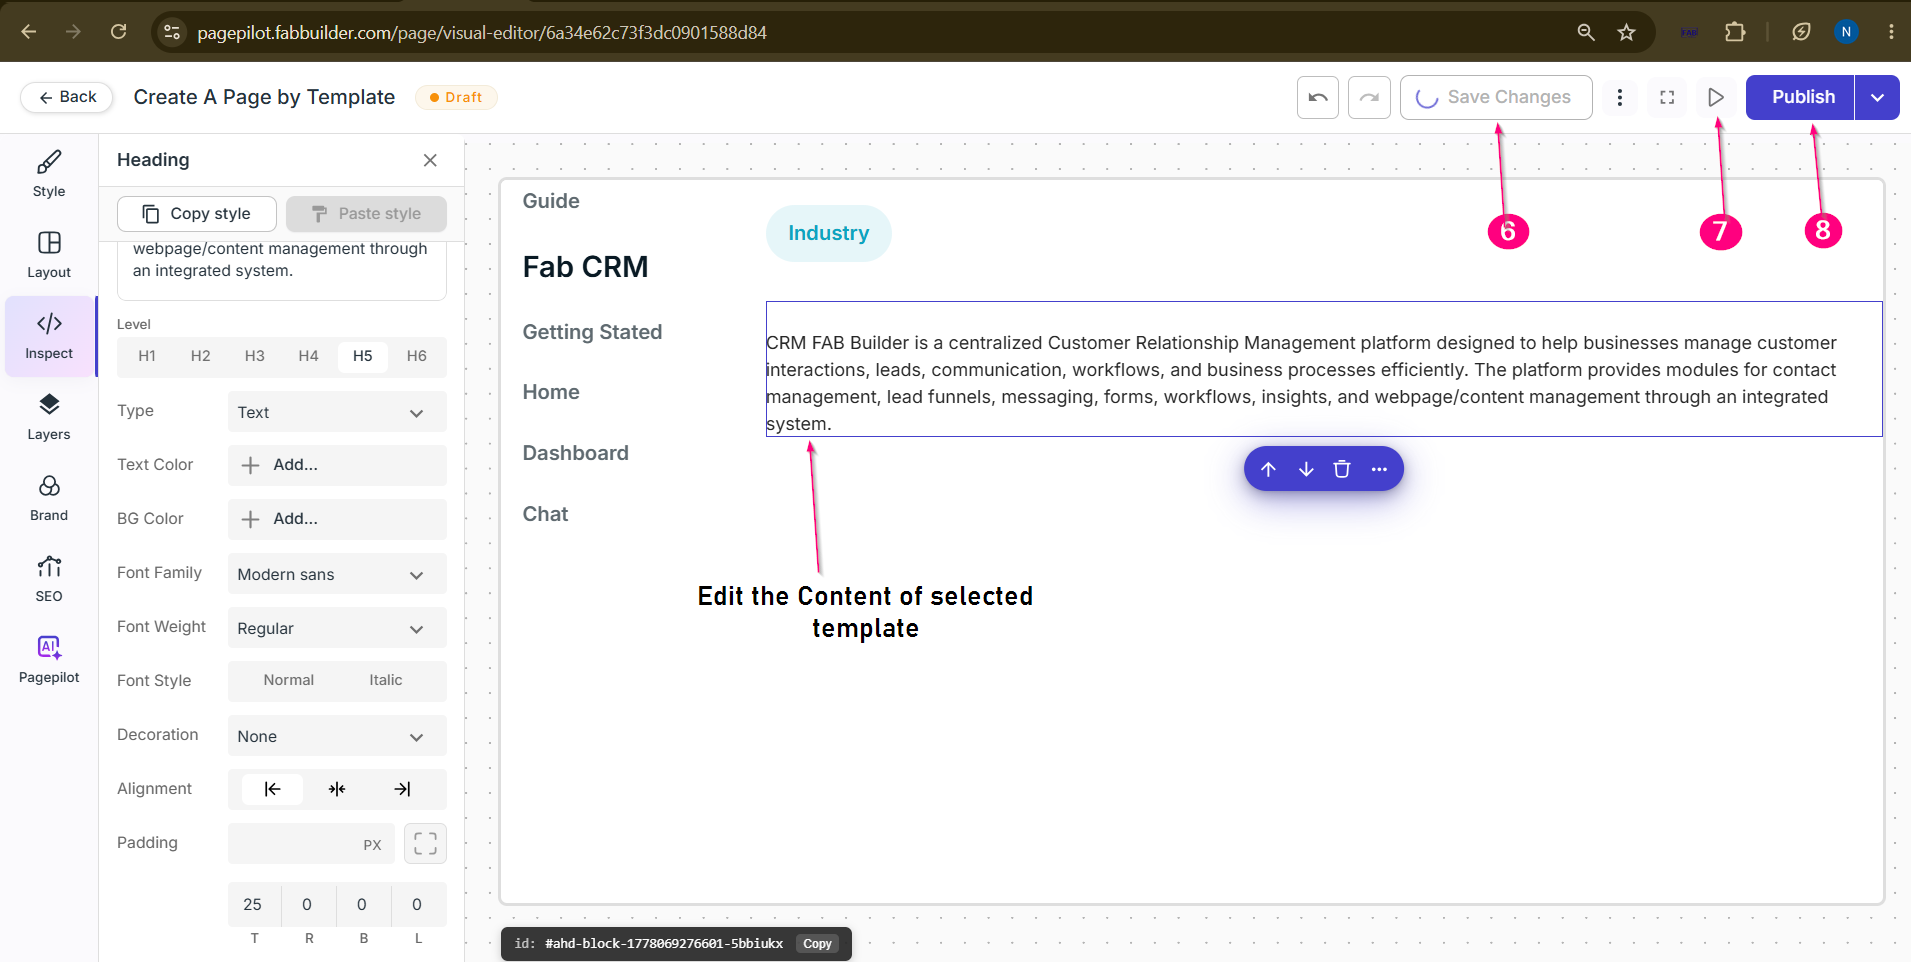 Screen-Add block
Step 7: Preview the PageClick the Preview button to review the tour and verify that all steps, content Step 8: Publish the PageClick on Publish Page
Screen- Added Content
Step 9: Review Before Going LiveBefore making the Page live, review and configure the publishing settings:
Step 10: Publish the PageAfter verifying all settings, click the Publish button to make the Page live.
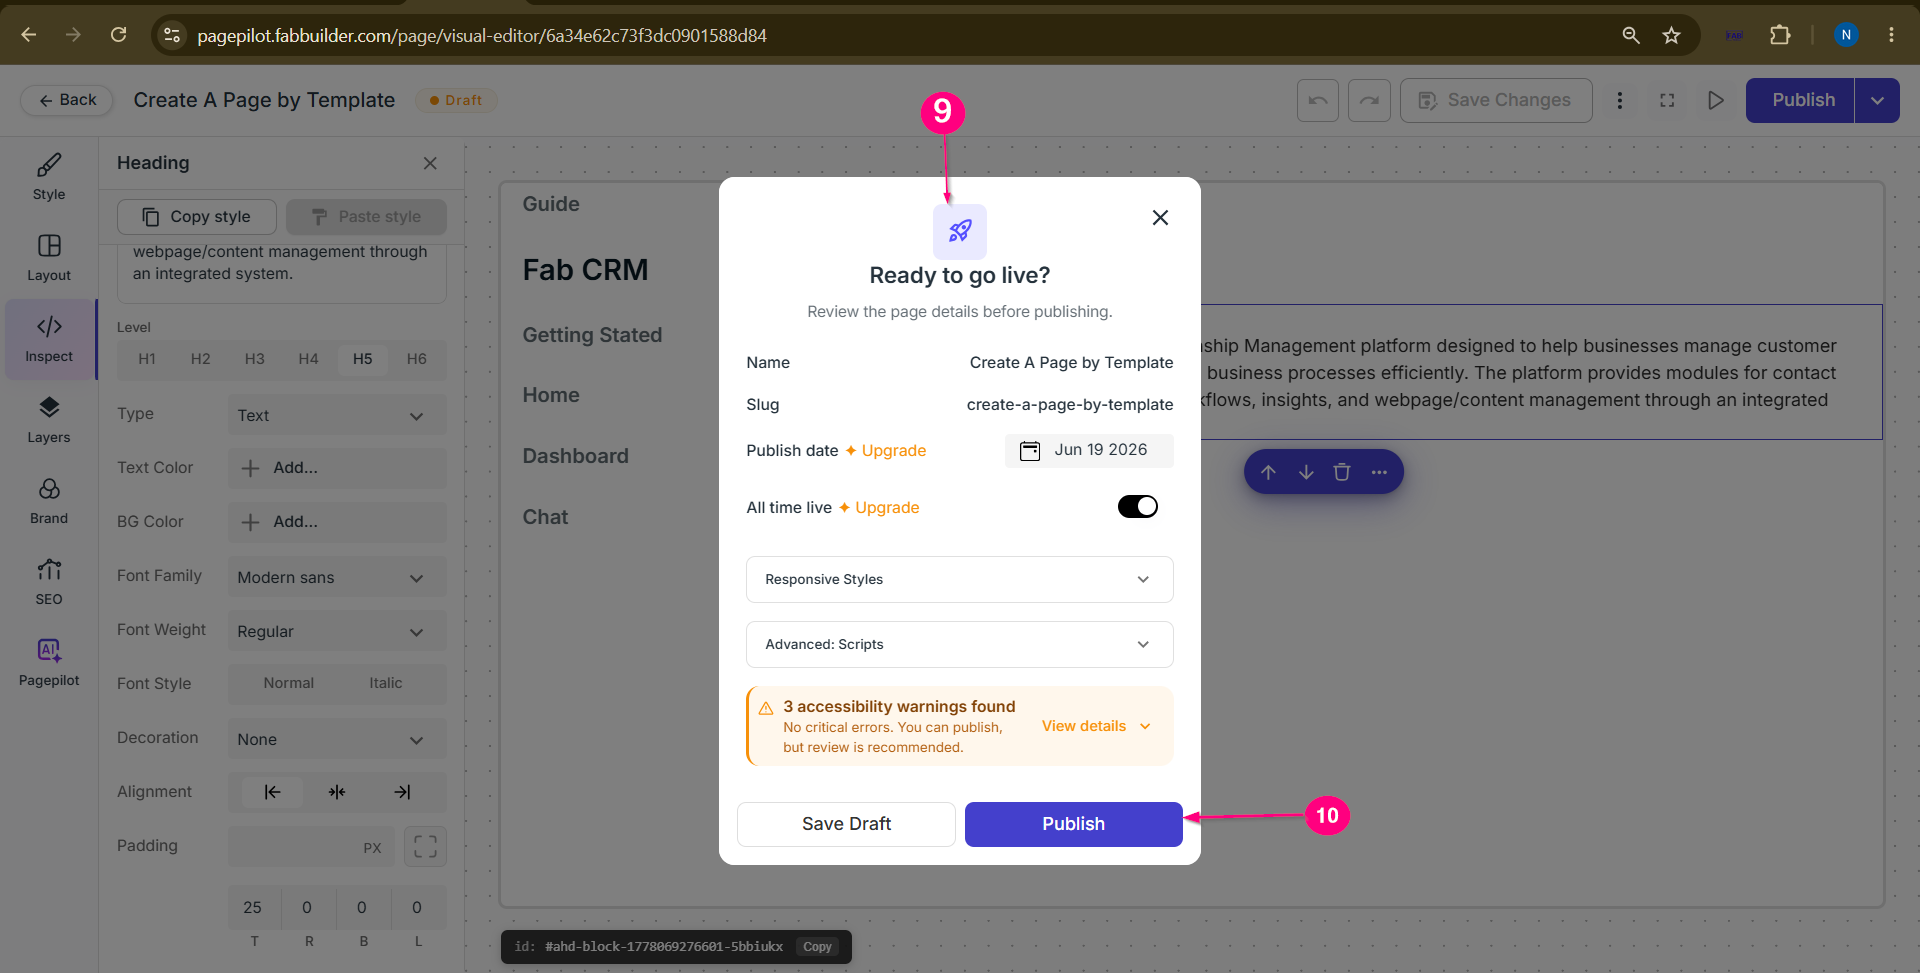 Screen- Review Details After successful publishing, the published tour will be visible in the Page Dashboard List. 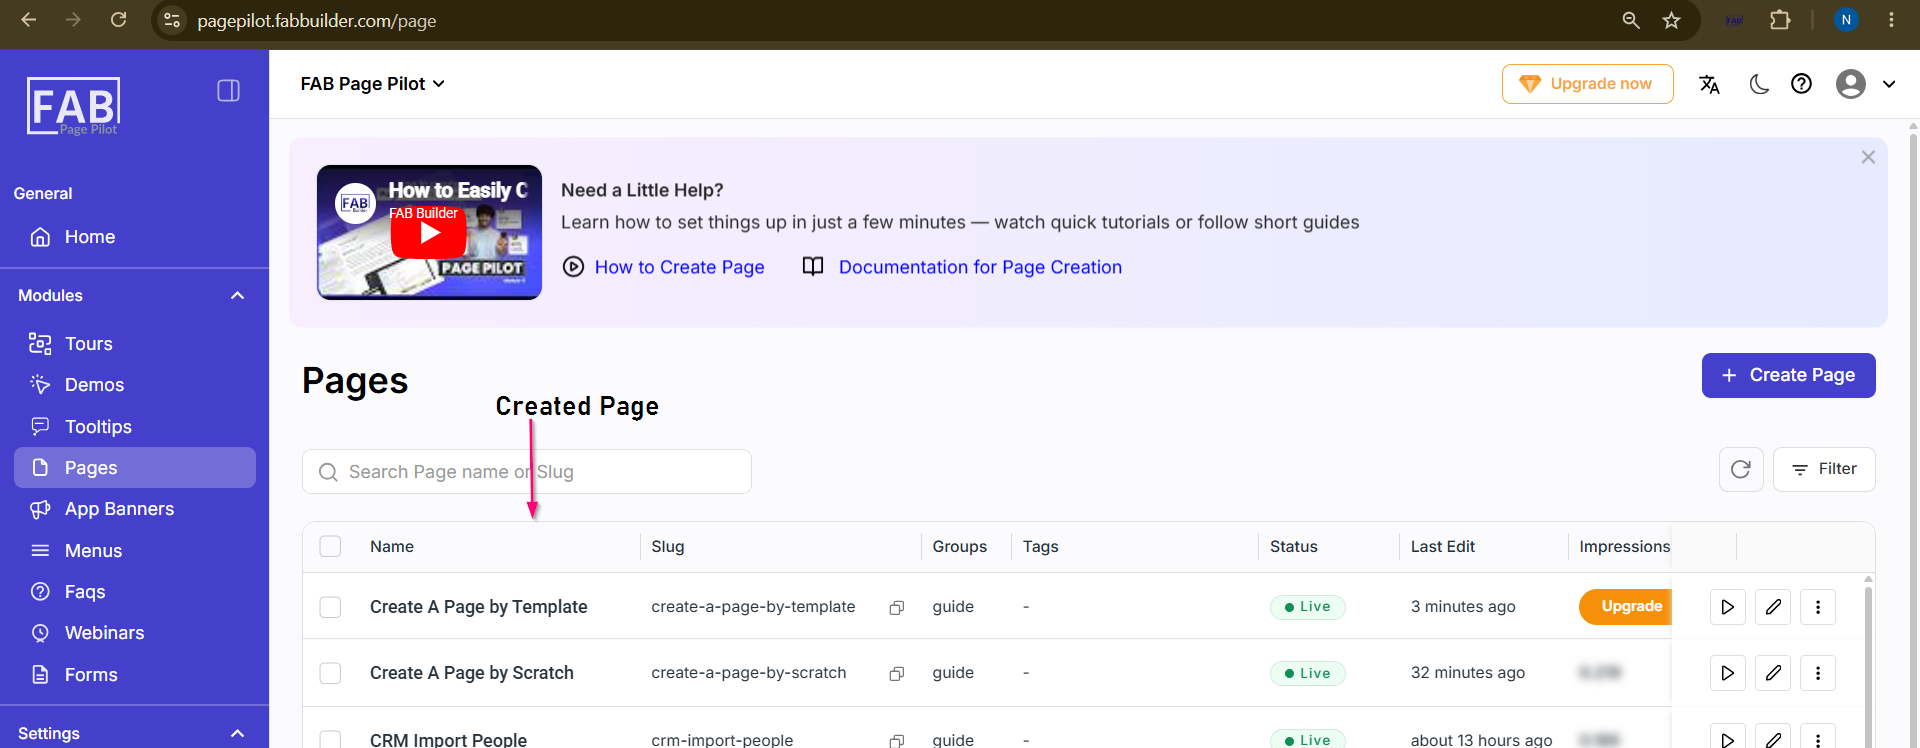 Screen- Created Page on Page Dahboard |