How to Create a Tooltip Using the Template Method This documentation explains the step-by-step process to create a tooltip using the Template Method in the Page Pilot. Prerequisites· User has valid login access to the Page Pilot. · Required permissions for Tooltip Management are enabled. · Details of the target page and element Id.
After successful login to the Page Pilot, the user will land on the dashboard screen.
Step 1: Open the Tooltip ModuleClick on the Tooltip tab from the left-side menu panel.
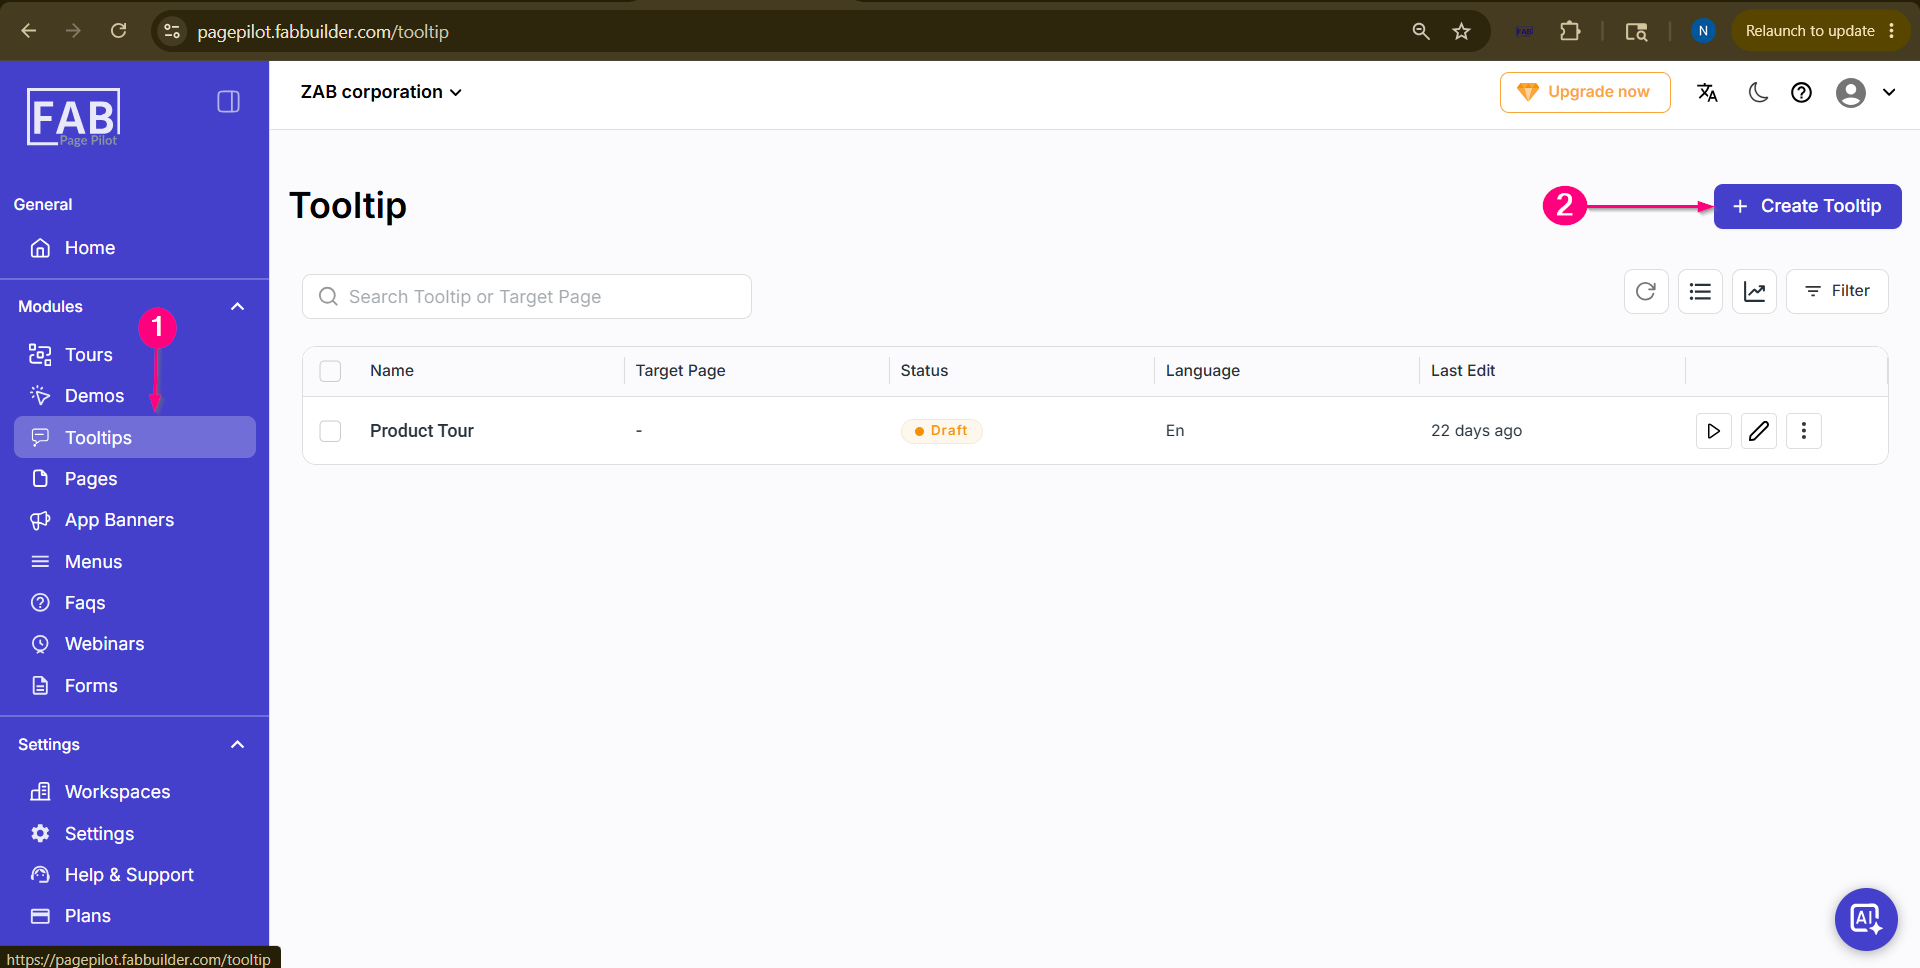 Screen- Access to Tooltip
Step 2: Click on “Create Tooltip”Click the Create Tooltip button available on the Tooltip dashboard.
Step 3: Enter Tooltip DetailsA popup window will appear where the user needs to enter the tooltip details:
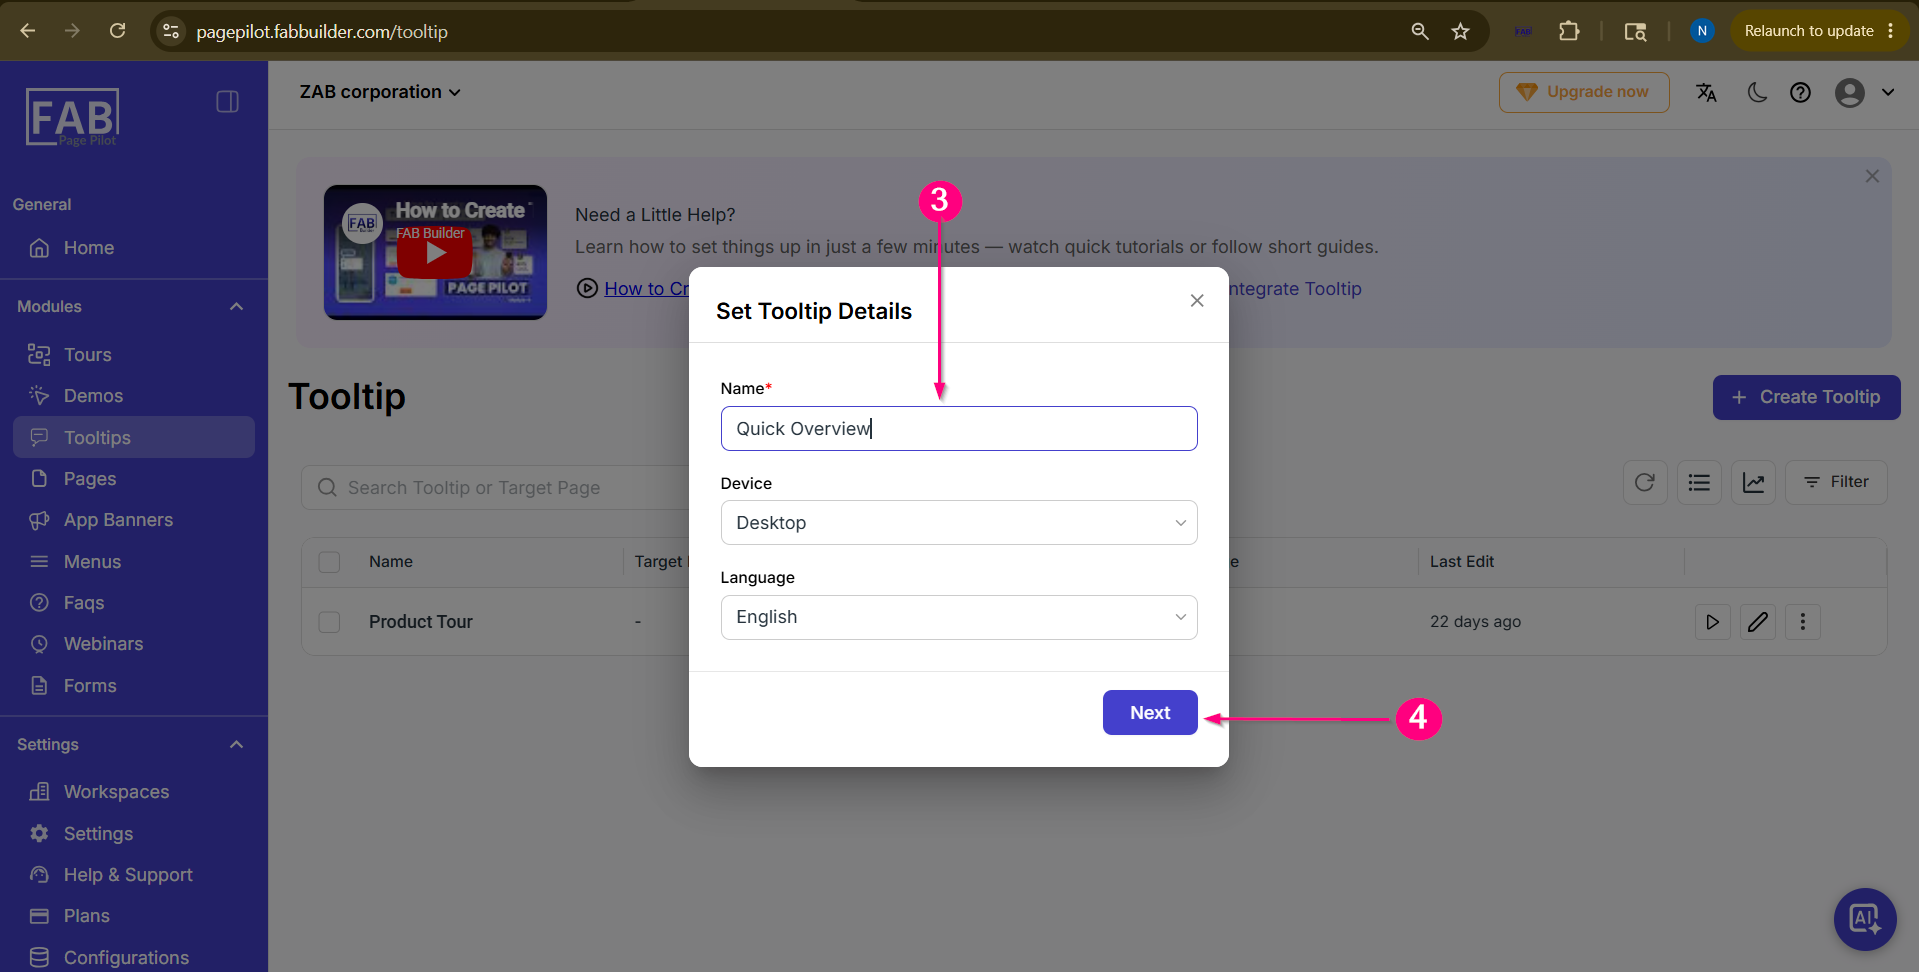 Screen- Add Tooltip Details Step 4: Click on Next Button
After entering all required details, click Next.
Step 5: Select Tooltip Creation MethodAnother popup screen will appear showing two methods for creating a tooltip: 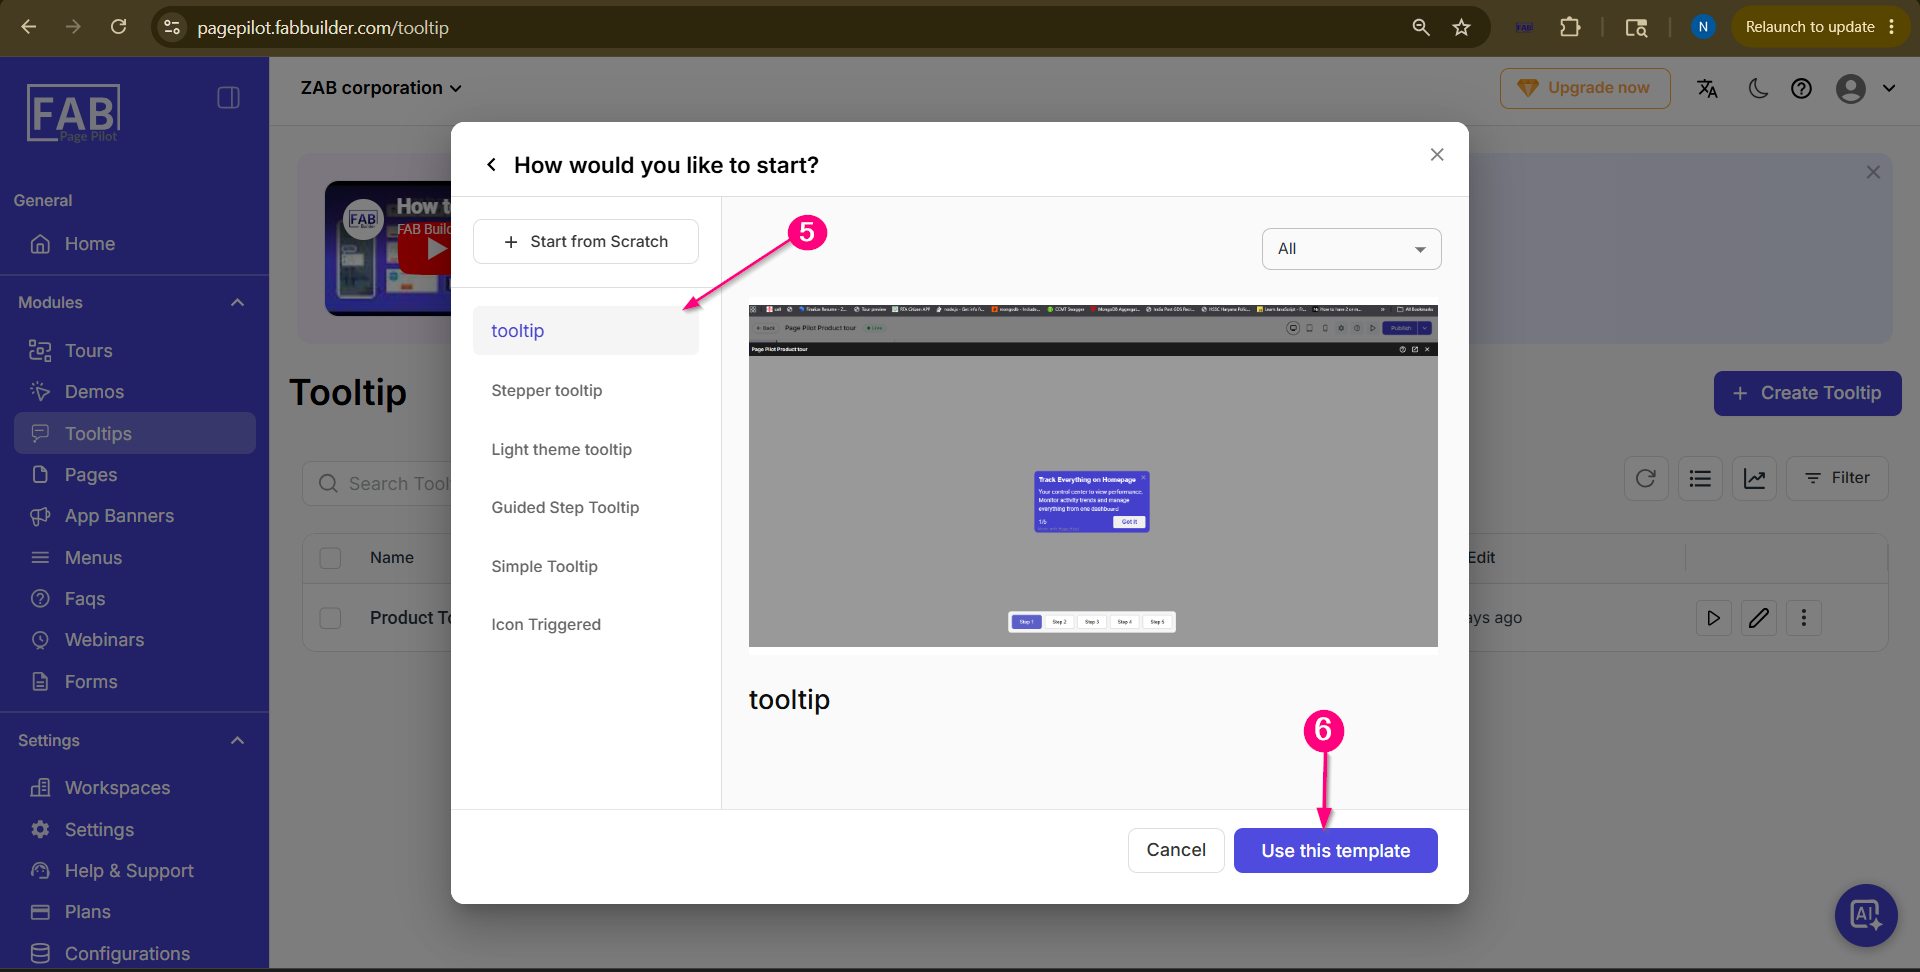 Screen-Select Template Step 6: Select the Tooltip TemplateChoose the required tooltip template from the available templates and click Use This Template.
Step 7:Customize the Tooltip by Adding or Edit BlockUser can add more block by clicking on plus sign "+" To edit the content on selected template Double click on content box
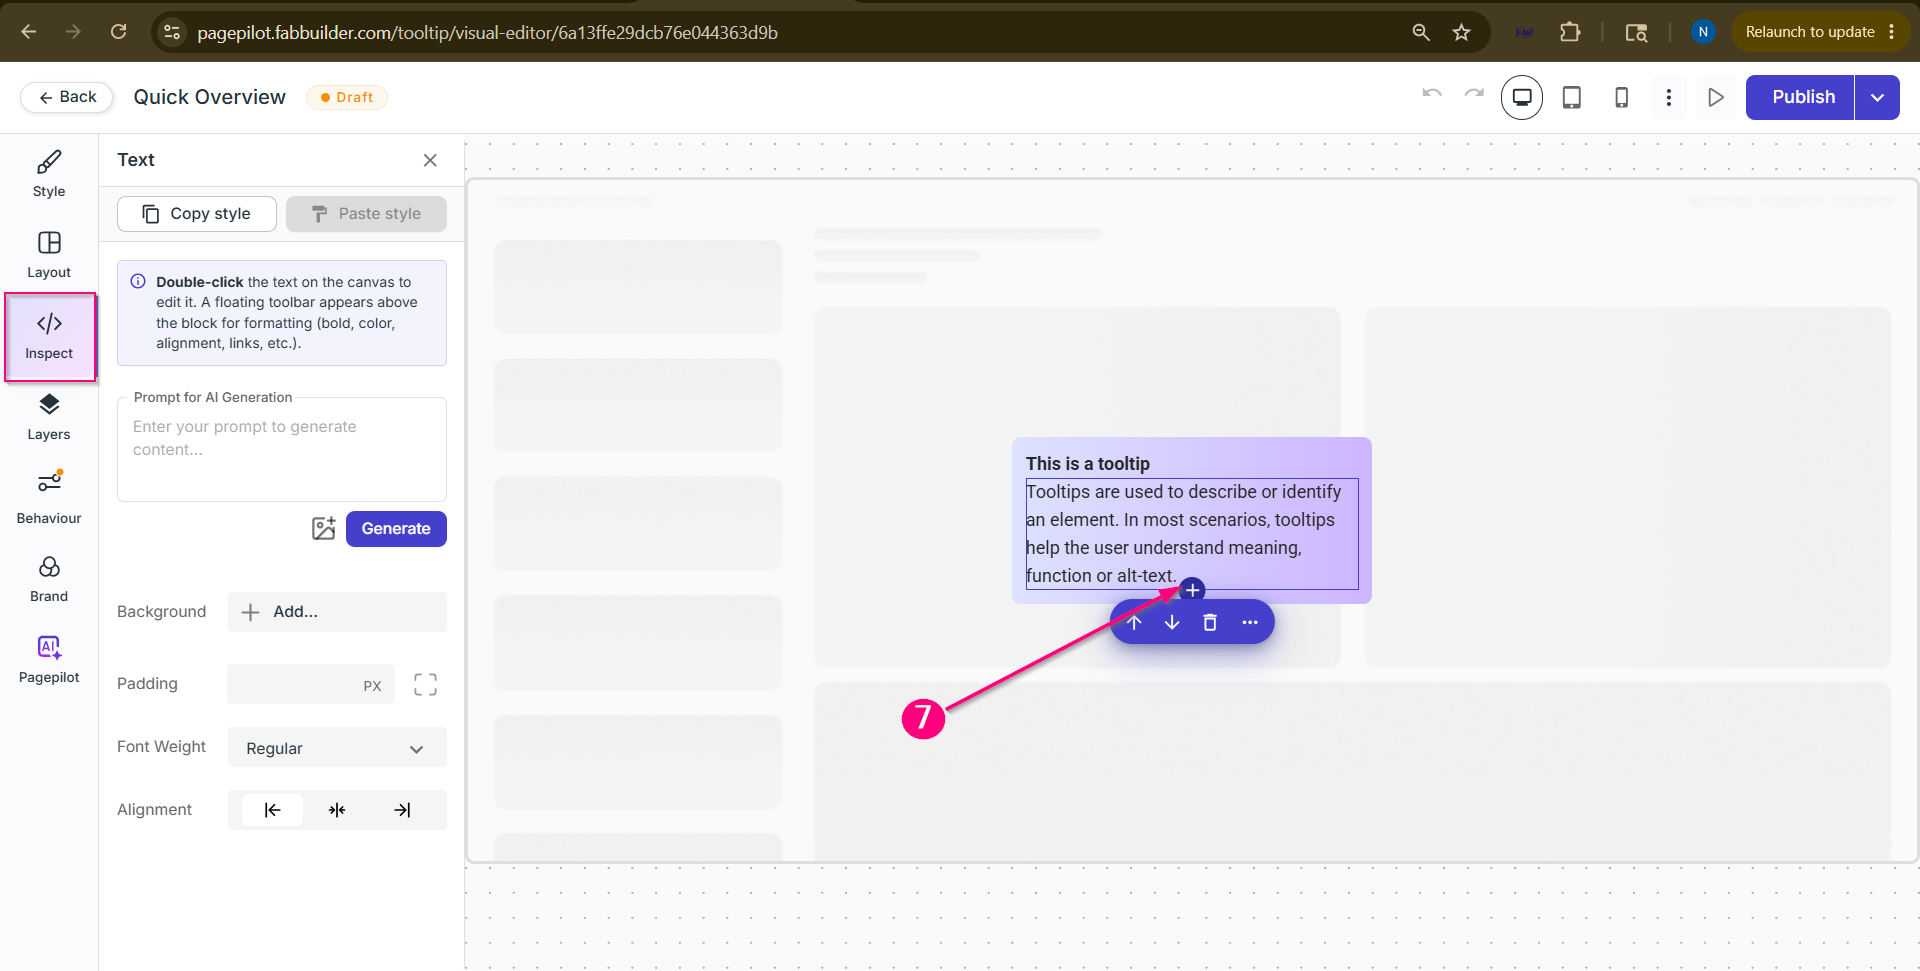
Screen-Edit/Add content Tooltip content of Visual Editor Screen
Step 8: Add Element IDClick on behaviour tab and Enter the Element ID where the tooltip should be displayed on the target page.
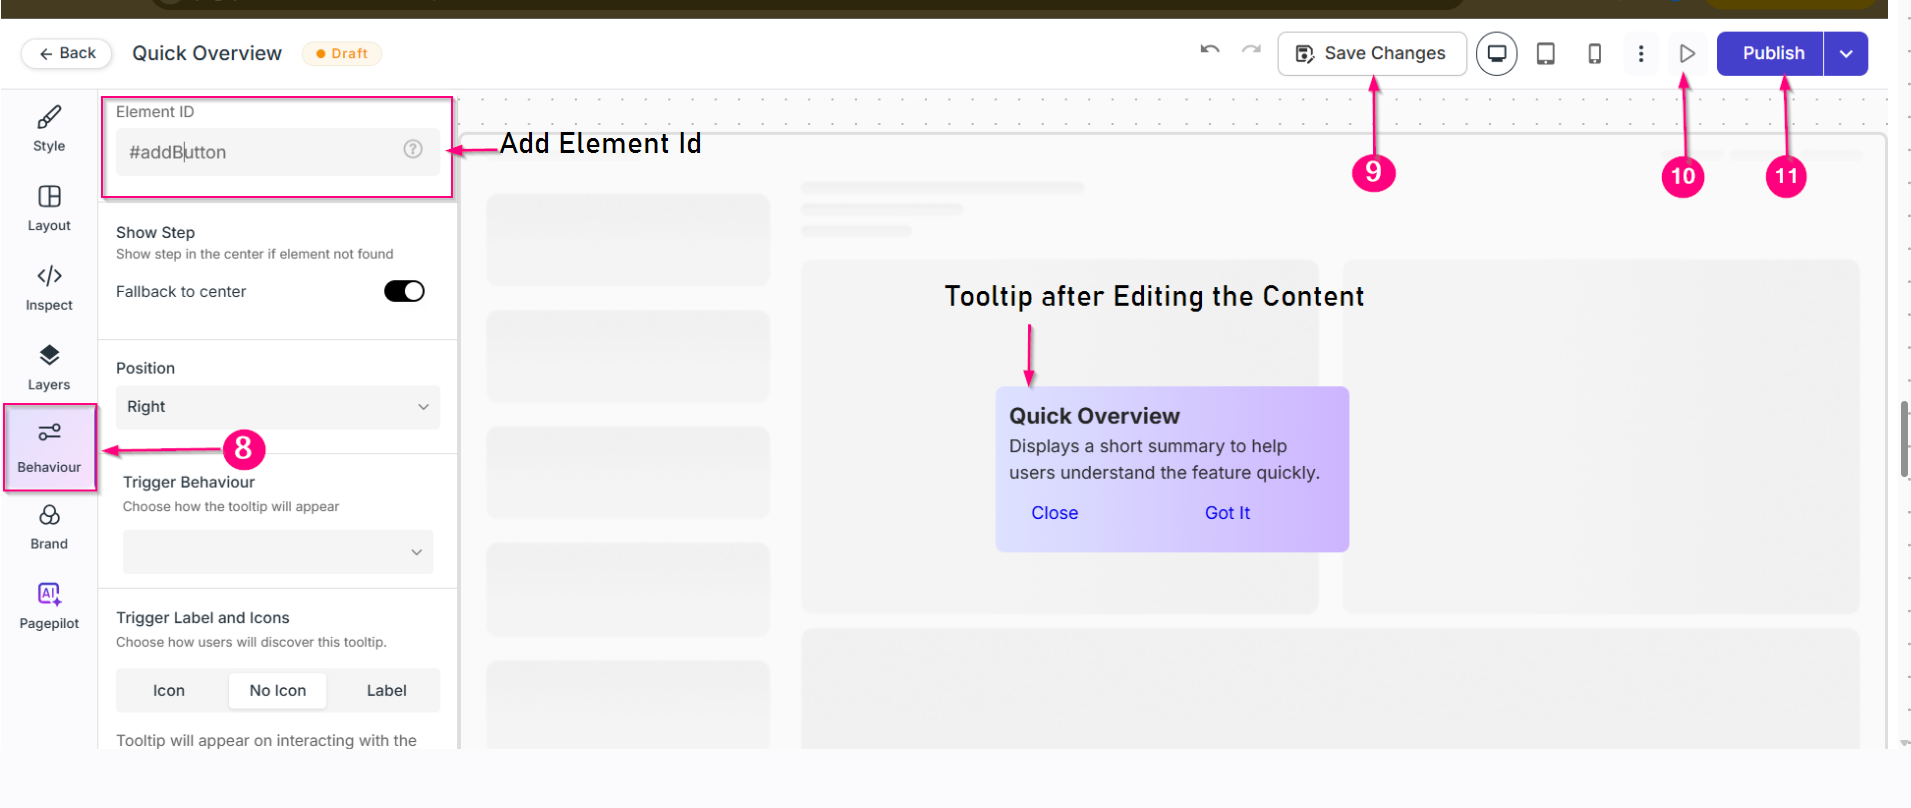 Screen-Add Element ID
Step 9: Save the Tooltip
Click on the Save button to save the tooltip configuration.
Step 10: Preview the Tooltip
Click on the Preview button to verify the tooltip appearance and functionality.
Step 11: Publish the Tooltip
Click on the Publish button. Step 12: Add Details to Live
A popup screen will appear where the user can configure additional publishing details:
Step 13: Live tooltip and View the Created TooltipAfter entering the required details, Live the tooltip by clicking on Publish or save as draft.
Once the tooltip is successfully published, the user can view the created tooltip on the Tooltip Dashboard.
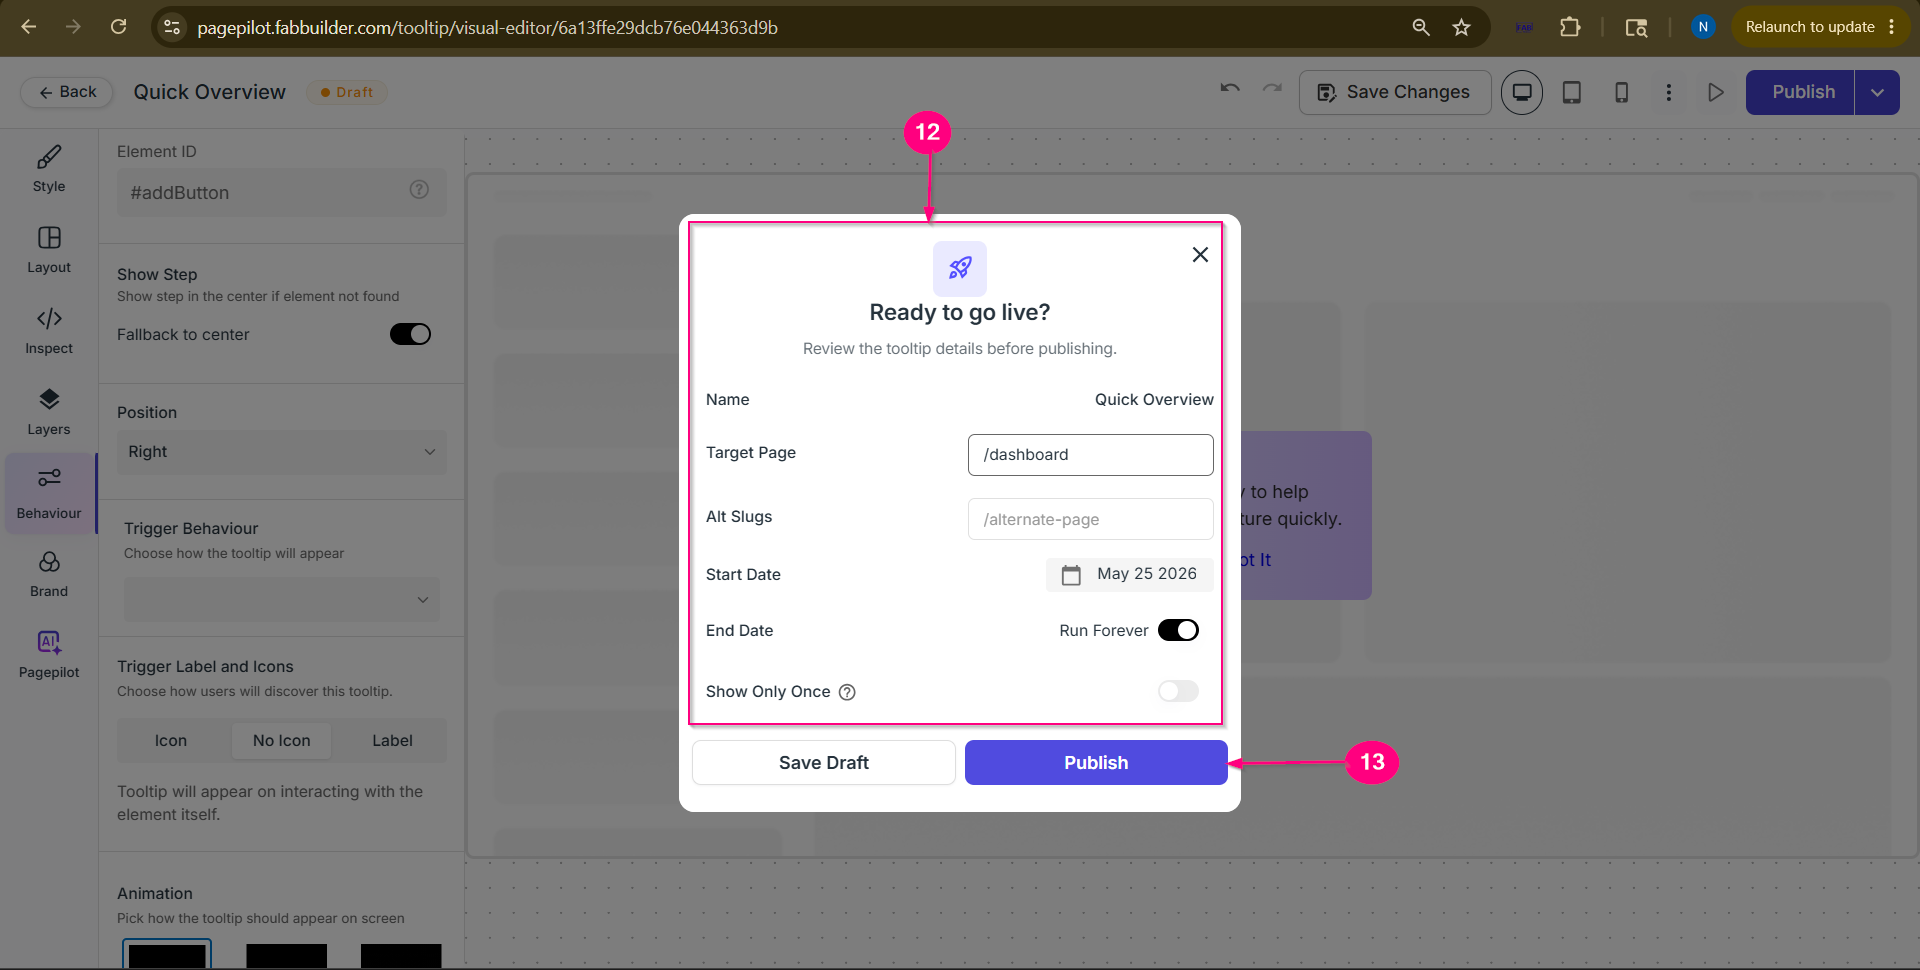 Screen- Live the Tooltip 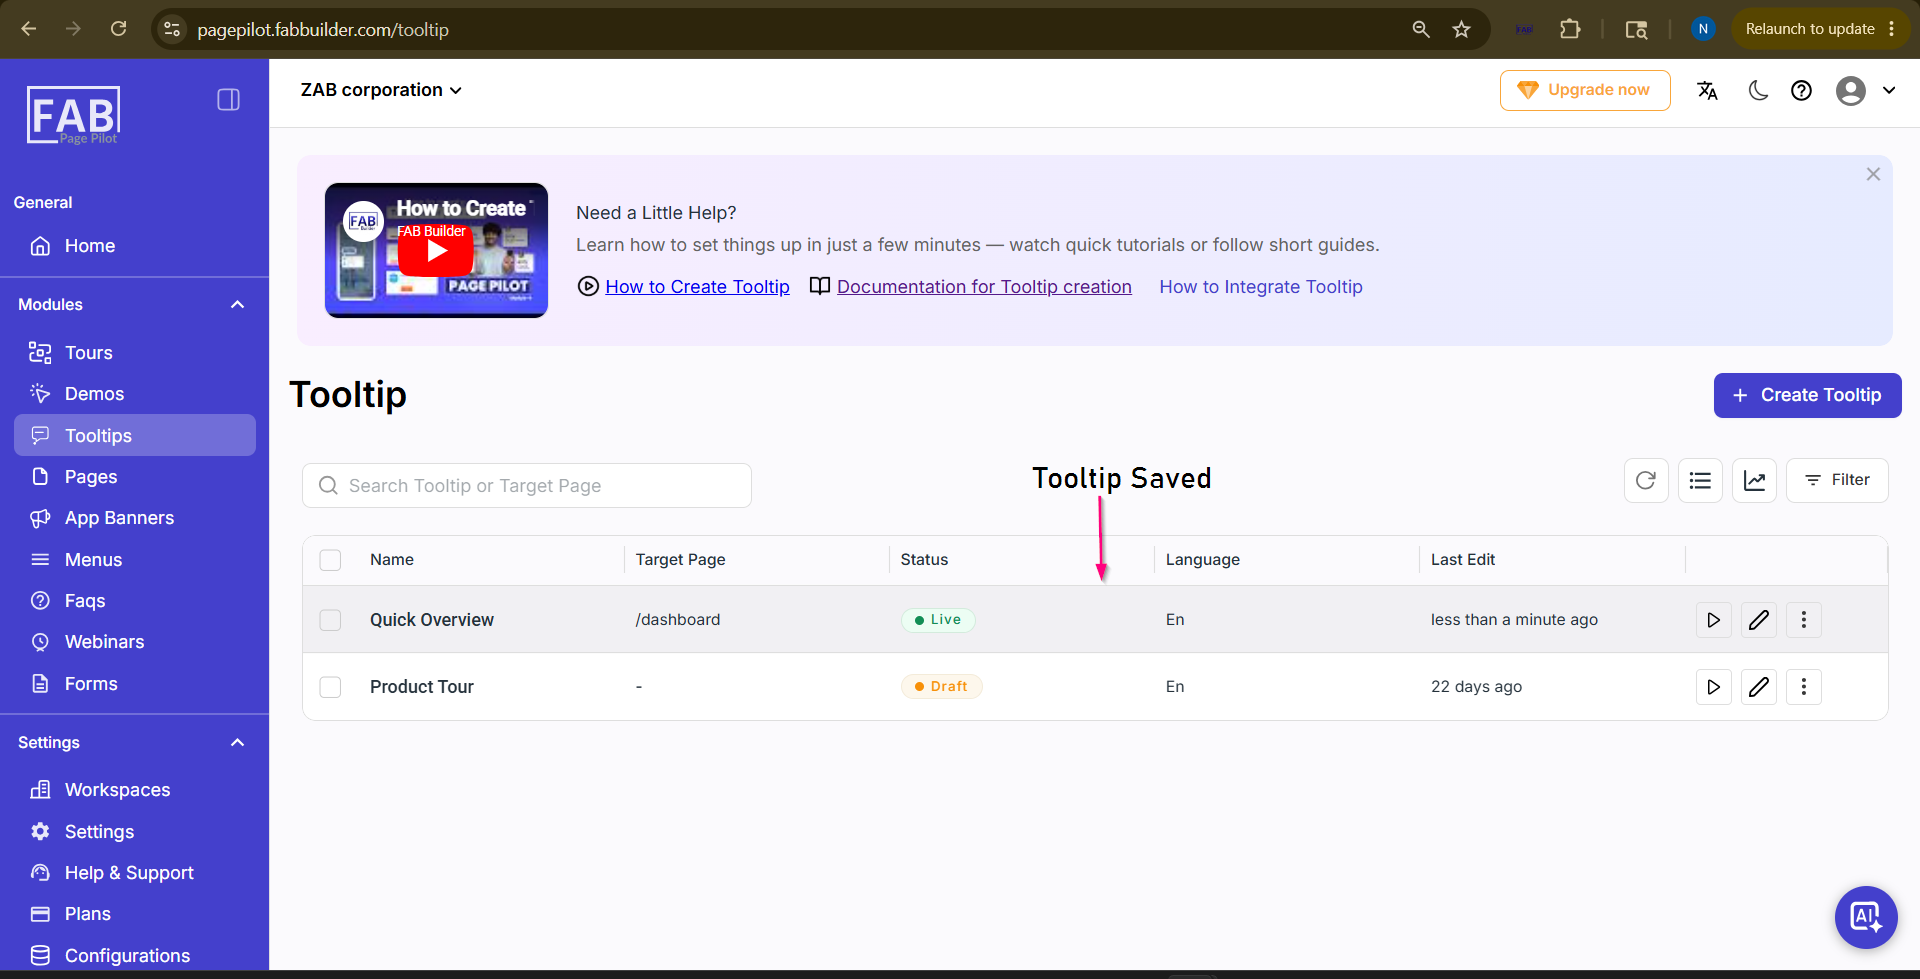 Screen- View the Created Tooltip |