Form
The Form Module helps collect user information such as name, email address, mobile number, registrations, feedback, or demo requests.
In PagePilot, forms are created using the Form Builder and can be attached to:
When the interaction is published and the end user submits the form, the collected data is stored in the CRM system. This data can later be used for lead generation, webinar registrations, customer follow-up, marketing campaigns, and user engagement tracking.
Workflow in PagePilot
Create Form → Attach Form to Tooltip/Tour/Webinar/Demo → Publish Interaction → User Submits Form → Data Stored in CRM
How to Create a Form in PagePilot
This documentation explains the step-by-step process to create a form in PagePilot.
Prerequisites
Before creating a form, ensure that:
Steps to Create a Form
Step 1: Access the Form Module
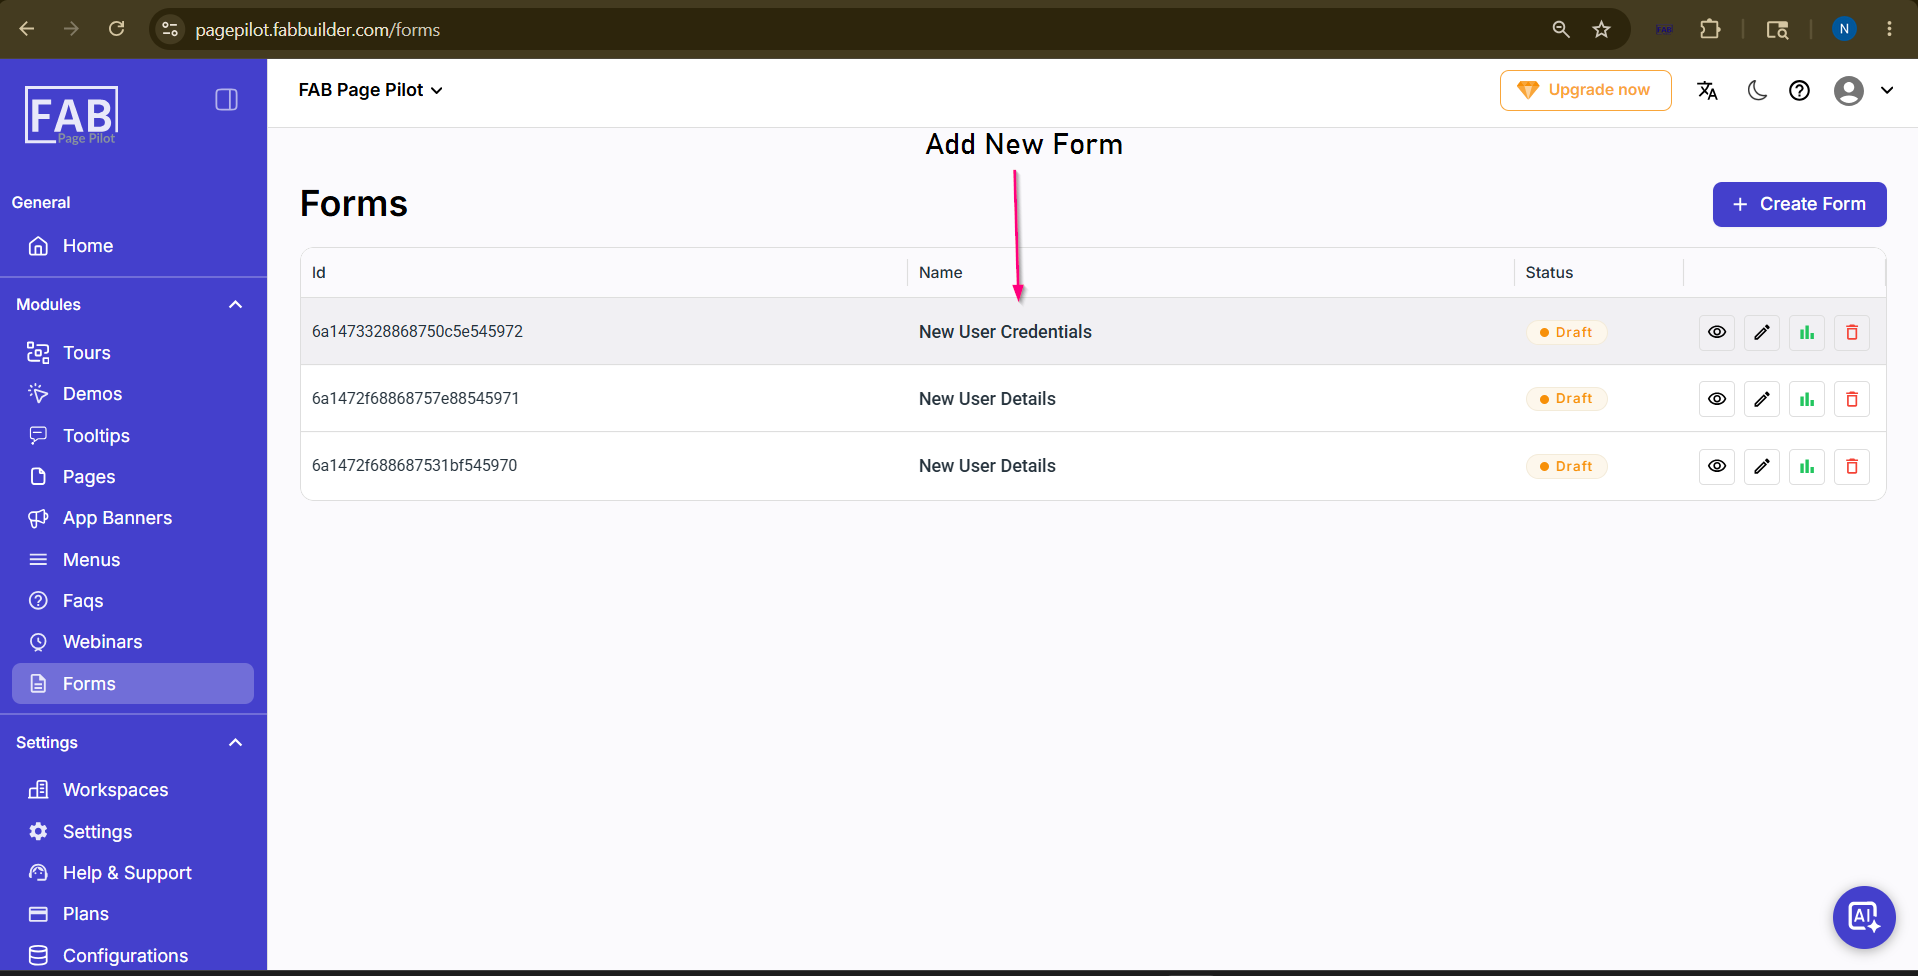
After successful login to the PagePilot platform, the user will land on the dashboard screen.Click on Form Module
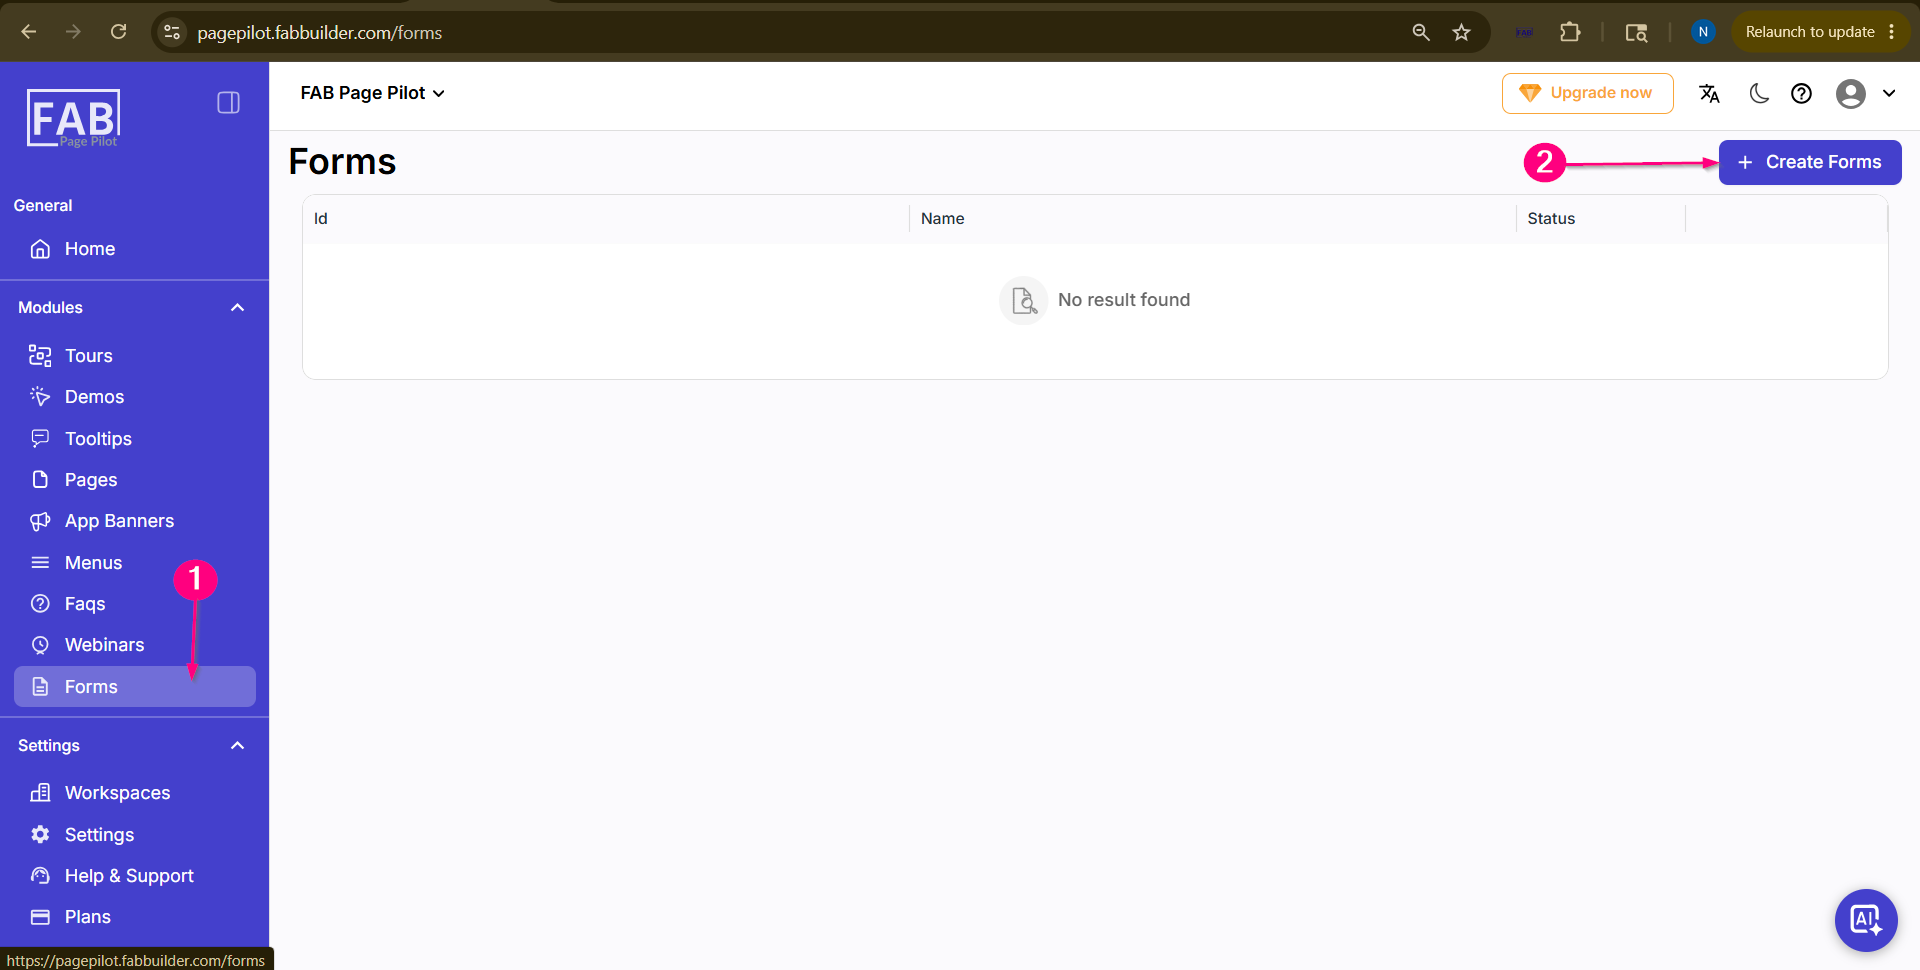 Screen- Access and Create Forms
Step 2: Click on Create Form
Click on the Create Form button.
A popup screen will appear where the user needs to enter the form name.
Step 3: Enter Form Details
Add the required form details such as:
Step 4: Enter Form DetailsAfter entering the details, click Next. 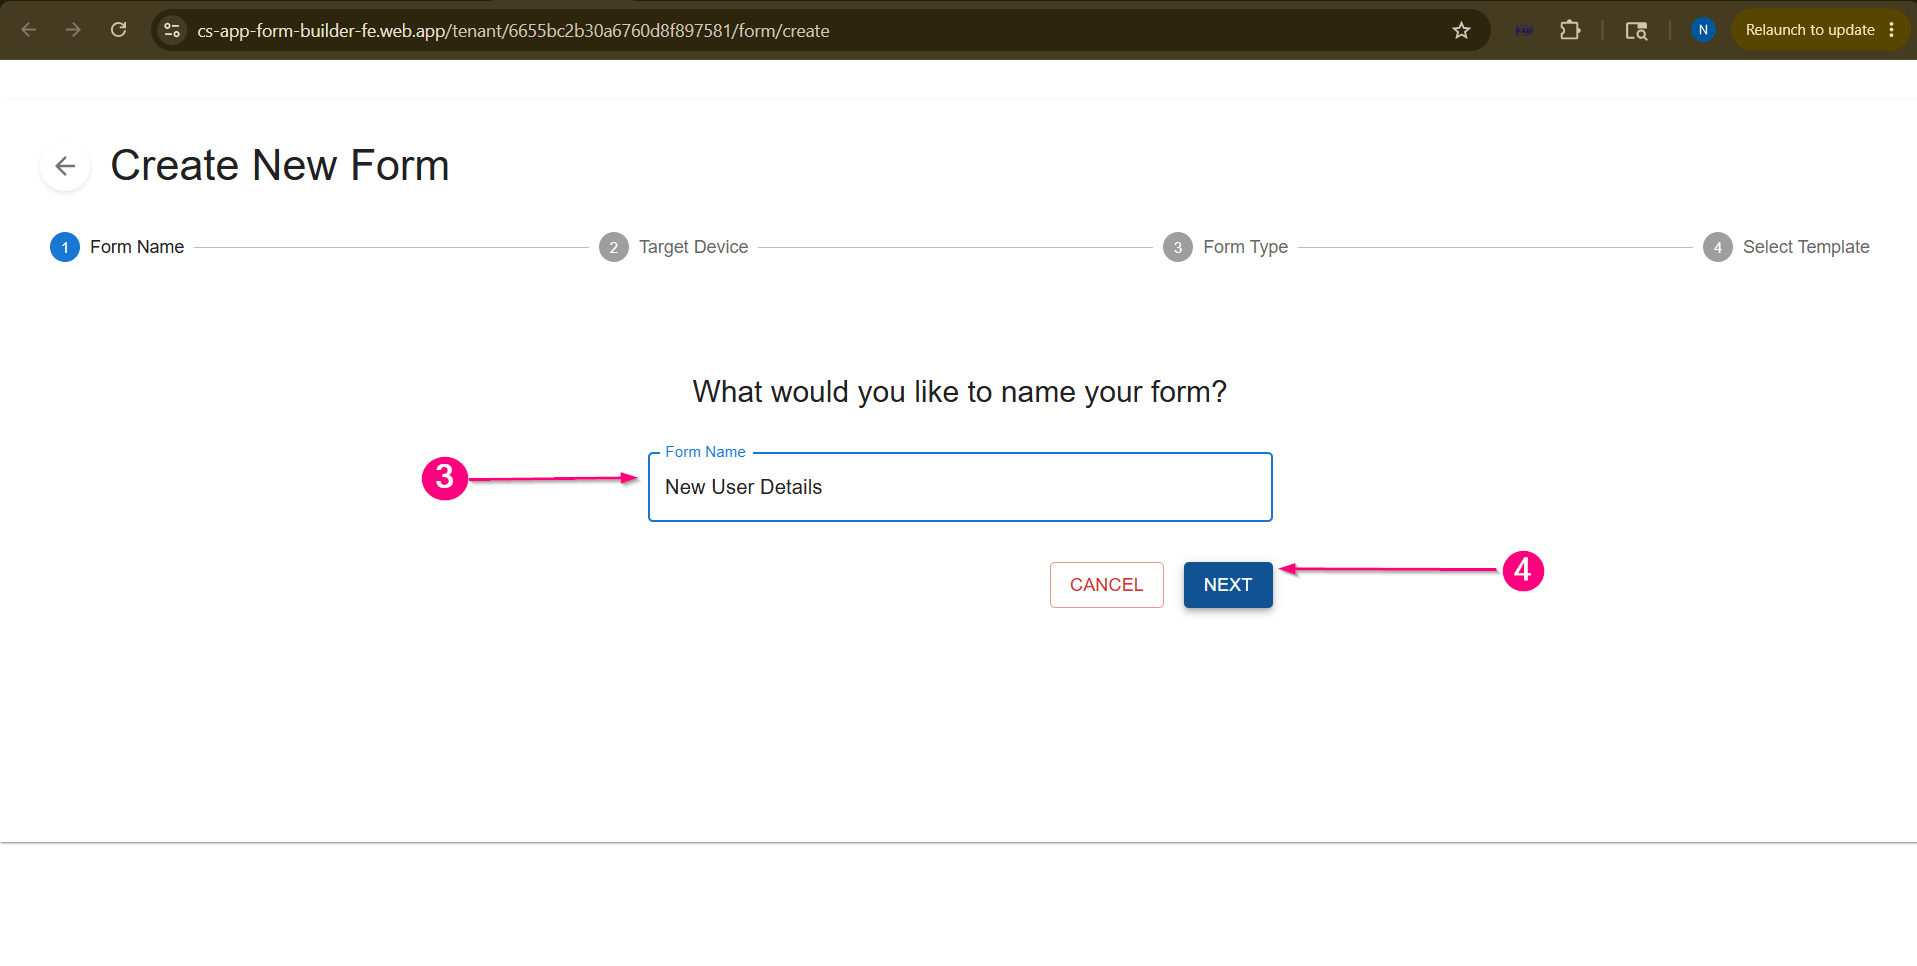 Screen- Add Form Name
Step 5: Enter Form DetailsSelect Device
The Select Device option is used to choose the device type on which the form will be displayed.
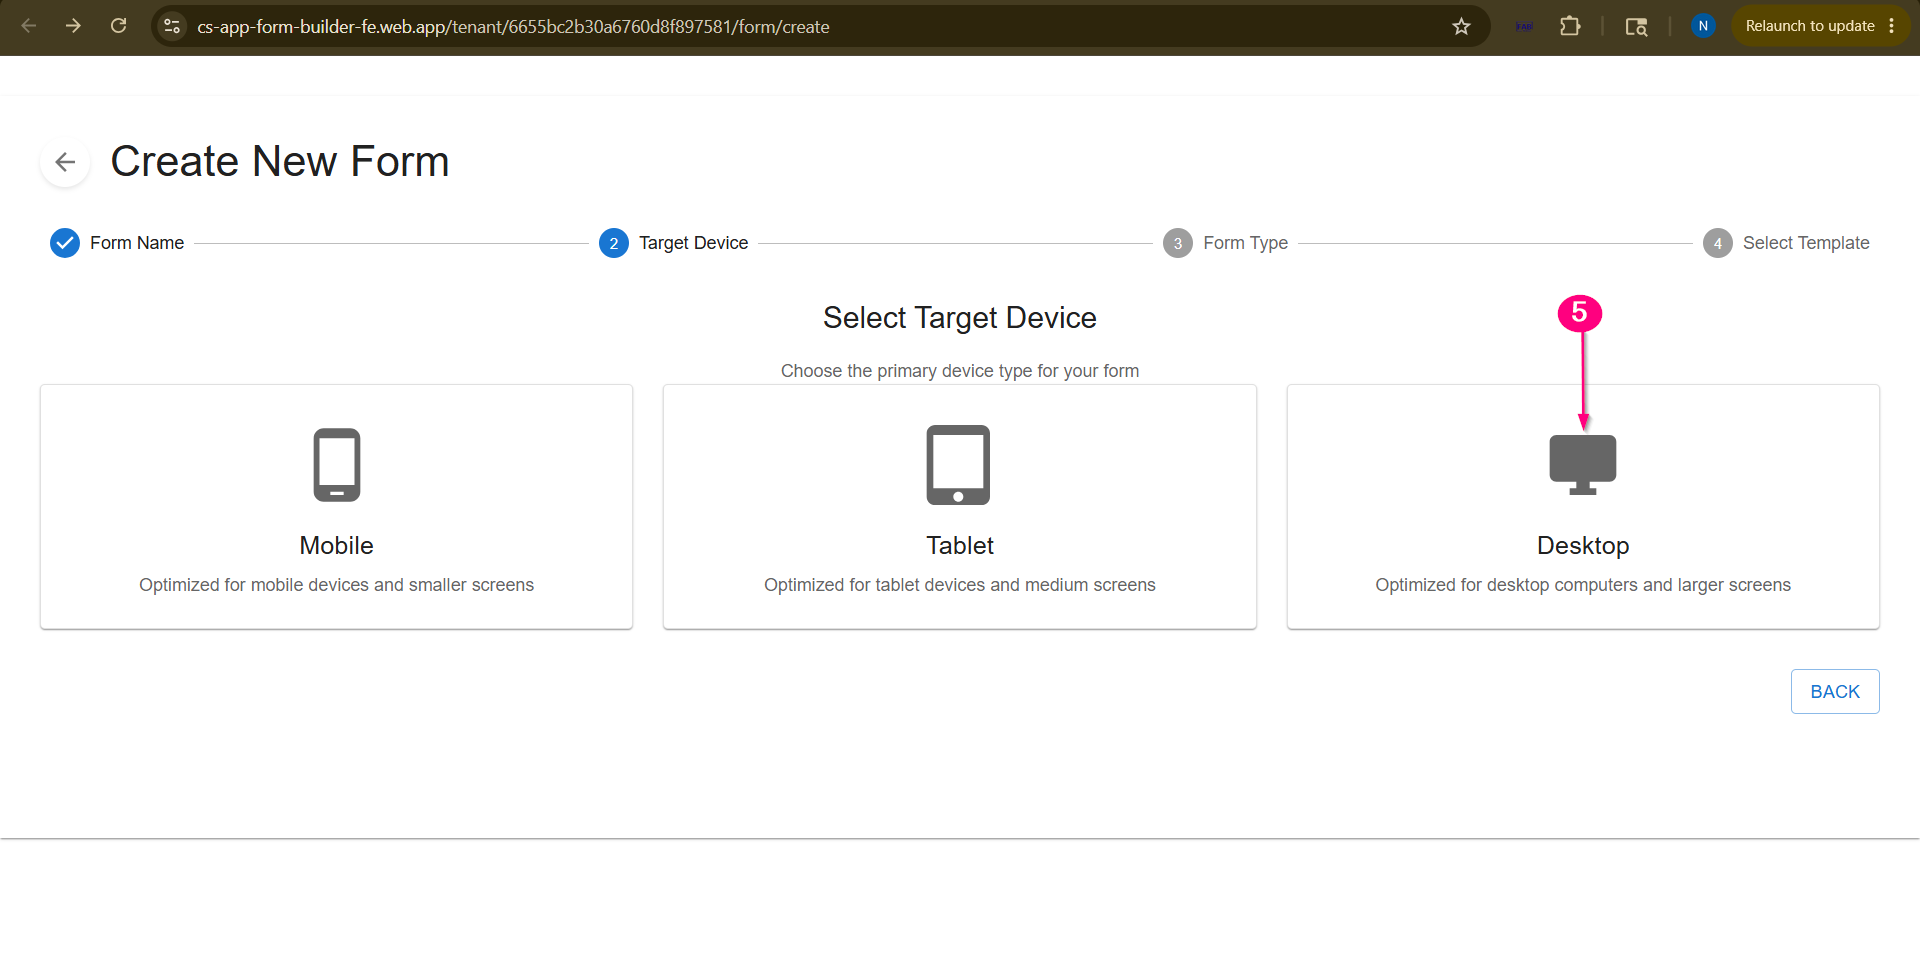
tStep 6: Create the Form
Create the form by selecting single page or multiple page. Now the Form Builder screen will open in next step. 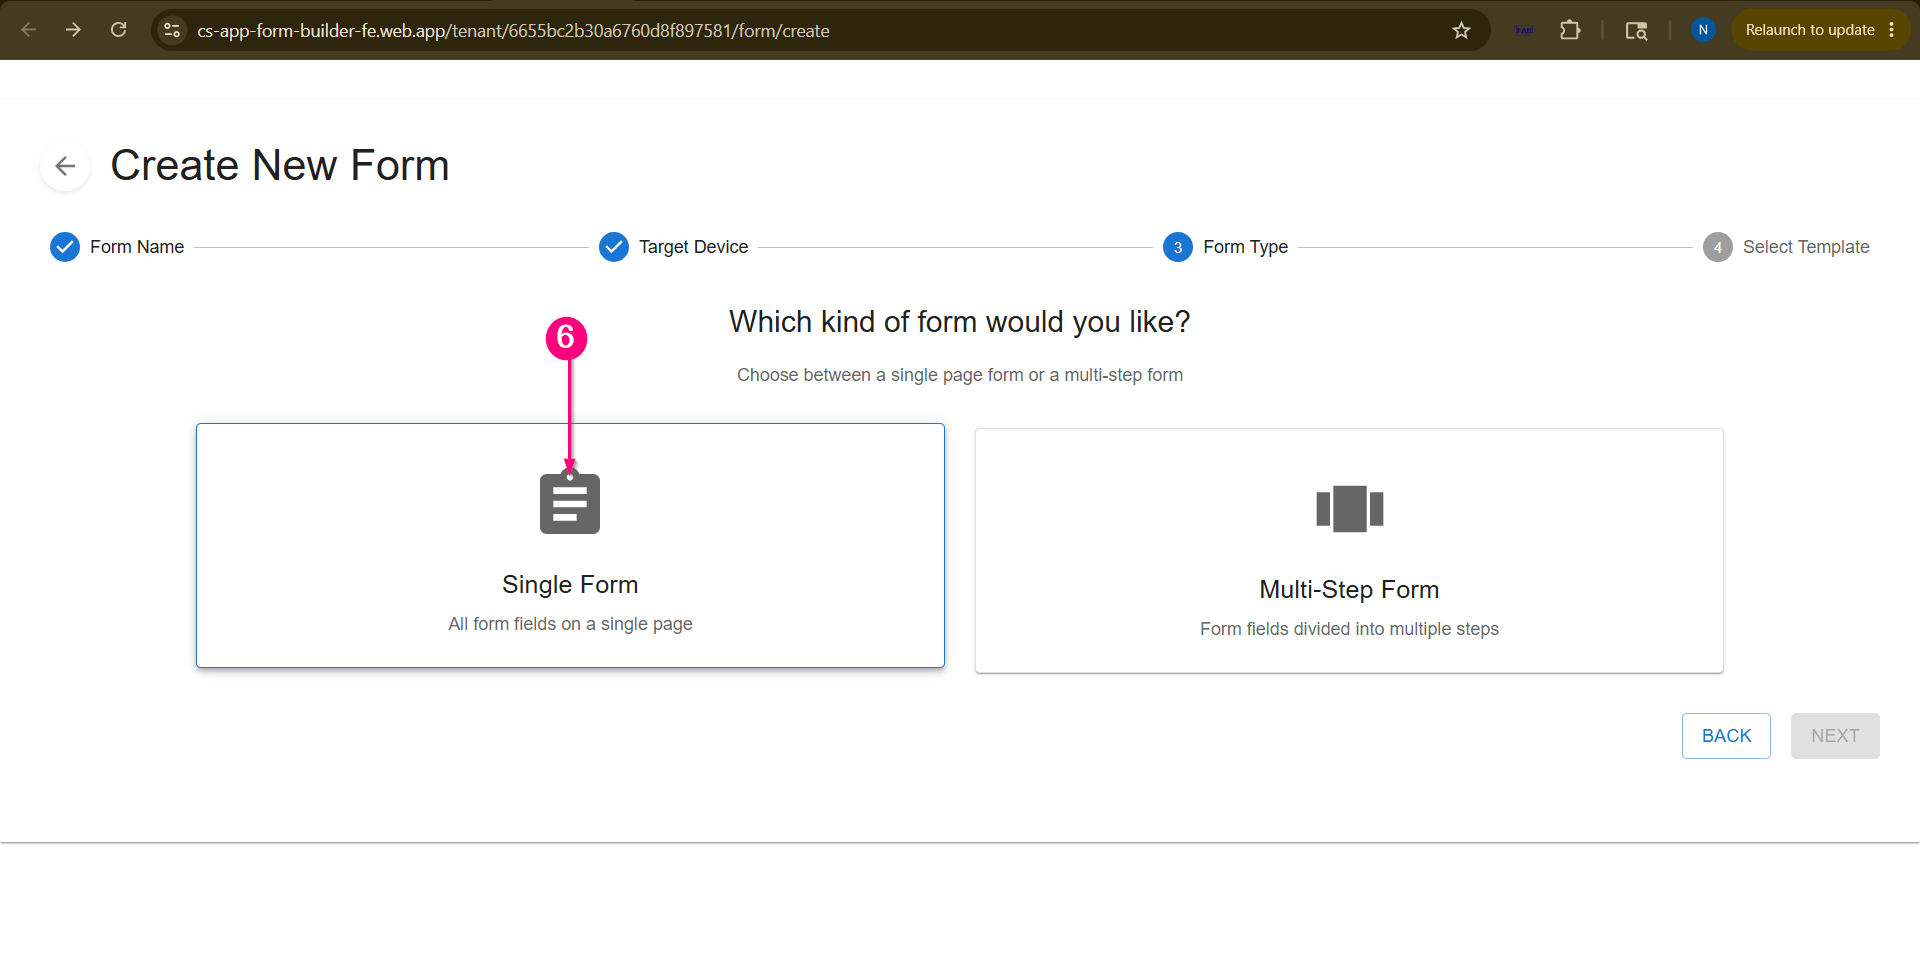 Screen- Select single Page Form
Step 7: Select Method to Create FormThere are two ways user can create form
Here form is created from scratch method.
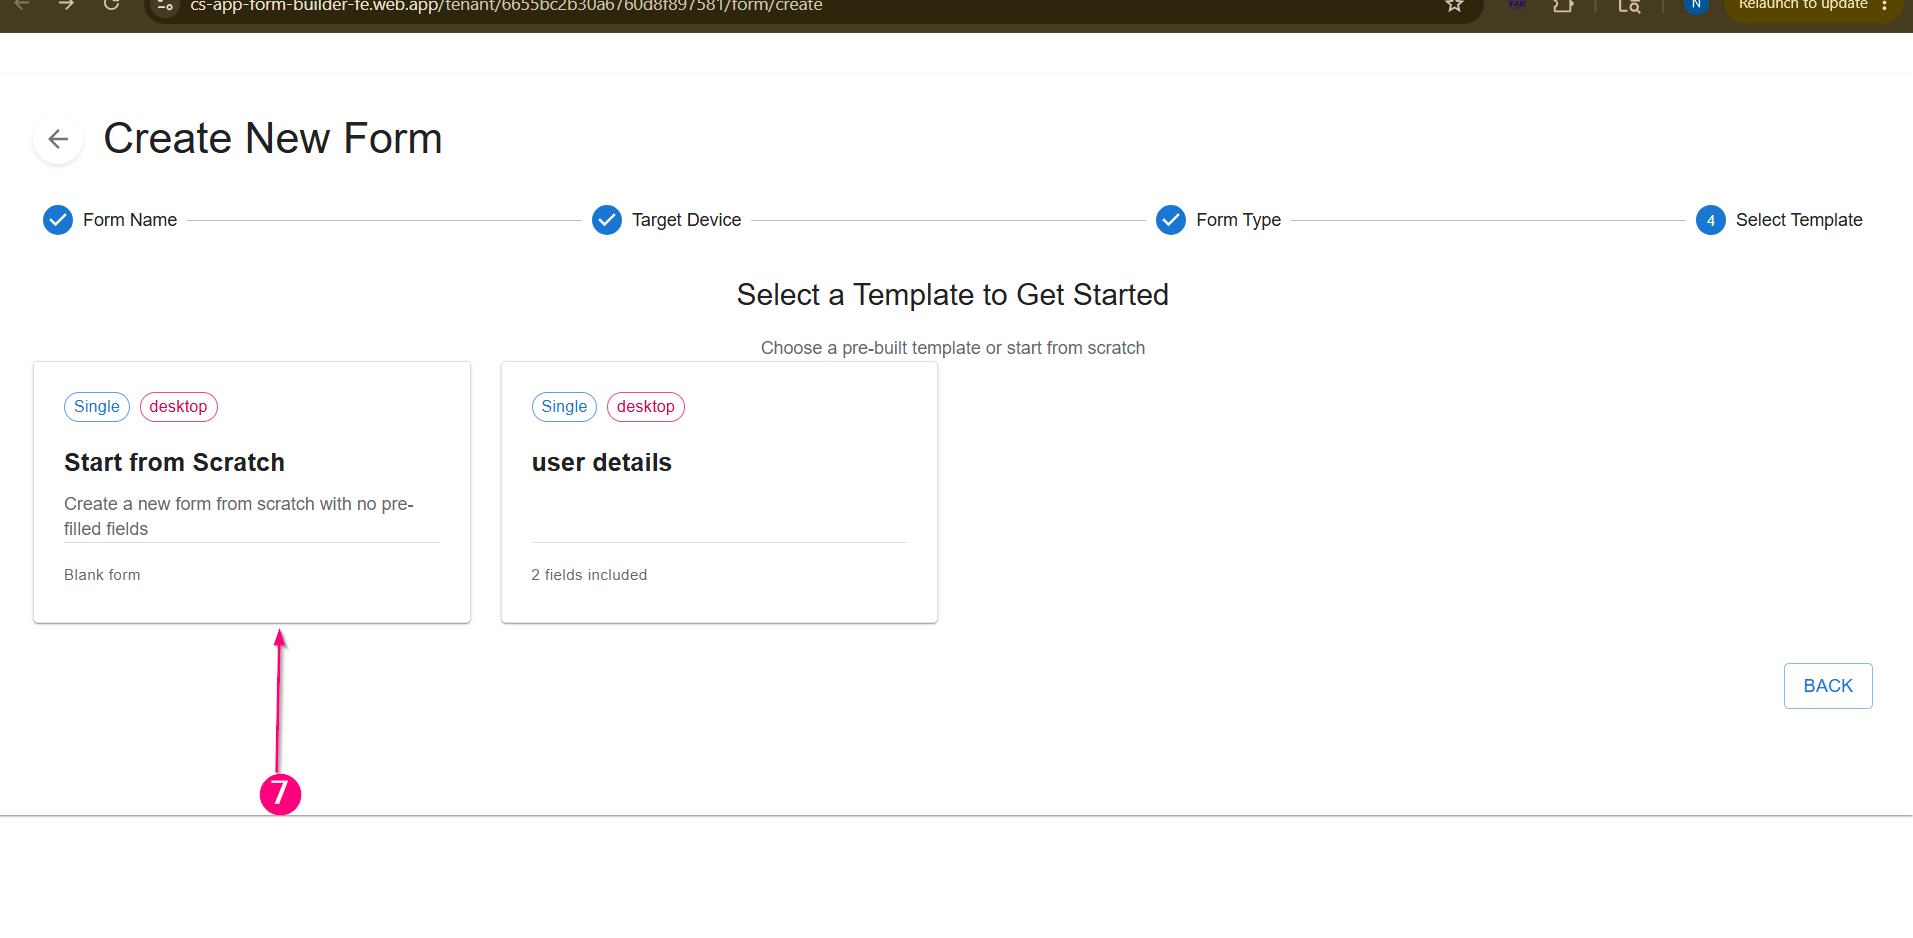 Screen - Select Methods to Create Form
Step 8: Add Form Elements from Toolbox
From the Toolbox panel on the right side, drag and drop the required form elements onto the canvas.
Available elements include:Header Text,Paragraph,Text Input etc.
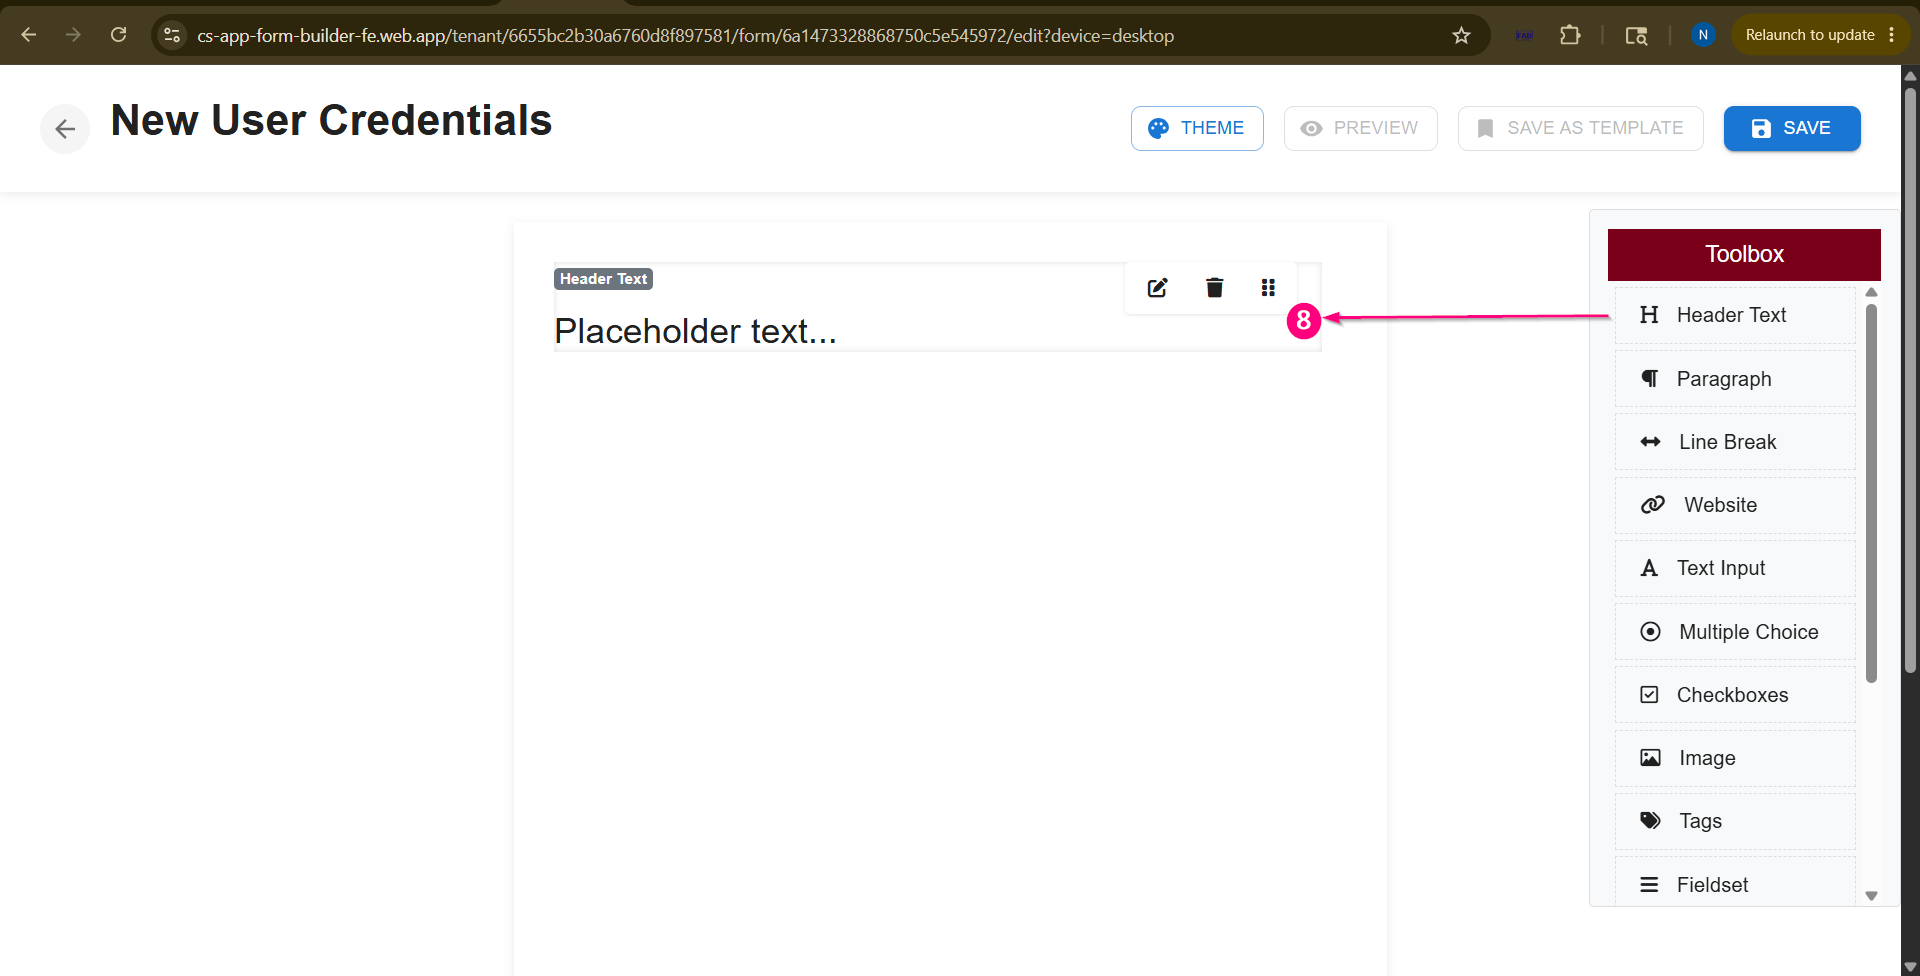
Step 9: Click on Edit ButtonBefore configuring the form element filed user must click on edit button.
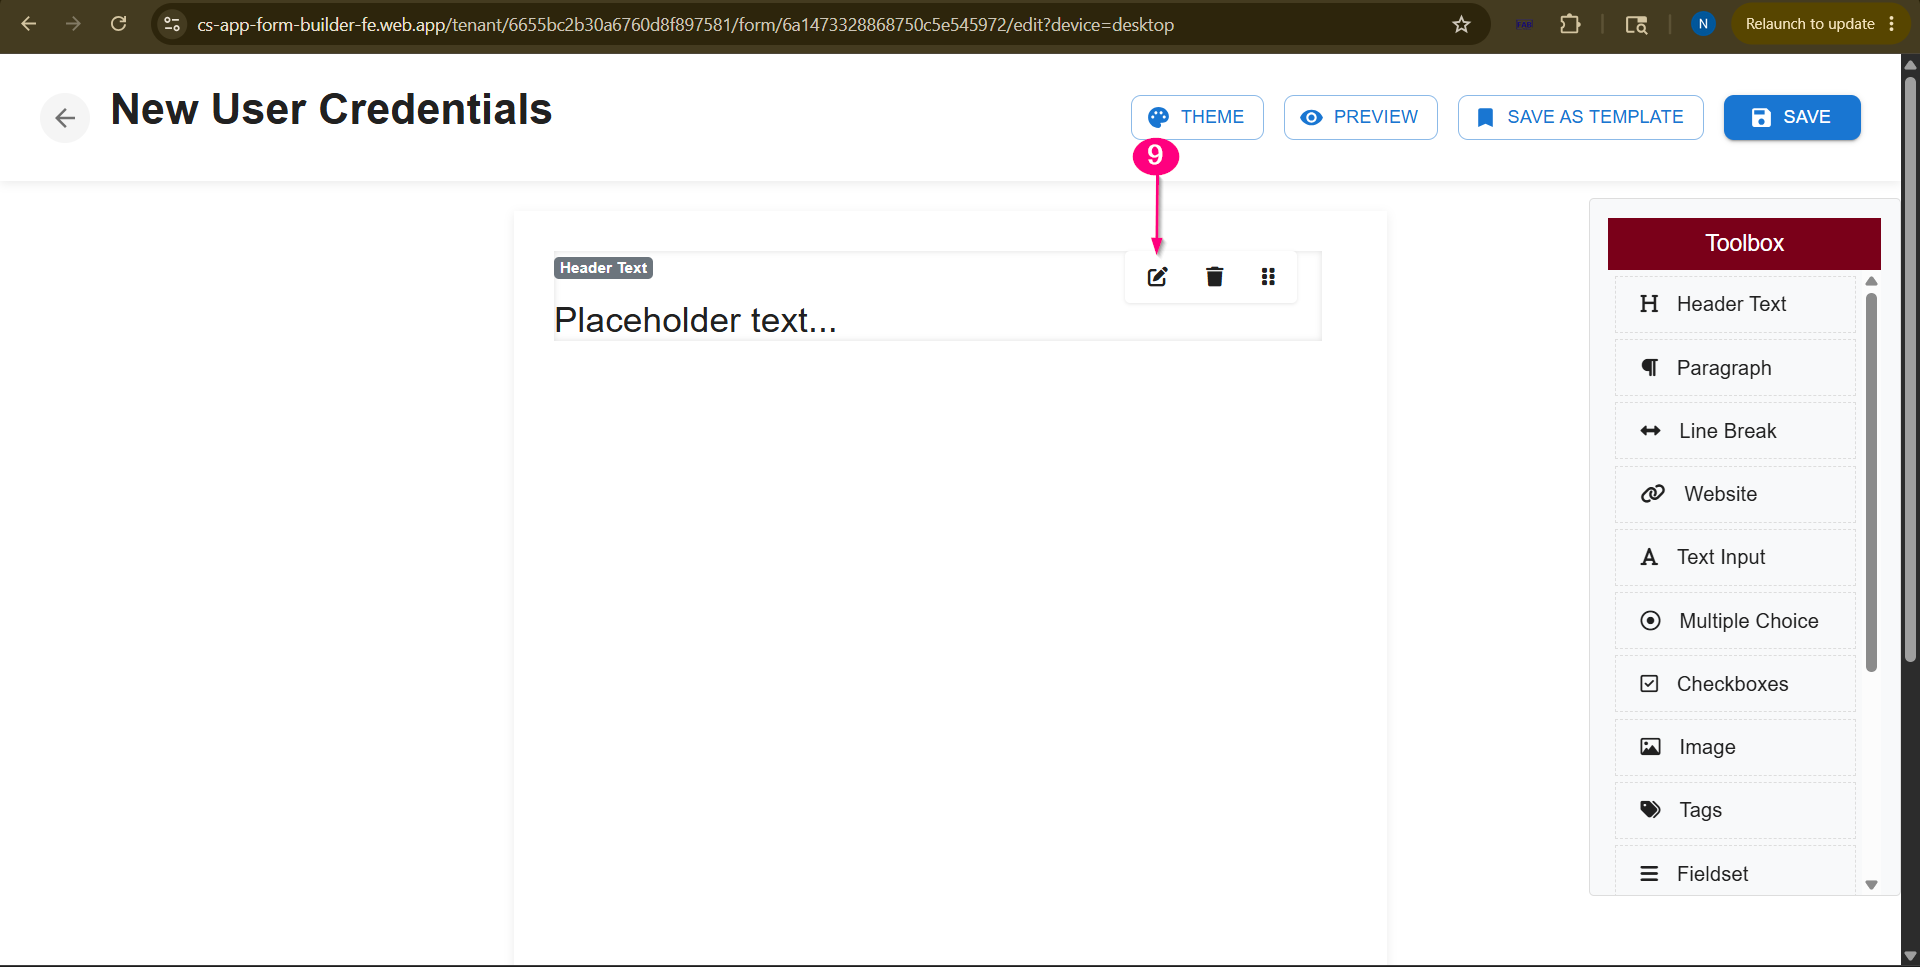
Step 10: Configure Field Details
After clicking on edit button user can configure the details of form element and related fieldfrom the left-side settings panel.relate changes can be seen on canvas.
Add:
Example:
The field name should be unique because it is used as the key when submitting form data.
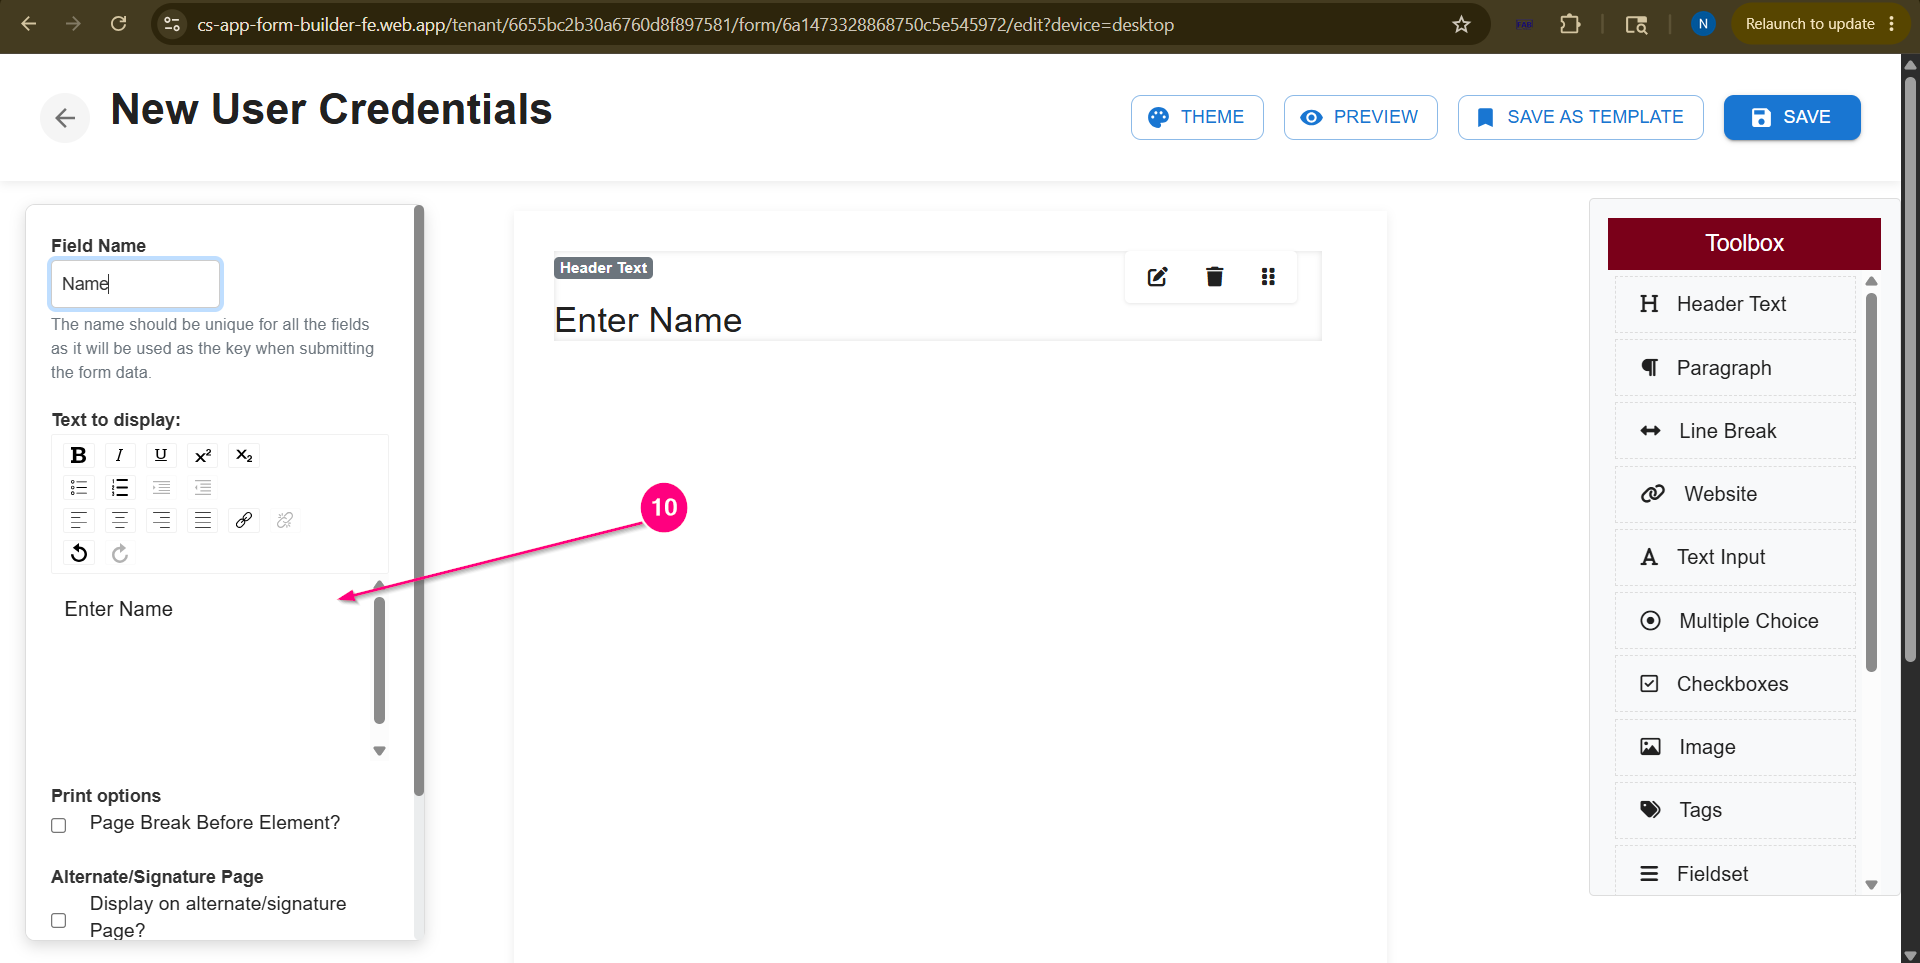 Screen- Add field and Text to Heading
Step 11. Add More Field DetailsUser can add more such fields by repeating same as described in previous step.
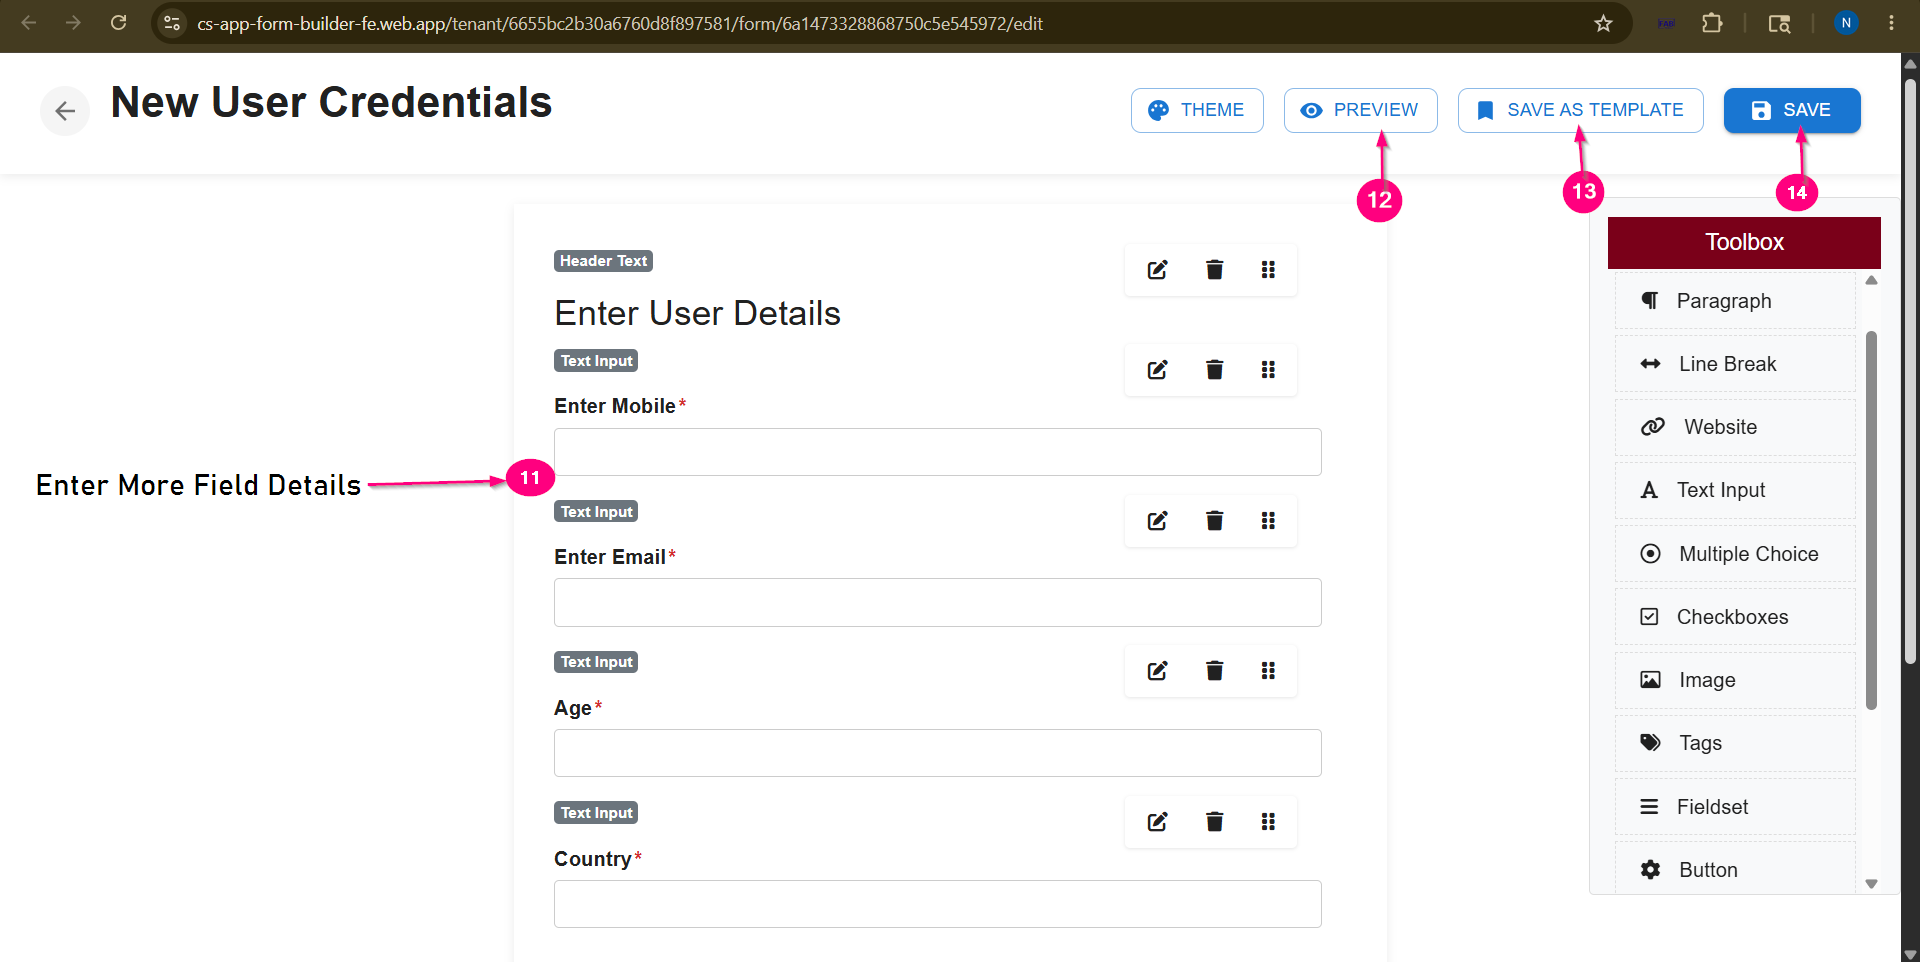 Screen- Add More Fields/Preview /Save Form
Step 12: Preview the Form
Click on the Preview button to verify the form layout and functionality.
Step 13: Save Template
Click on the Save As template button to verify the form layout and functionality.
Step 13: Save Form
Click on save Button to save Form
 Screen- Preview Form |