FAB PagePilot

GuideDocs
k
Getting Started
Module
Home
Settings
Other
Test
Tour Visual Editor
uiahiduai

Integration Steps

Select the required workspace or click Create Workspace to create a new workspace if required.


Step 1: Open the Workspace

After successfully logging in to thePagePilotapplication, navigate to Settings → Workspaces

Step 2: Add a Website
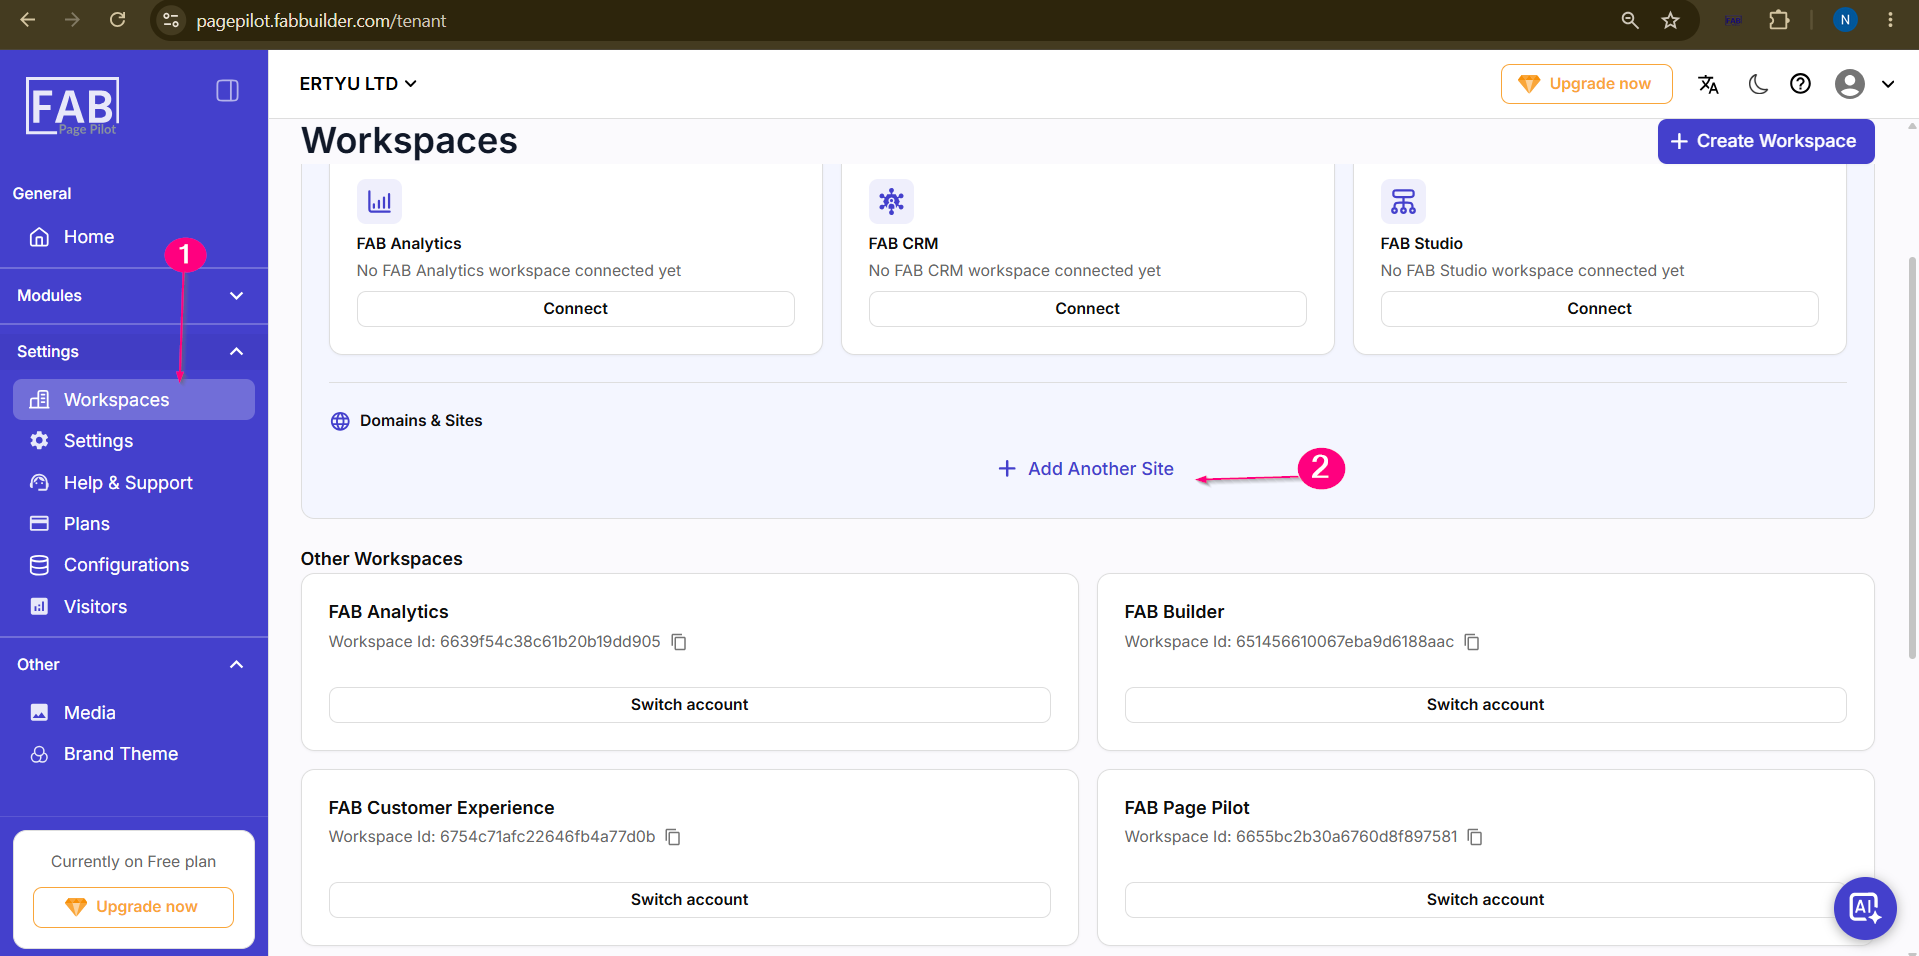
  1. Under the Domains & Sites section, click Add Another Site.
  2. The PagePilot Integration screen will open.

Sample product

Screen – Add Another Site

Step 3: Add Product Details
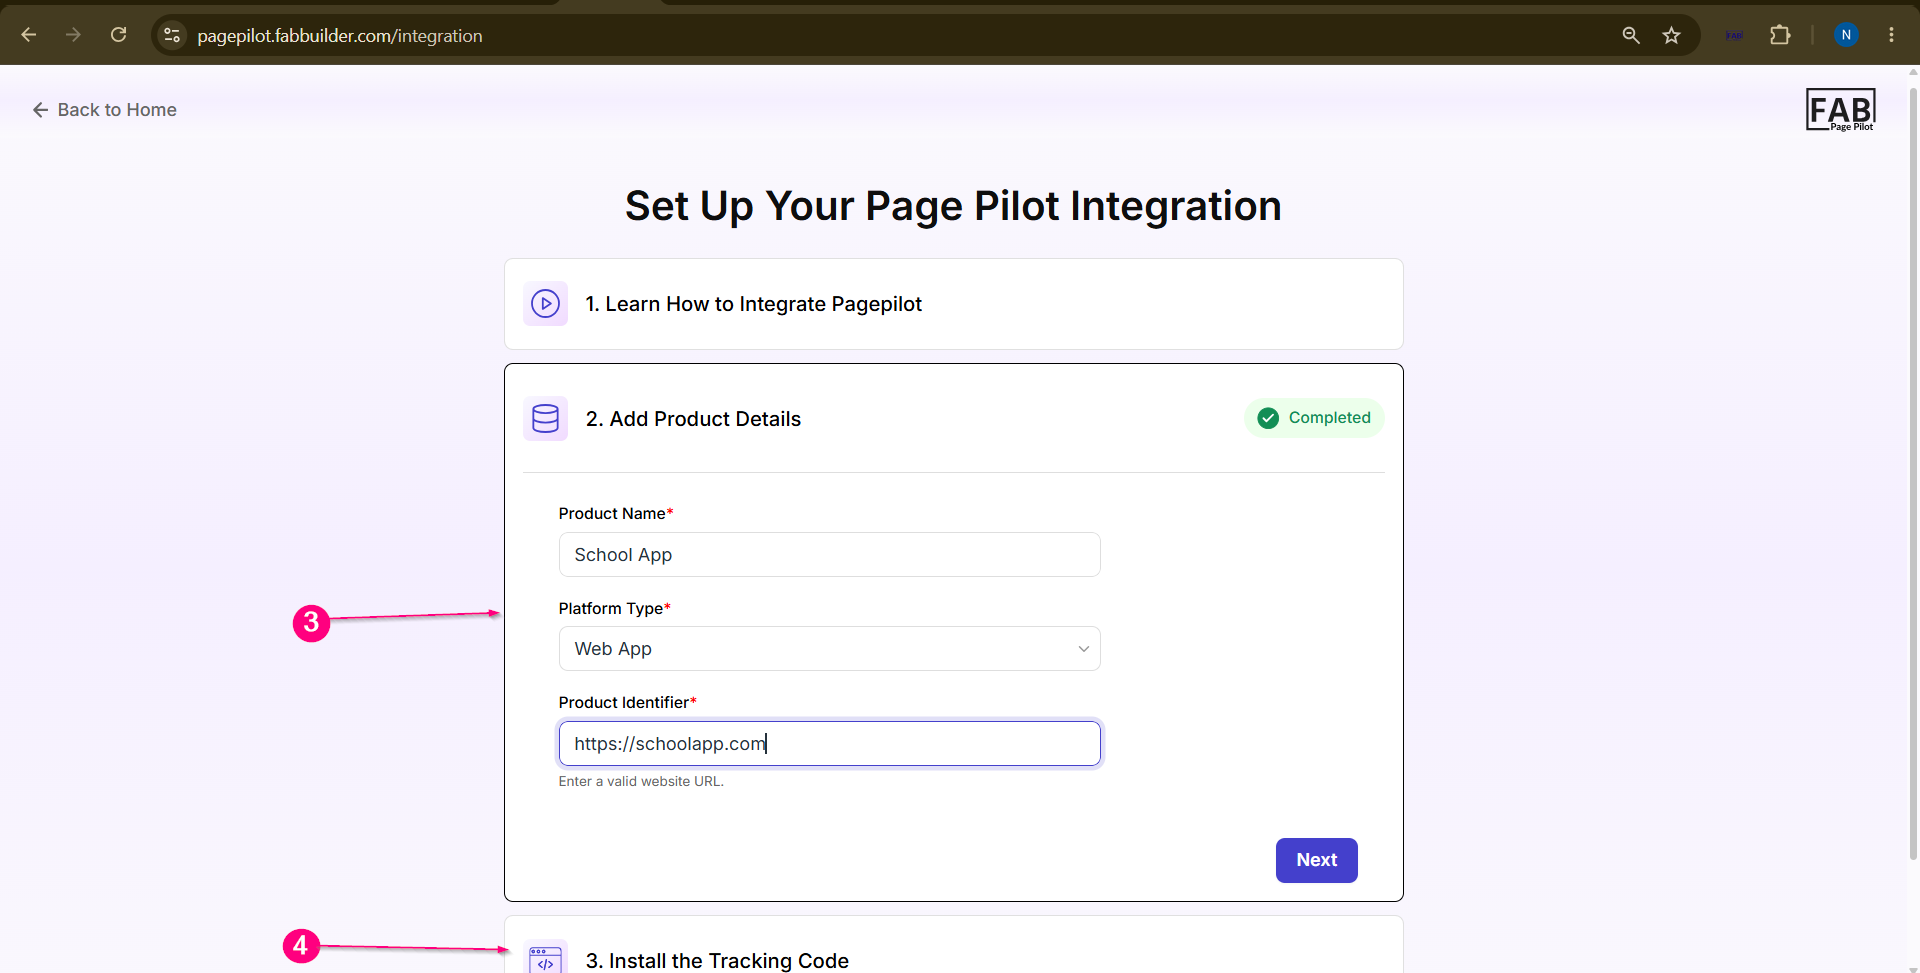
  • Click Learn How to Integrate PagePilot, if required, to view the integration guide.
  • Enter the Product Name.
  • Select the Platform Type from the drop-down list.
  • Enter the Product Identifier (Website URL).
  • Click Next to proceed to the tracking code installation.
Sample product

Step 4: Install the Tracking Code

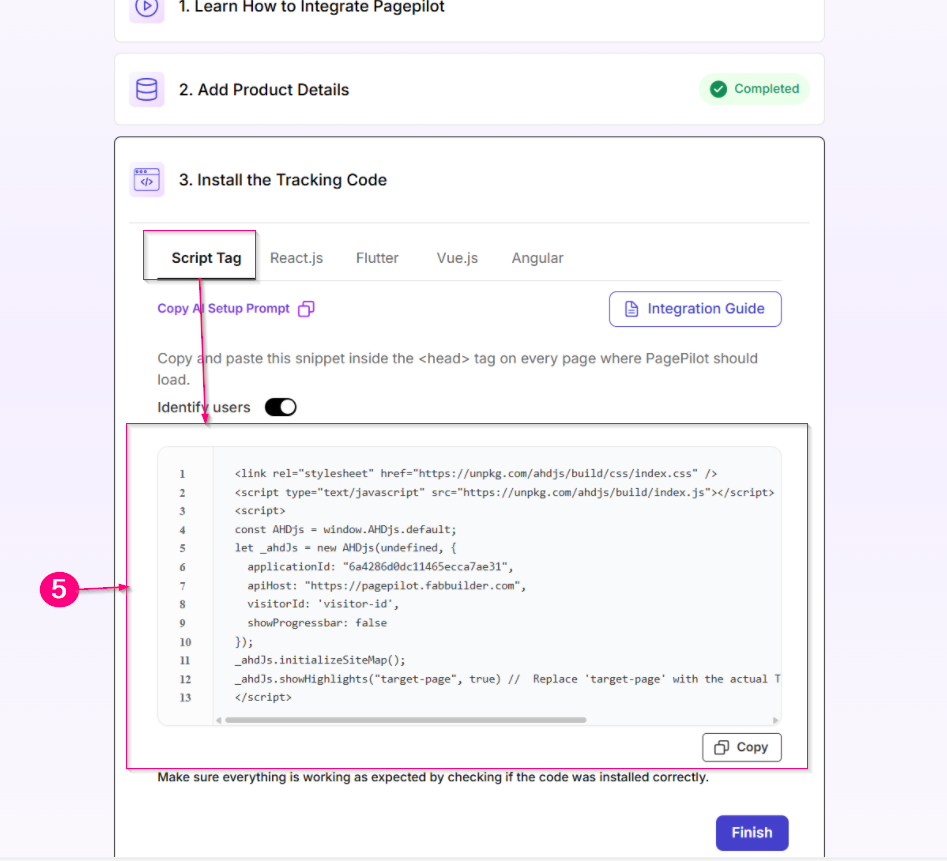
Select the required integration method (Script Tag, React, Angular, Flutter, etc.).
Sample product

Screen – Install Tracking Code


Step 5:Copy and Paste the generated tracking code

1.Add the tracking code to your web application's source code according to the selected integration method.
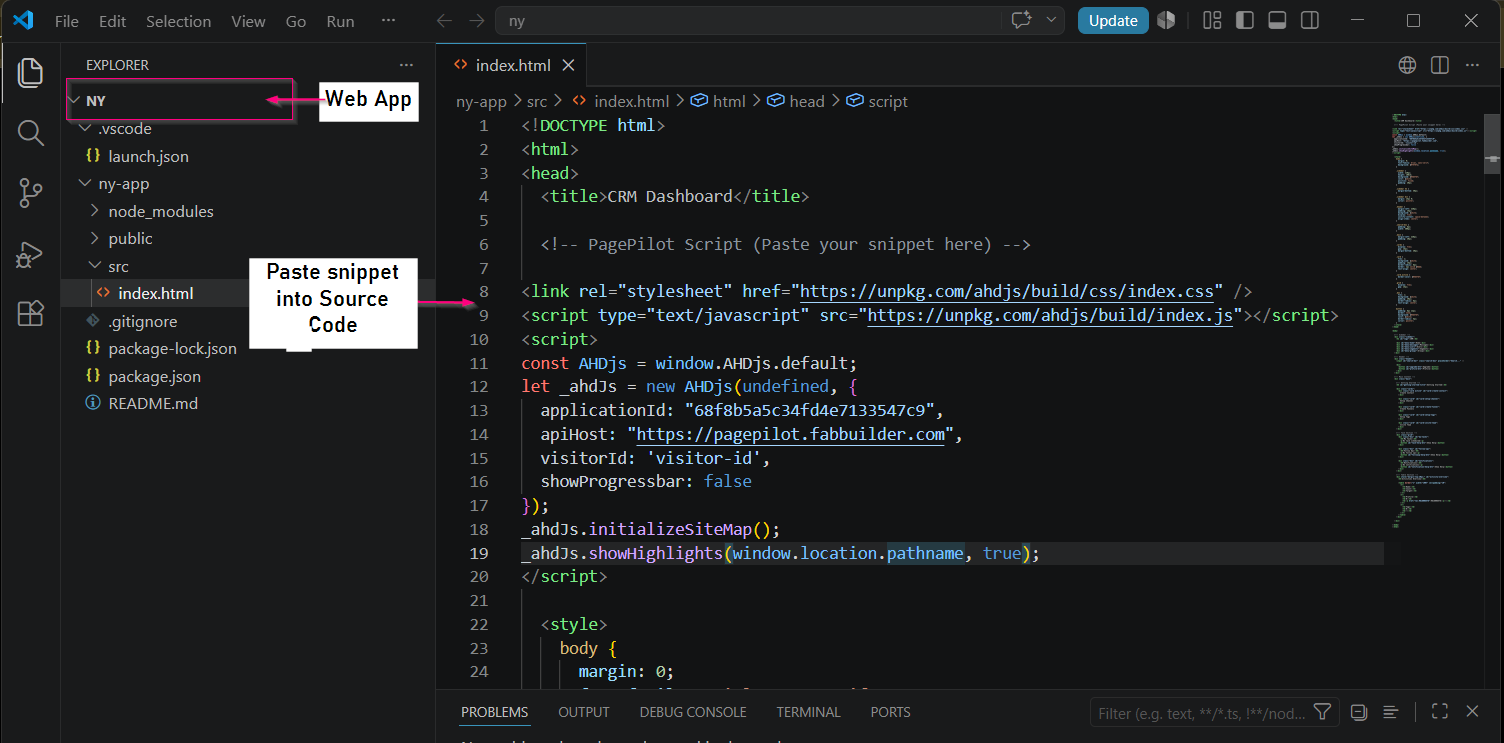
2.Save the changes and run or deploy the application.

Sample product
 

Verify the Integration

  1. Return to the PagePilot Dashboard.
  2. Create or edit a Tour, Tooltip, or other experience.
  3. Publish the experience.
  4. Open the integrated website and verify that the published experience is displayed.

Screen – Experience Displayed on Website
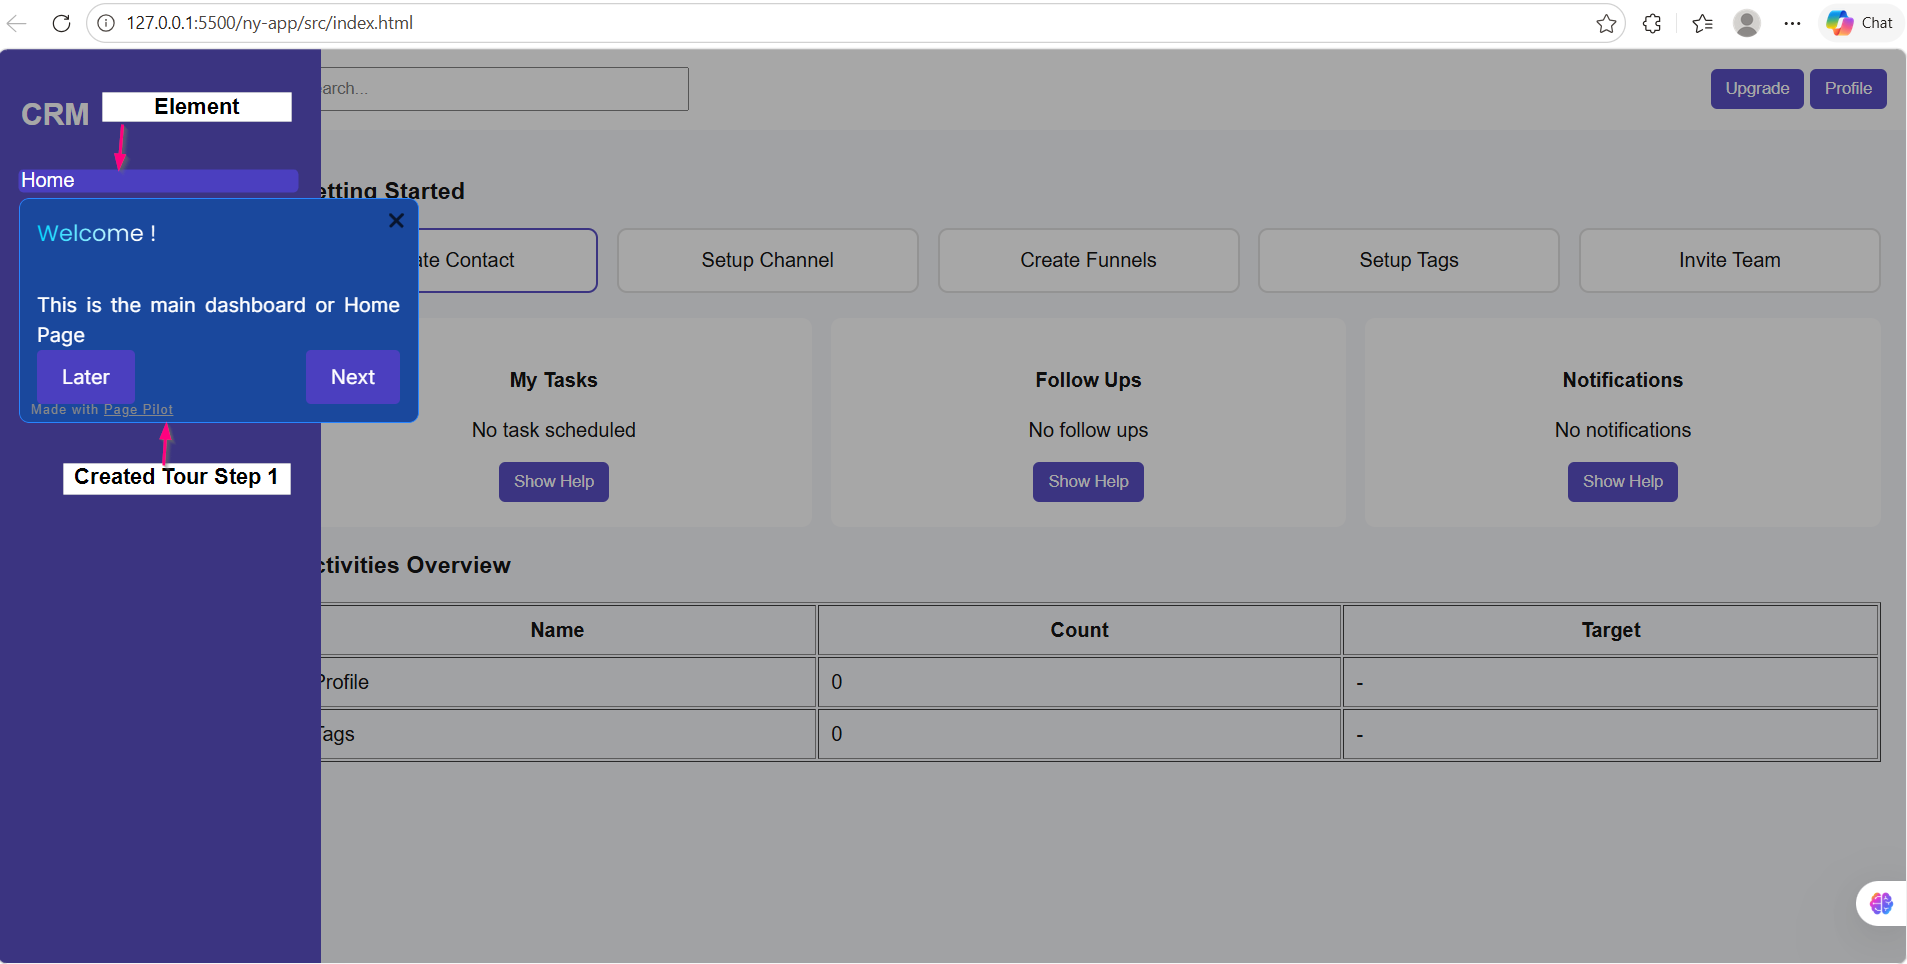
Note:Successful integration can be verified by creating and publishing an experience in PagePilot and confirming that it appears on the integrated website.

 
Sample product
Screen-Tooltip Published Post Integration 

Build by FAB Builder. The source code is available on GitHub.

ContactSponsor

Translate

Choose language

Select your preferred language for this documentation.