Tooltip(Page Pilot) Integrate with Webapp by Script Tag Installation
Overview
Script Tag integration is the quickest way to connect PagePilot with a web application and display tooltips that have already been created in PagePilot
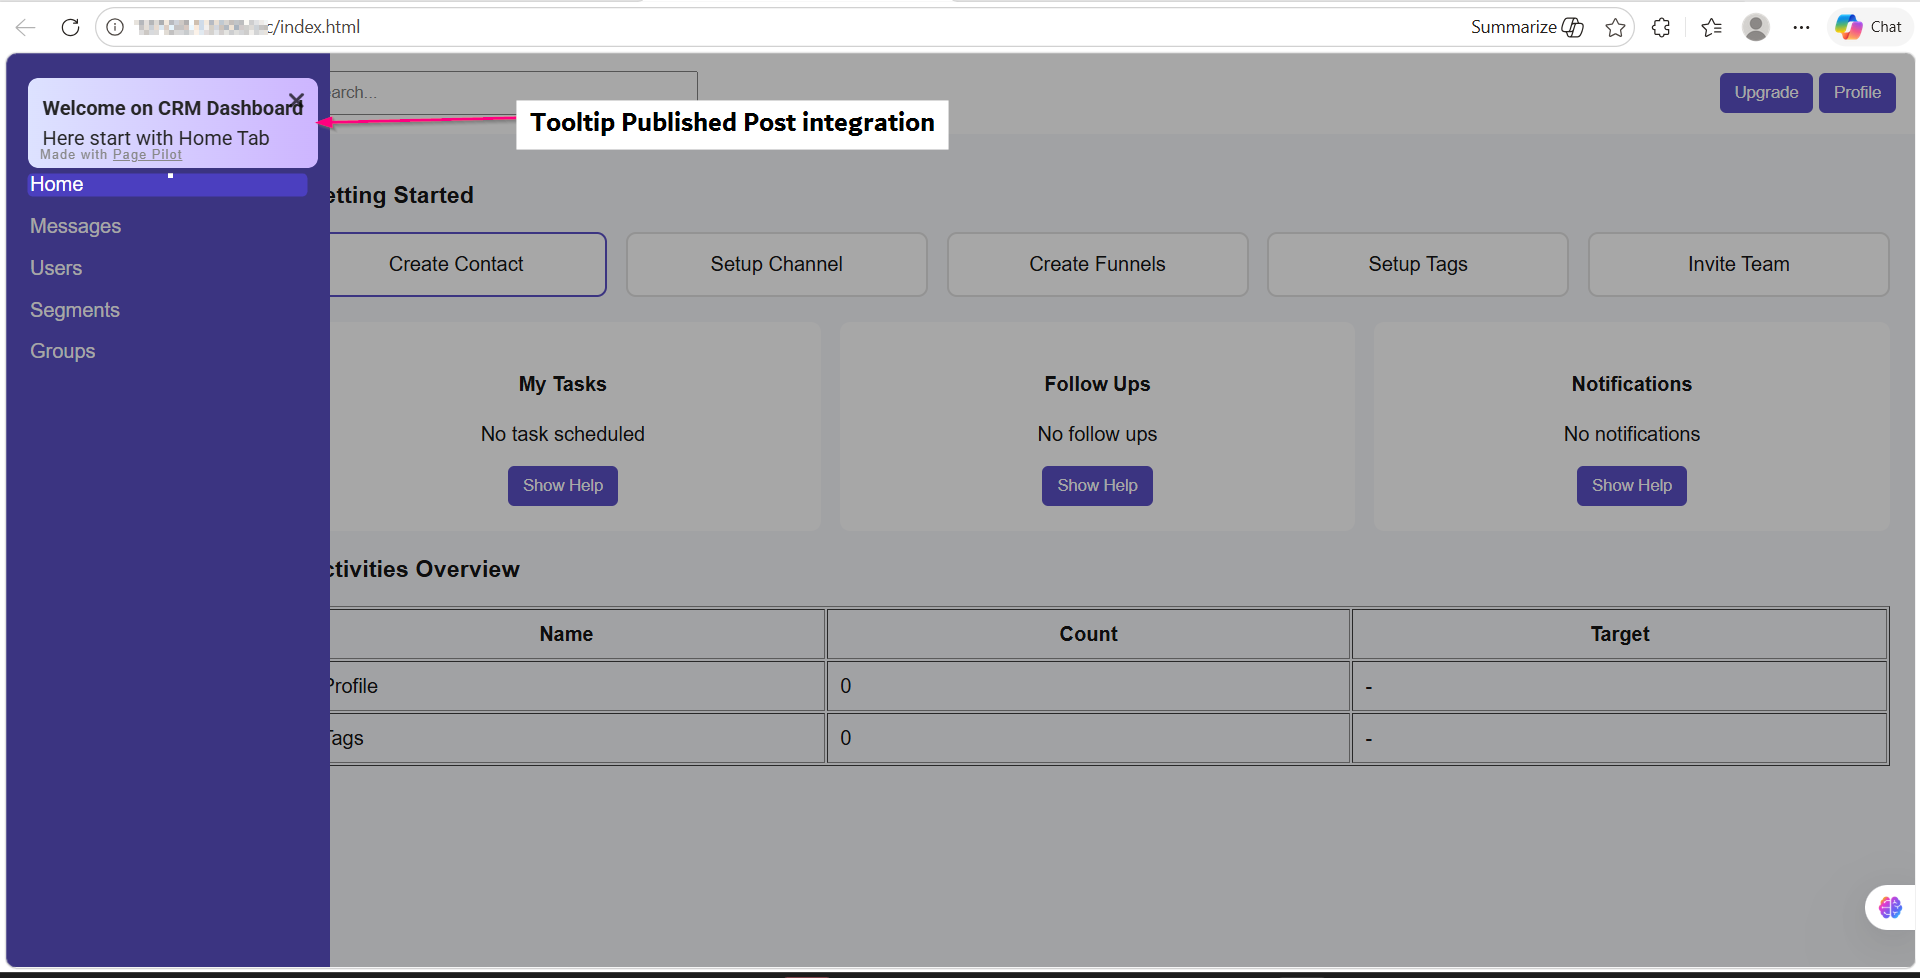
Screen- Tooltip Published post Integration on Web App
In this method:
- You only need to copy script (code)from Page Pilot tool and paste a script into web app HTML file
- No additional JavaScript coding is required
- PagePilot automatically loads and manages tooltips
Supported Use Cases
- Static HTML websites
- Landing pages
- CMS-based websites (WordPress, Webflow, etc.)
- Any application where HTML <head> can be edited
Prerequisites
Before integrating PagePilot using the Script Tag method, ensure the following:
Frontend Access
- Access to the web application’s frontend source code
- Ability to modify the <head> section of the page
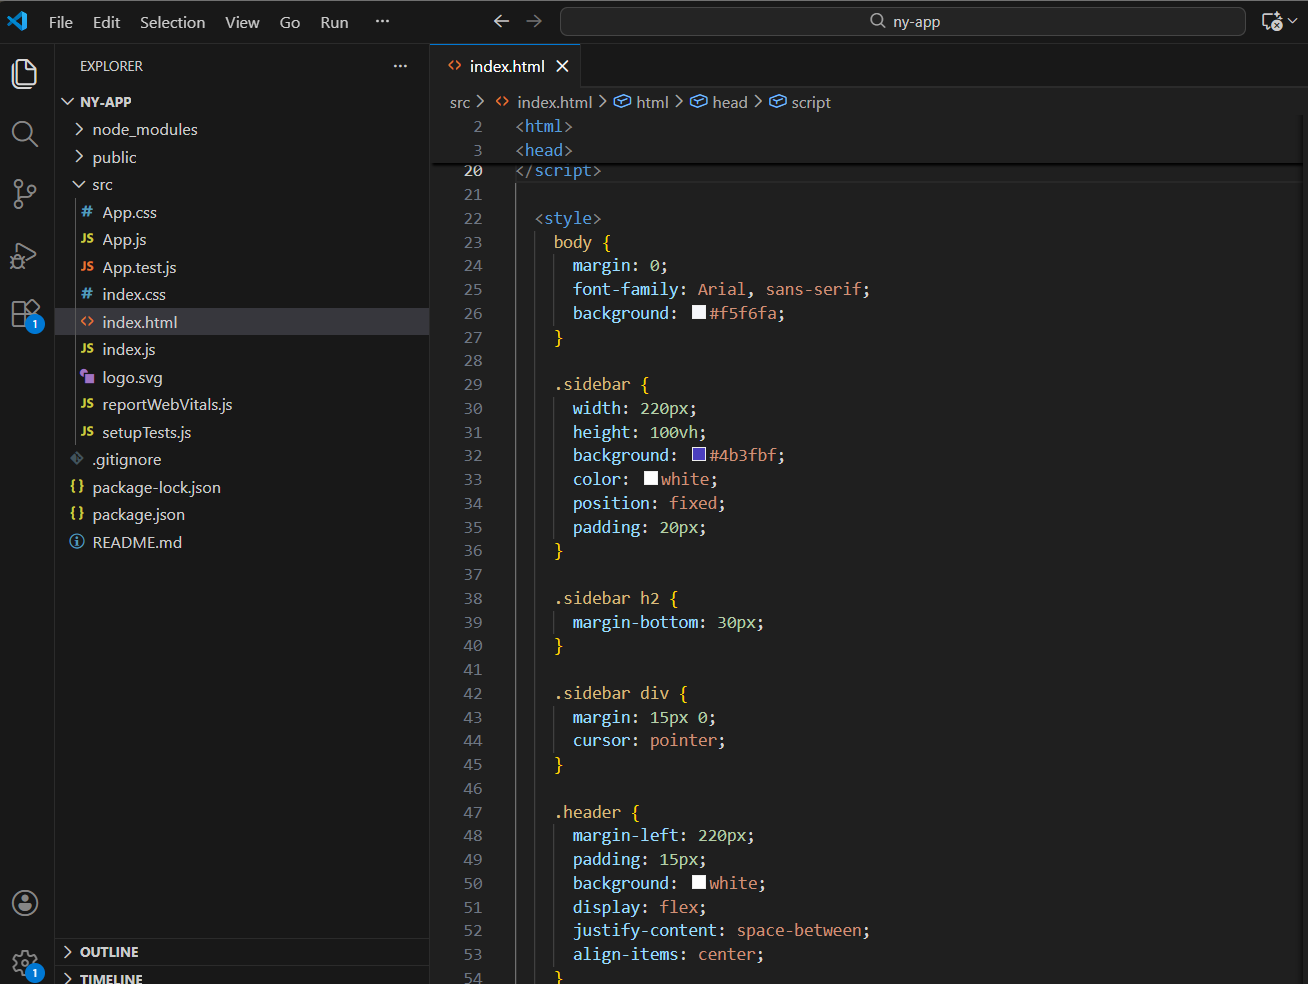
Screen -Web App Source code
PagePilot Workspace
- A workspace/application must be created in PagePilot
- The Application ID is auto-generated and included in the integration script
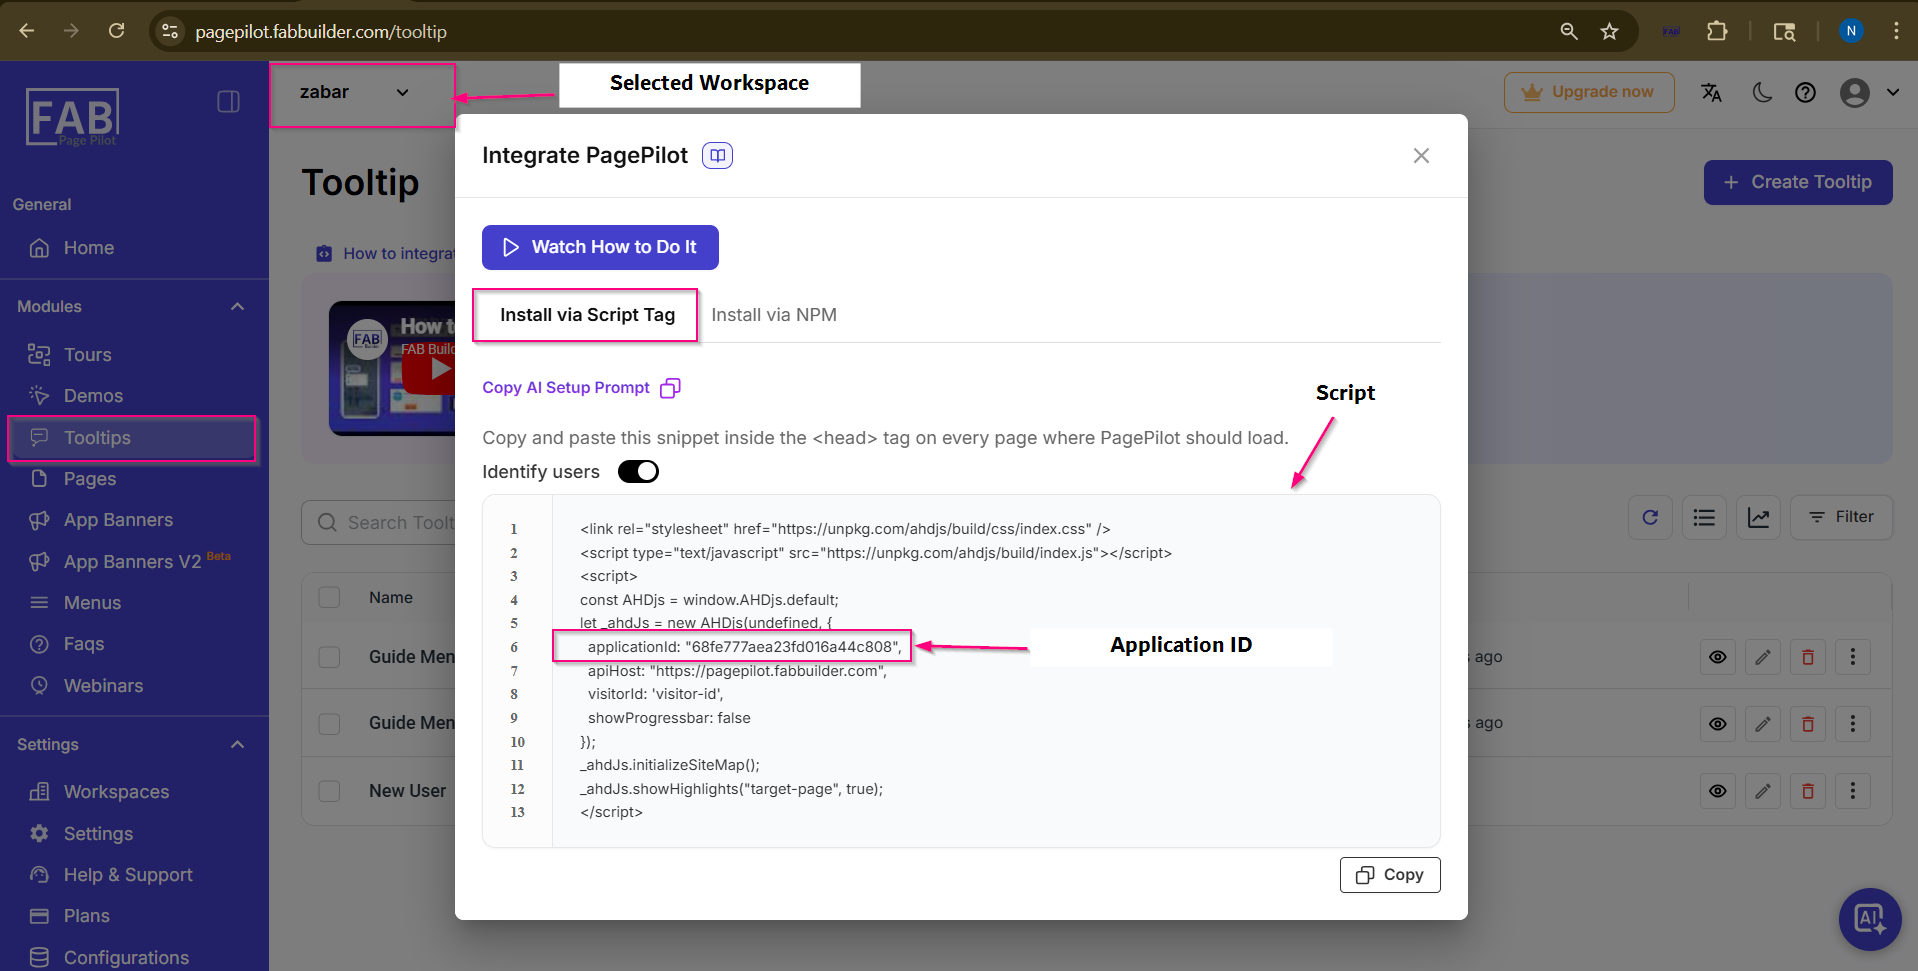
Screen -Script
Integration Script
- Ability to copy the Script Tag from the PagePilot integration screen
Target Elements
- UI elements(ie Home Menu selected) should have unique identifiers (ID or class)
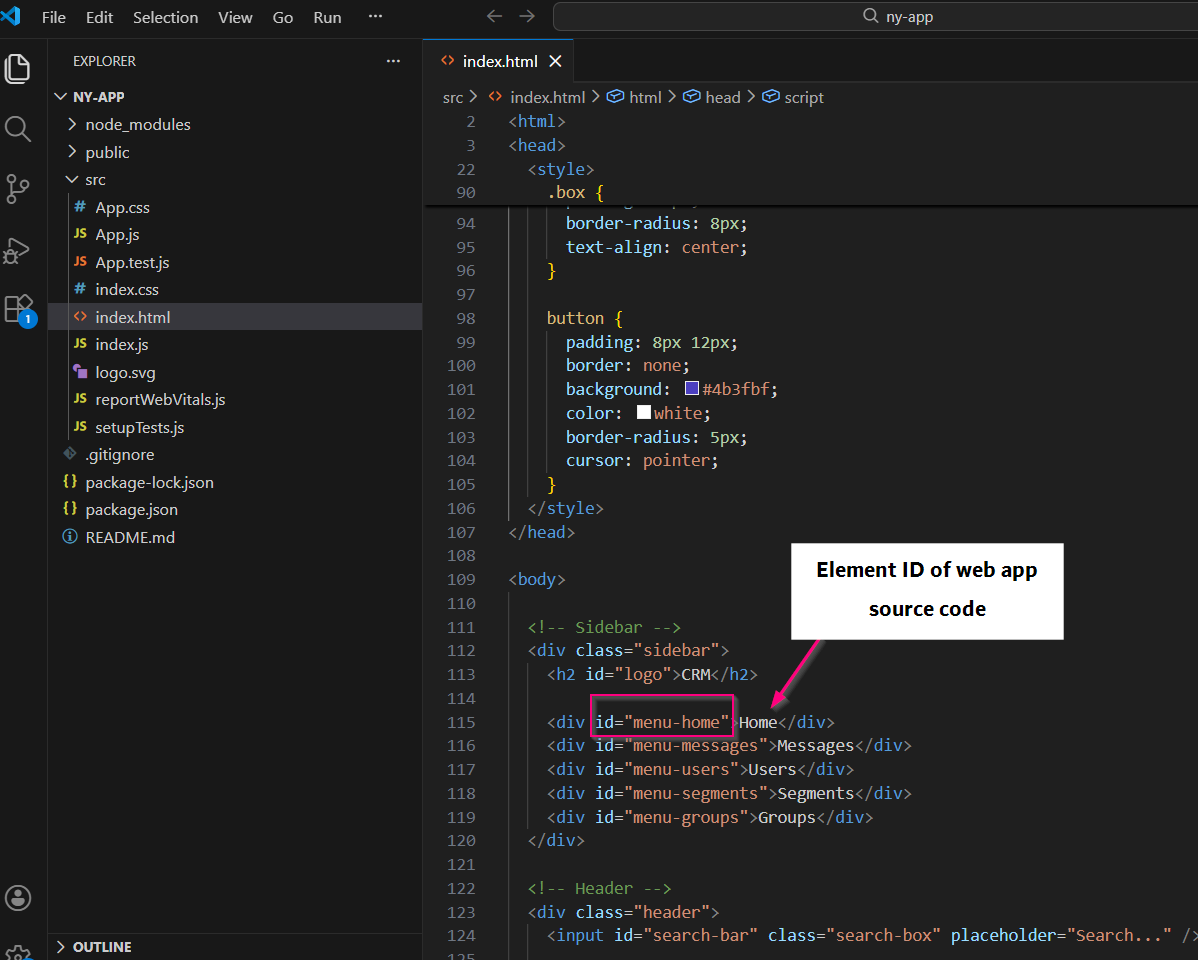
Screen- Source Code
- These will be used as selectors for tooltips
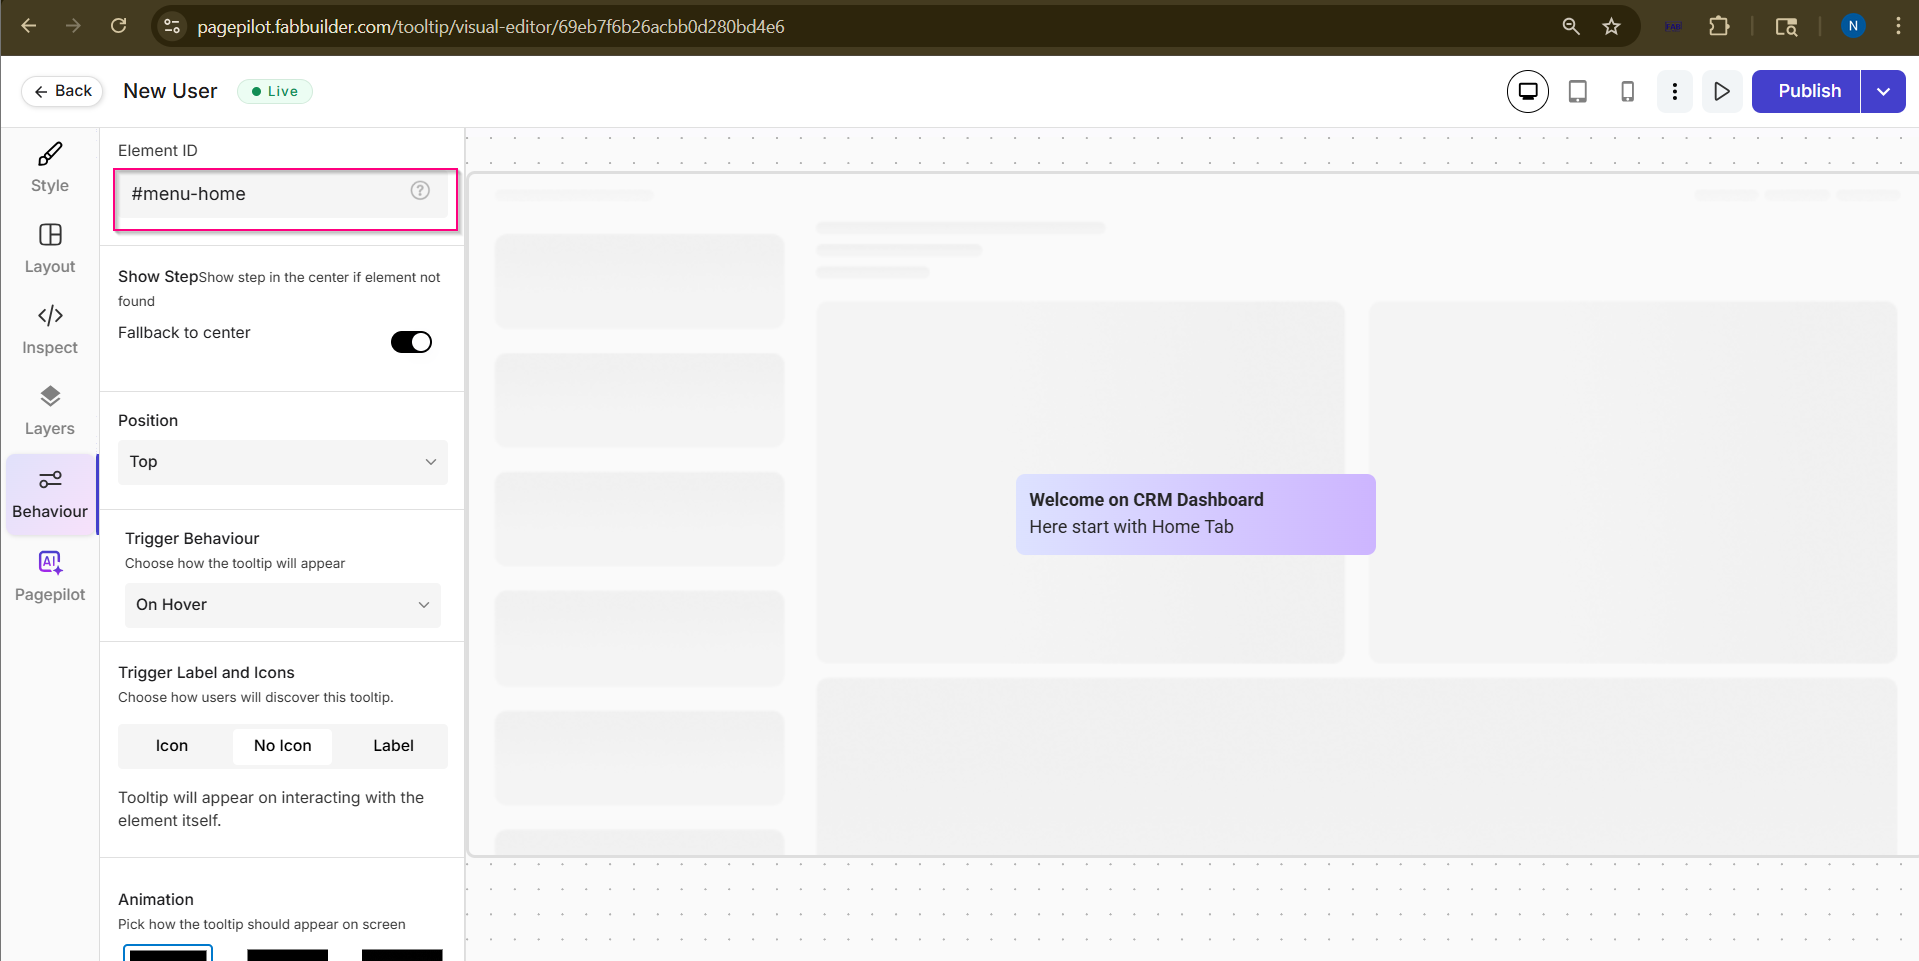
Screen- Element Id /Identifier
Target Page Details
User should have details of target page to publish tootltip.user can get those details on web page url

Screen- Targel Page on web Page url
PagePilot Dashboard Access
- Access to configure and publish tooltips
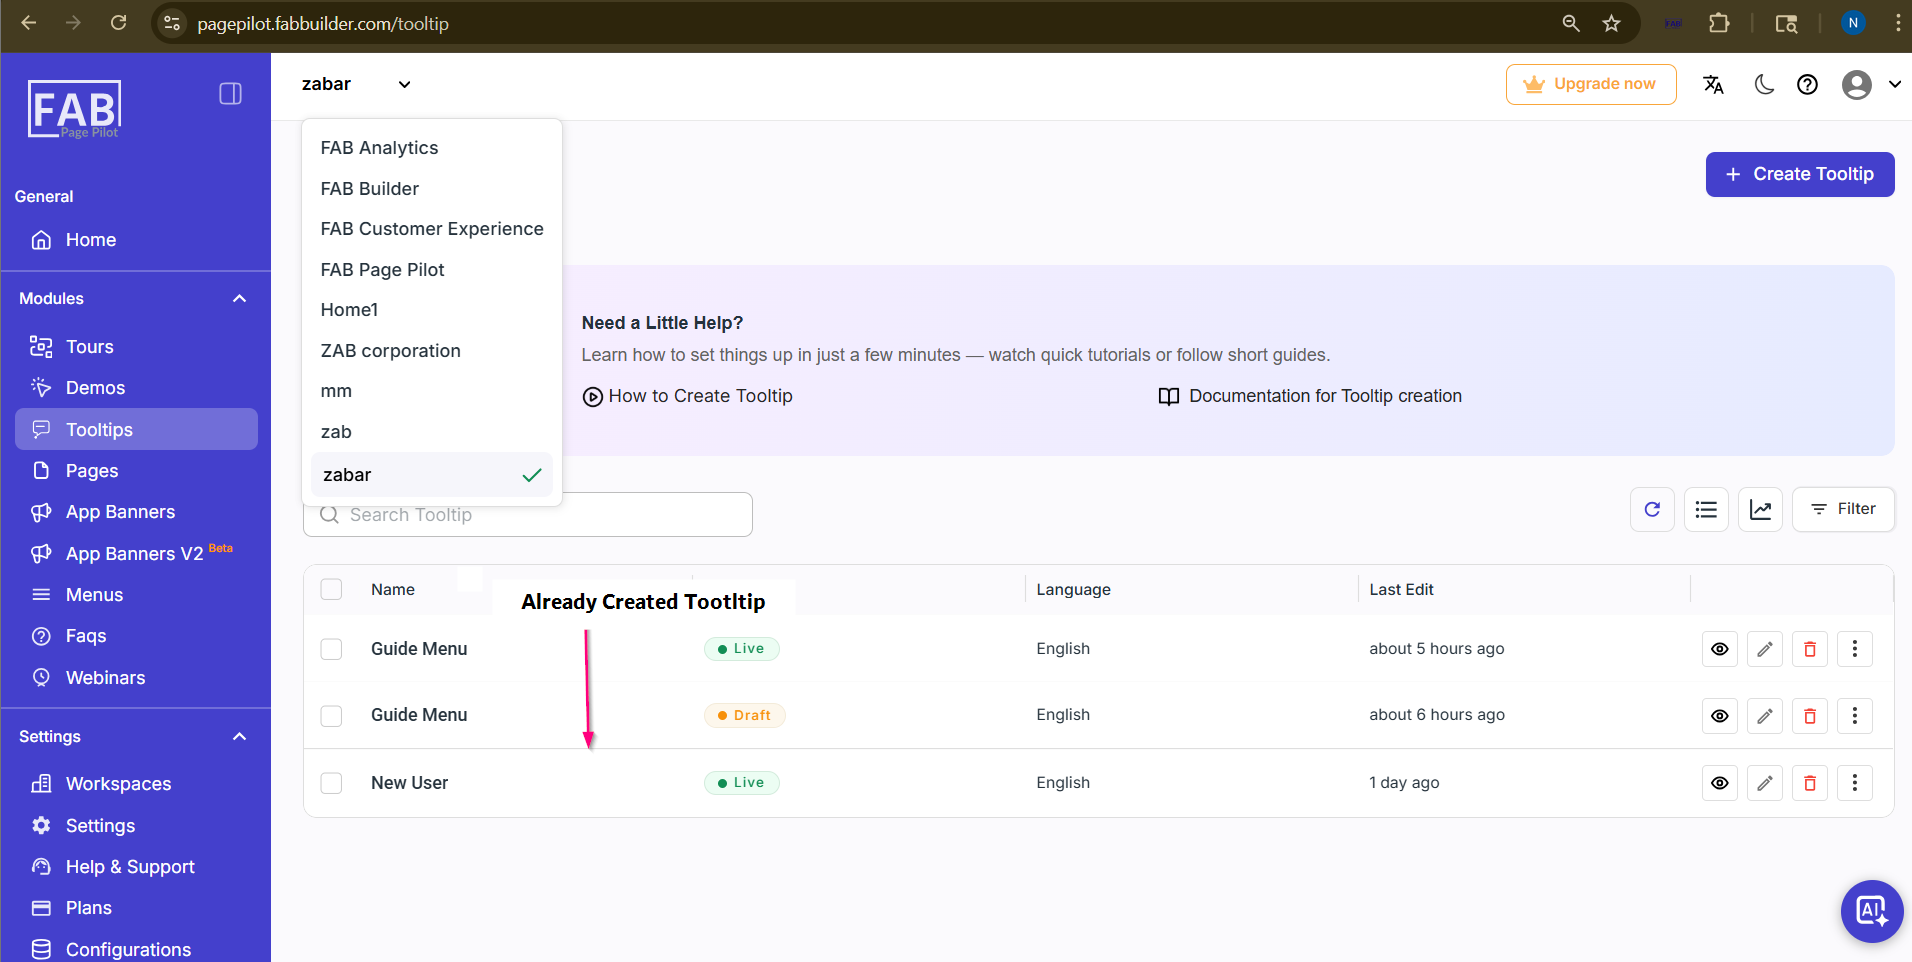
Screen- Created Tooltip
Browser Access
- A modern web browser (Chrome, Edge, etc.)
- Internet connection to load the PagePilot script
Integration Steps
Access PagePilot Integration
Log in to your application https://pagepilot.fabbuilder.com
- Navigate to PagePilot Module
- Select the worspace where tooltip is created.
- Click Integrate PagePilot
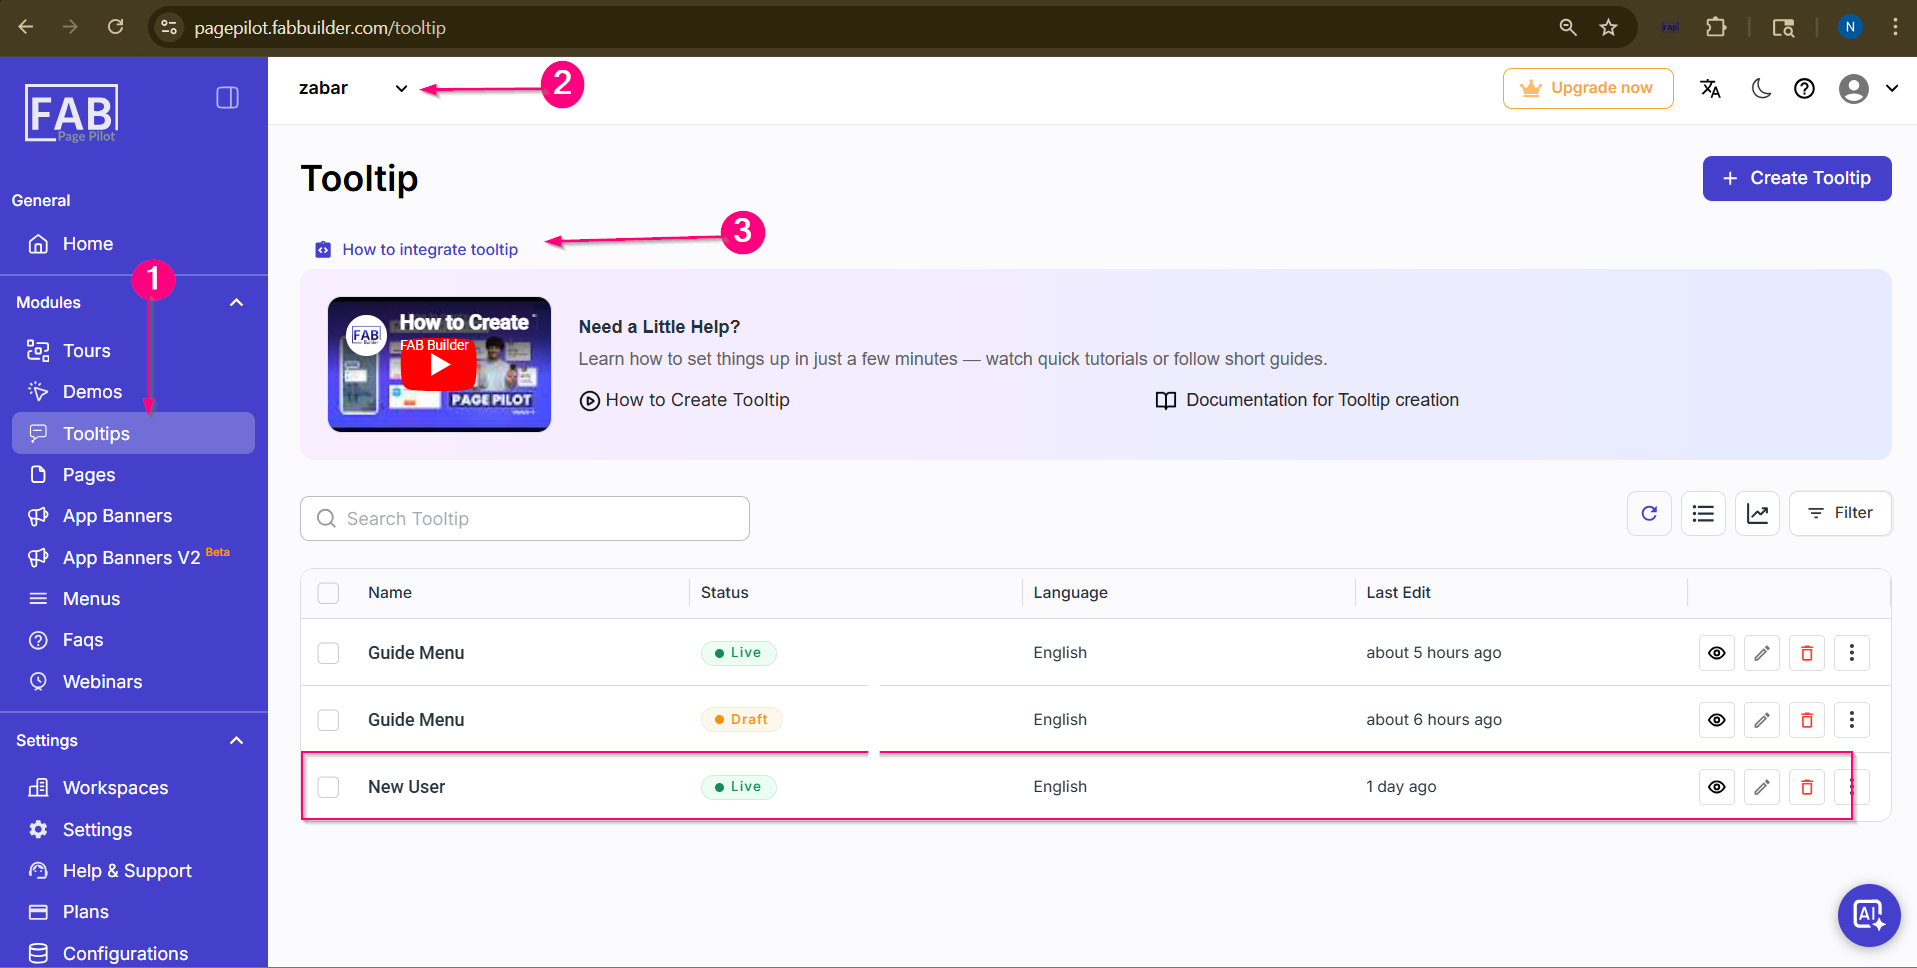
Screen- Steps to copy script
Copy Script Tag
4.Locate the Script Tag code.
5.Click Copy Script.
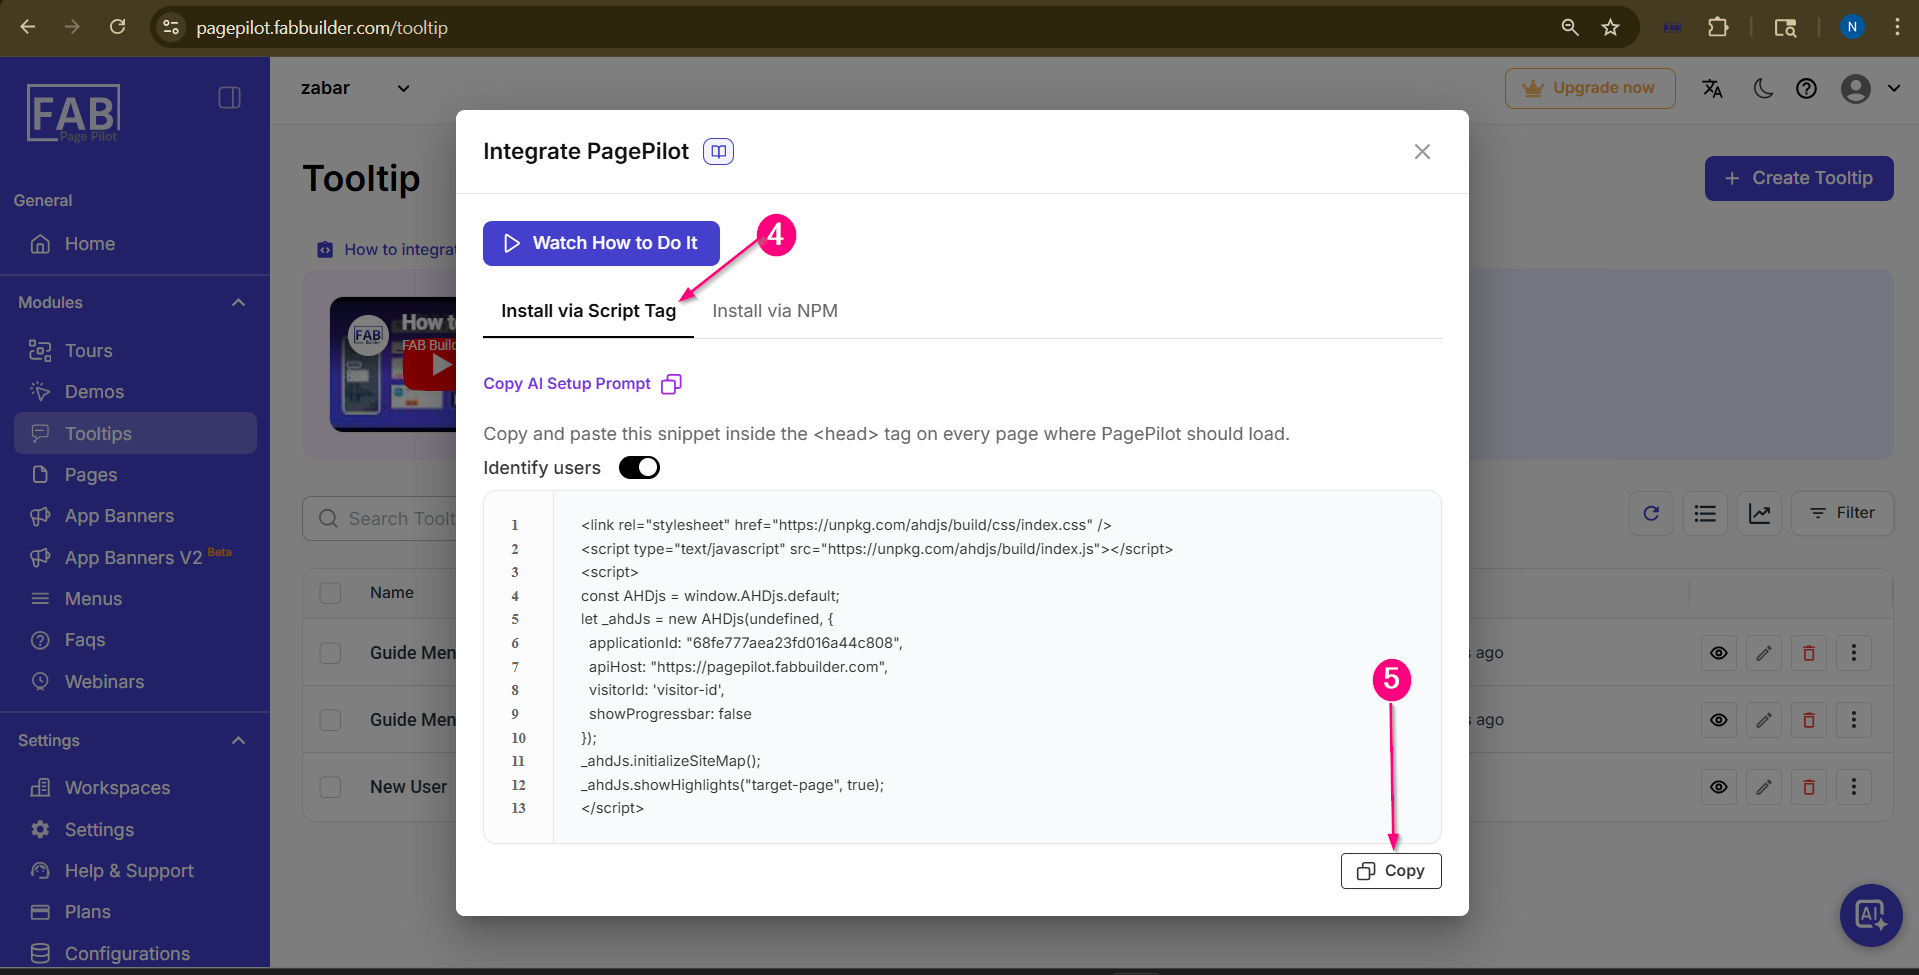
Screen- Select method and copy script
This script connects your website with PagePilo
Add Script to HTML on VS code
6.Open your HTML file (e.g., index.html)
7.Paste the script inside the <head> section
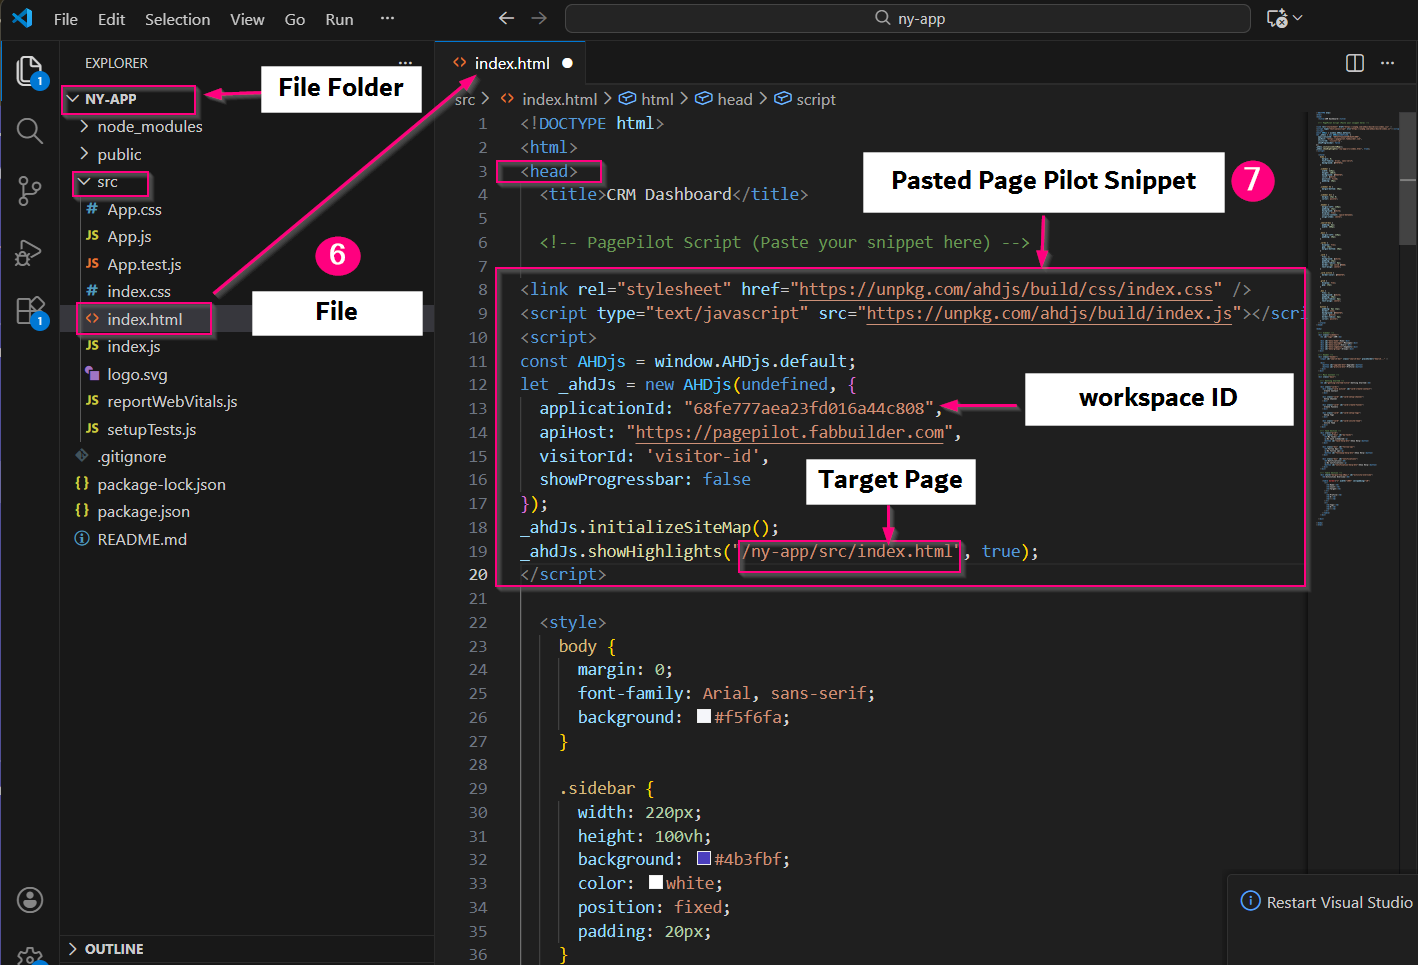
Screen- Select web appFile and paste script on Head
8.Save the file
9.Open your website in browser
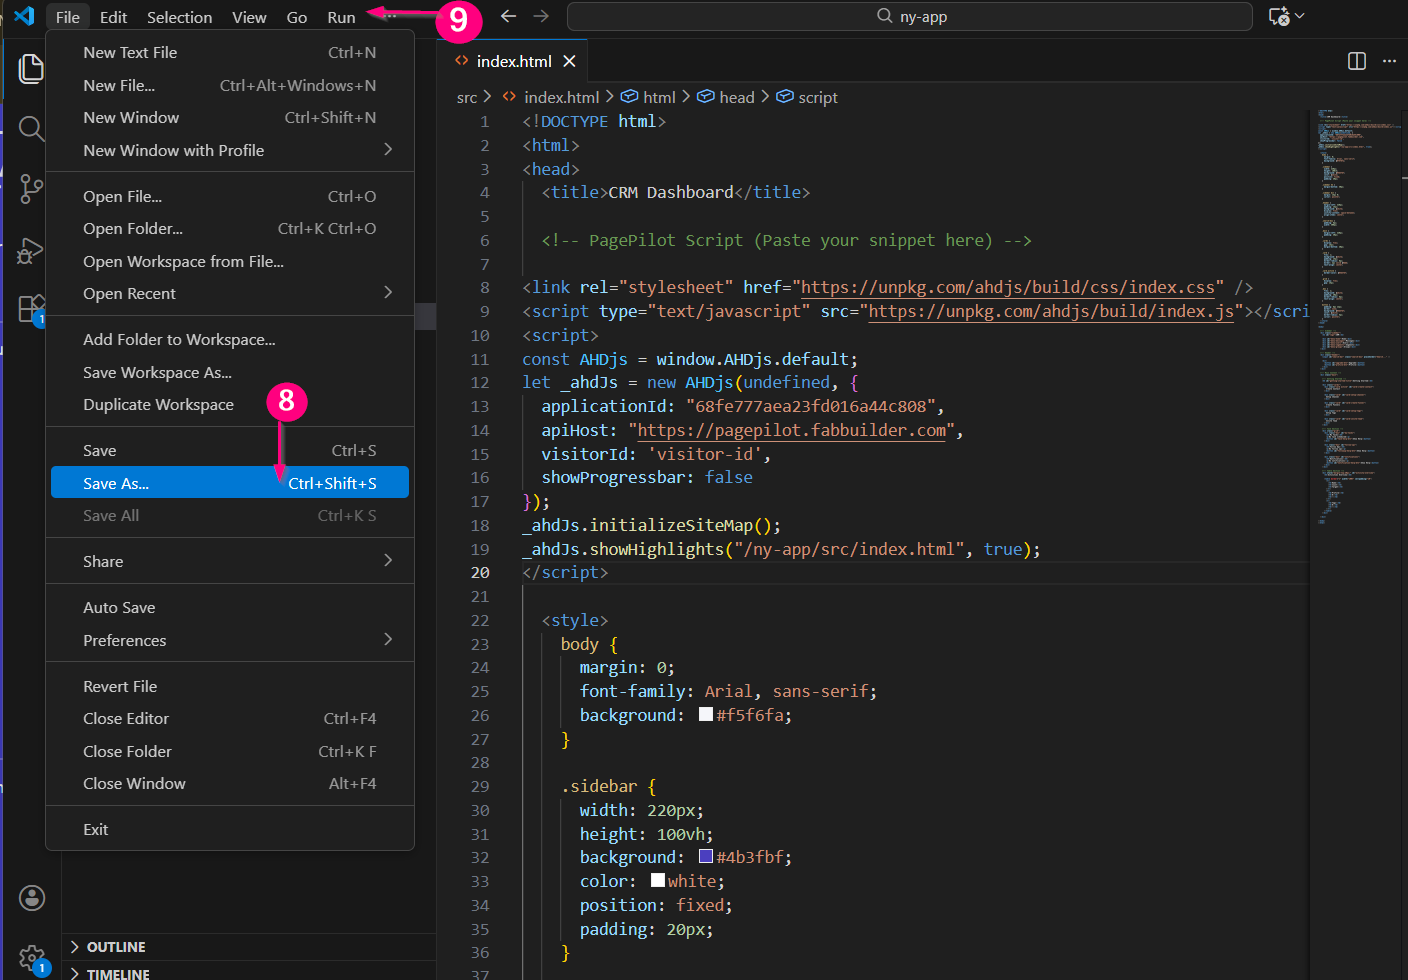
Screen- Save and Run Project on Browser
No success message is shown after integration, so the user can verify it by creating and publishing a tooltip.
Configure Tooltip
10.Go to PagePilot Dashboard .Create if not created or edit a tooltip. Here we click on edit button of created tootltip.
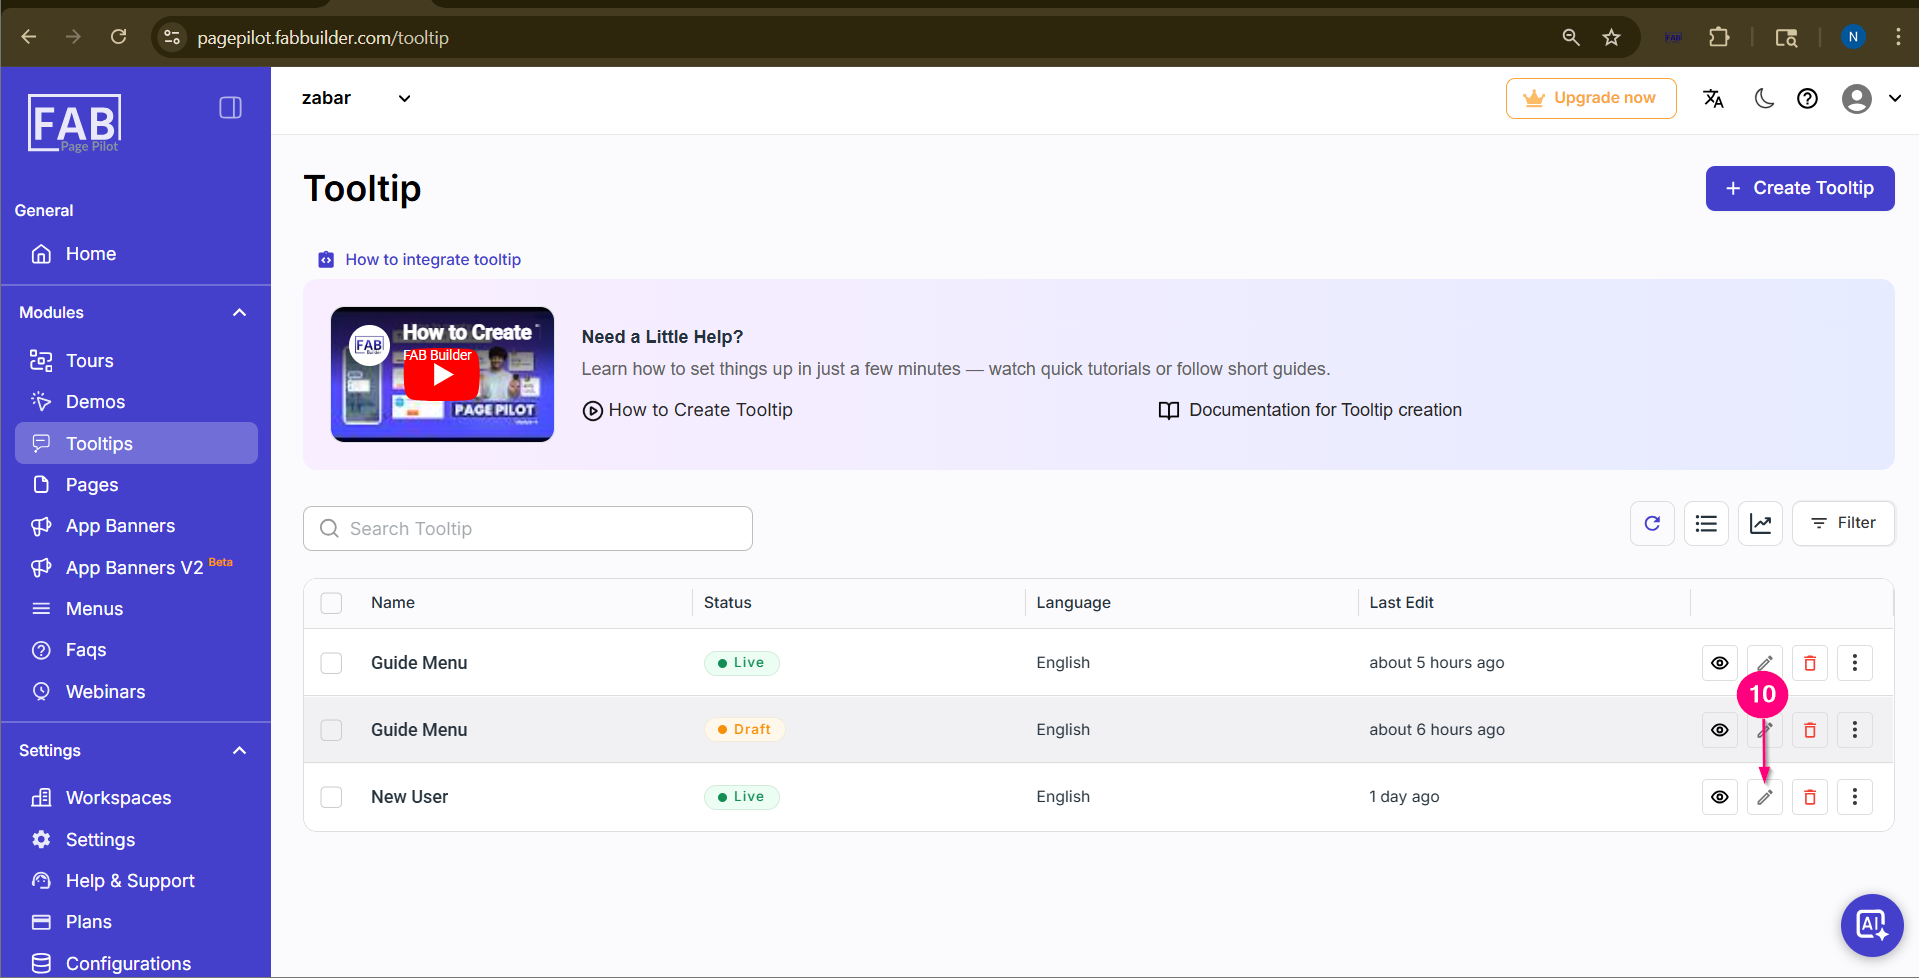
Screen- Select Tooltip to Add element id and Target Page
11.click on behavoiur tab
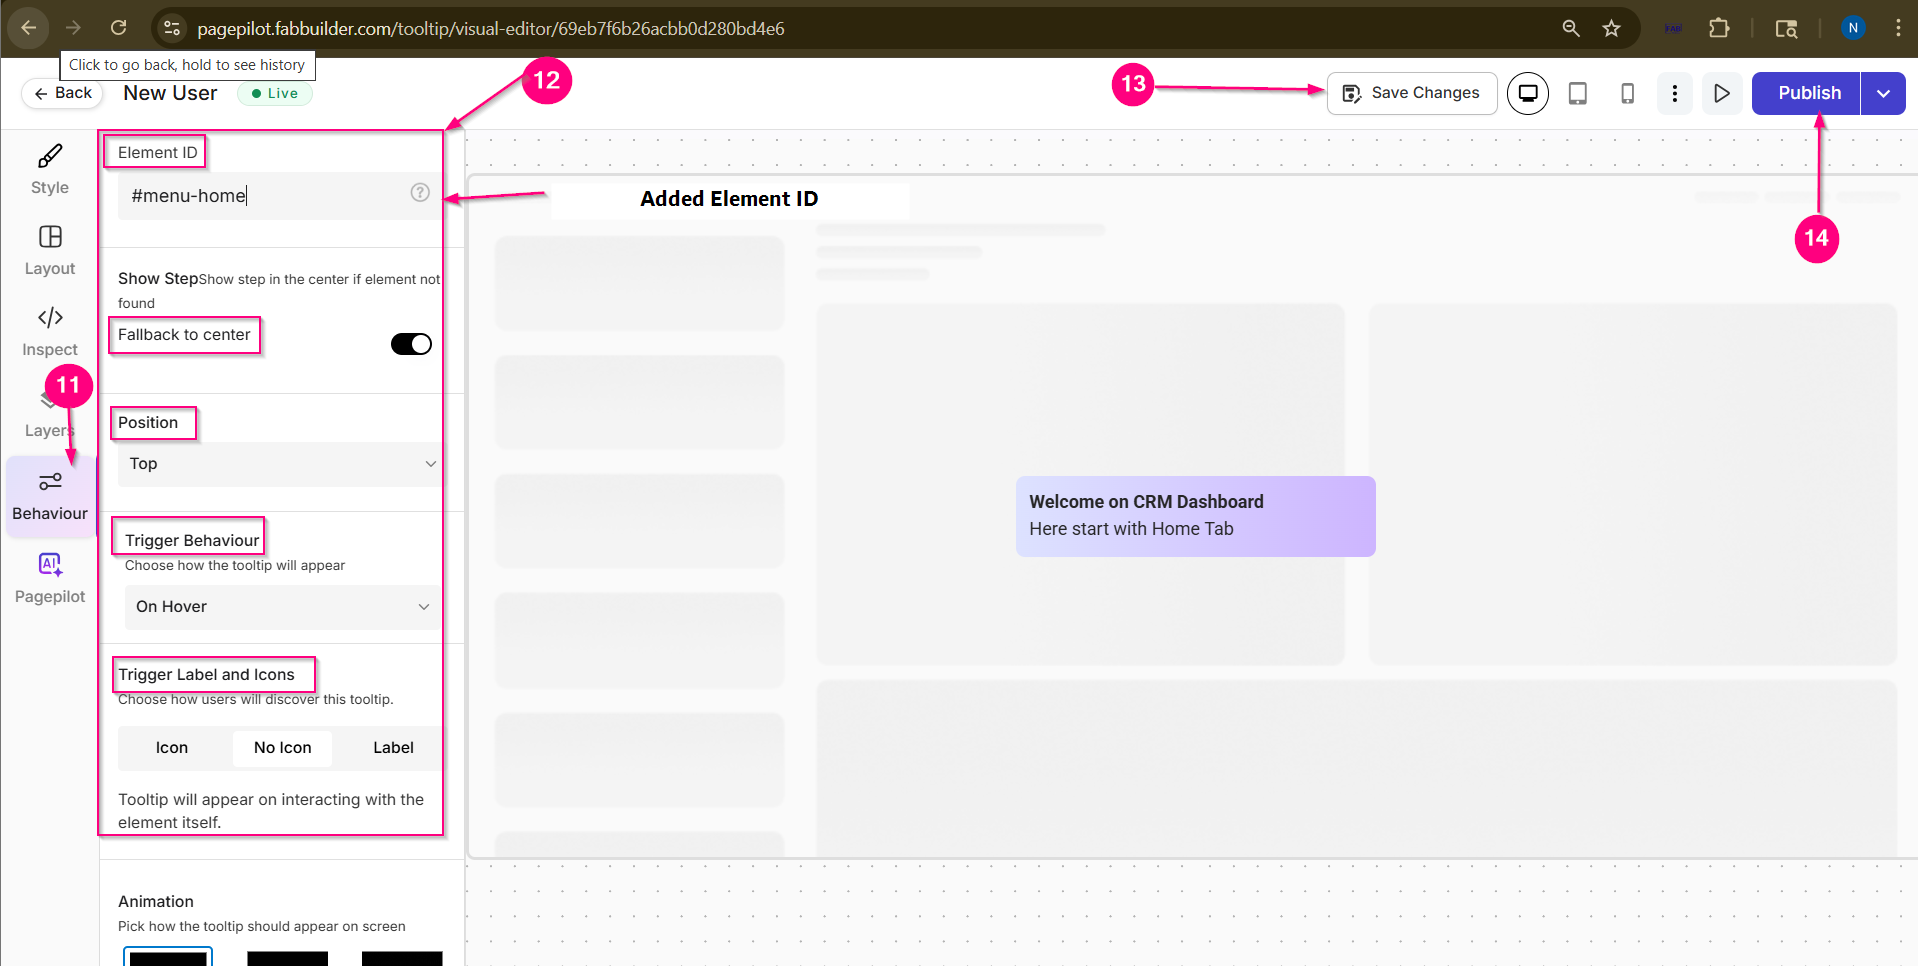
Screen- Add Element ID and Configure Tootltip Placement
12.Target Element → e.g., #menu-home
13.click on save change .
14.Click Publish.Ensure status is Active
15.Add target page details from project or web page url with other details.
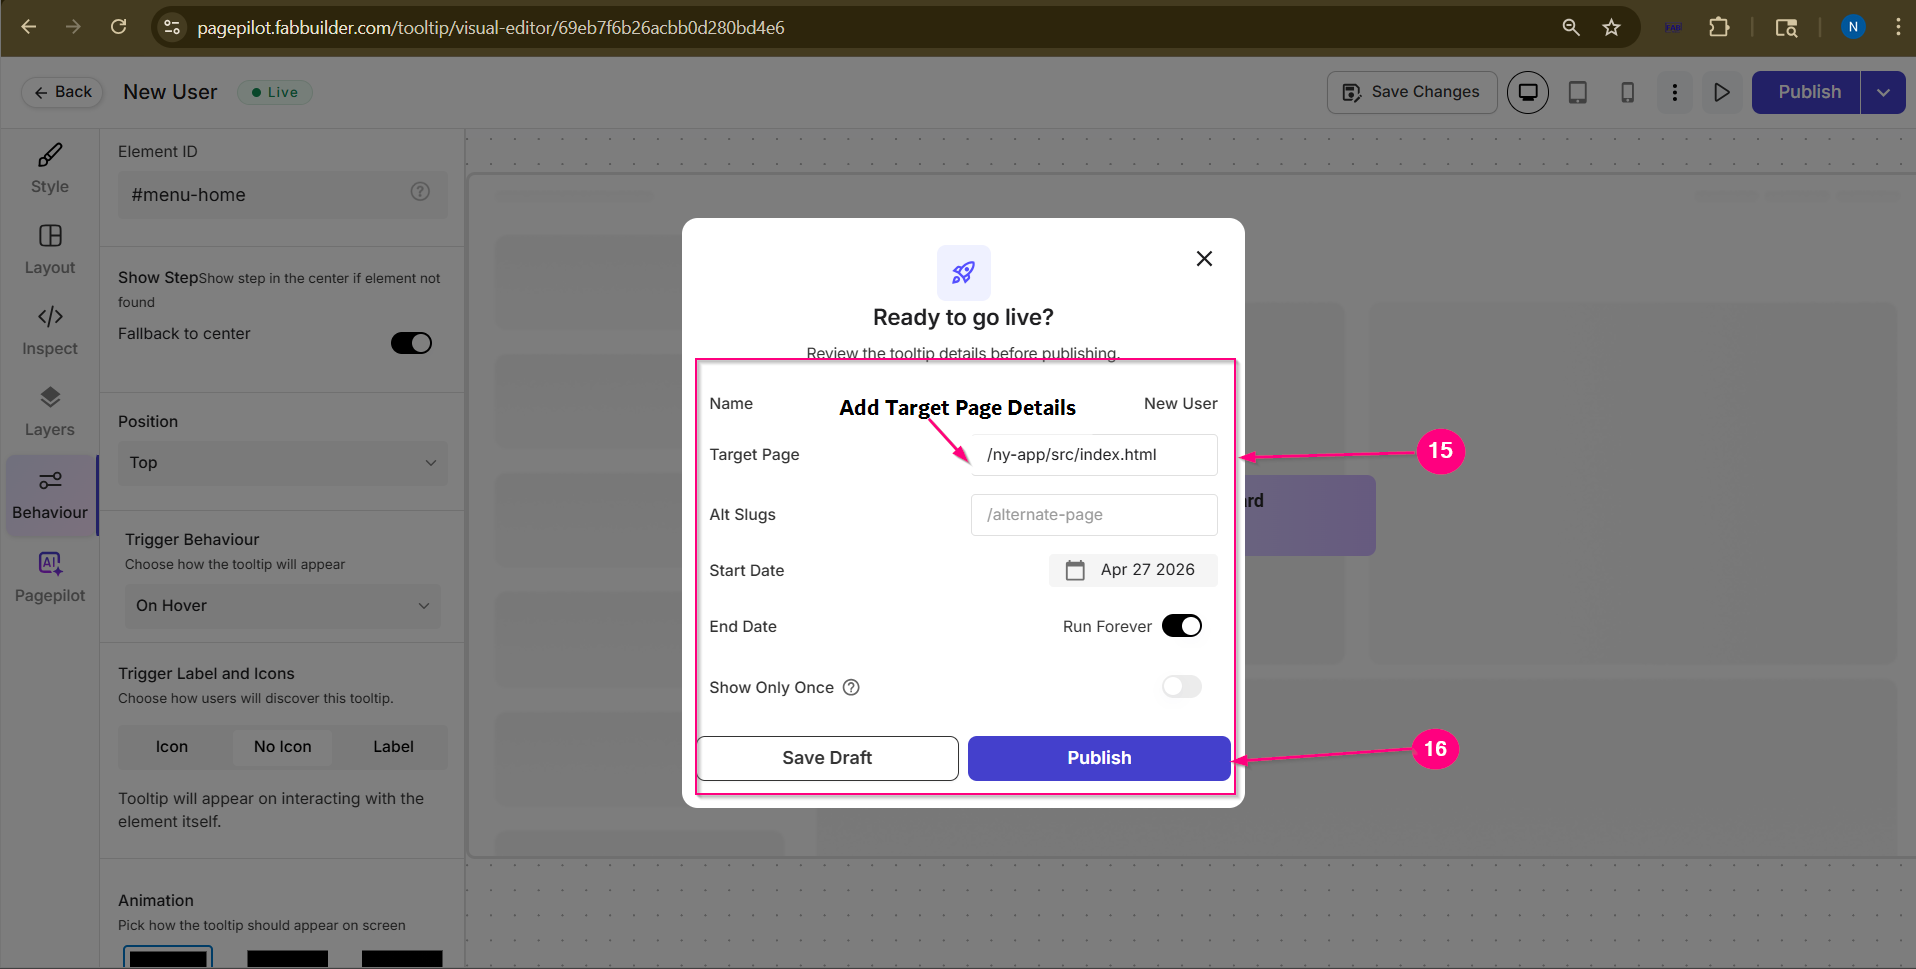 Screen- Select web appFile and paste script on Head
16.Click on publish button.
Screen- Tooltip Published post Integration on Web App
Validate Integration
- Refresh your web page
- Verify tooltip appears on target element
Tip: Use Ctrl + Shift + R for hard refresh
⚠️ Important Notes
- Script only enables PagePilot — tooltips are configured in dashboard
- Target element must exist in HTML
- Always use correct selector:
- ID → #element-id
- Class → .class-name
- Do not use full URL in target page
- Ensure module is publishedSummary
- Ideal for static websites