Tour(Page Pilot) Integrate with Webapp by NPM installation
Tour(PagePilot) Integration with Web Application (NPM Installation Method)
Overview
NPM installation is used to integrate PagePilot with modern web applications and display tooltips, product tours, and demos that are already created in PagePilot.
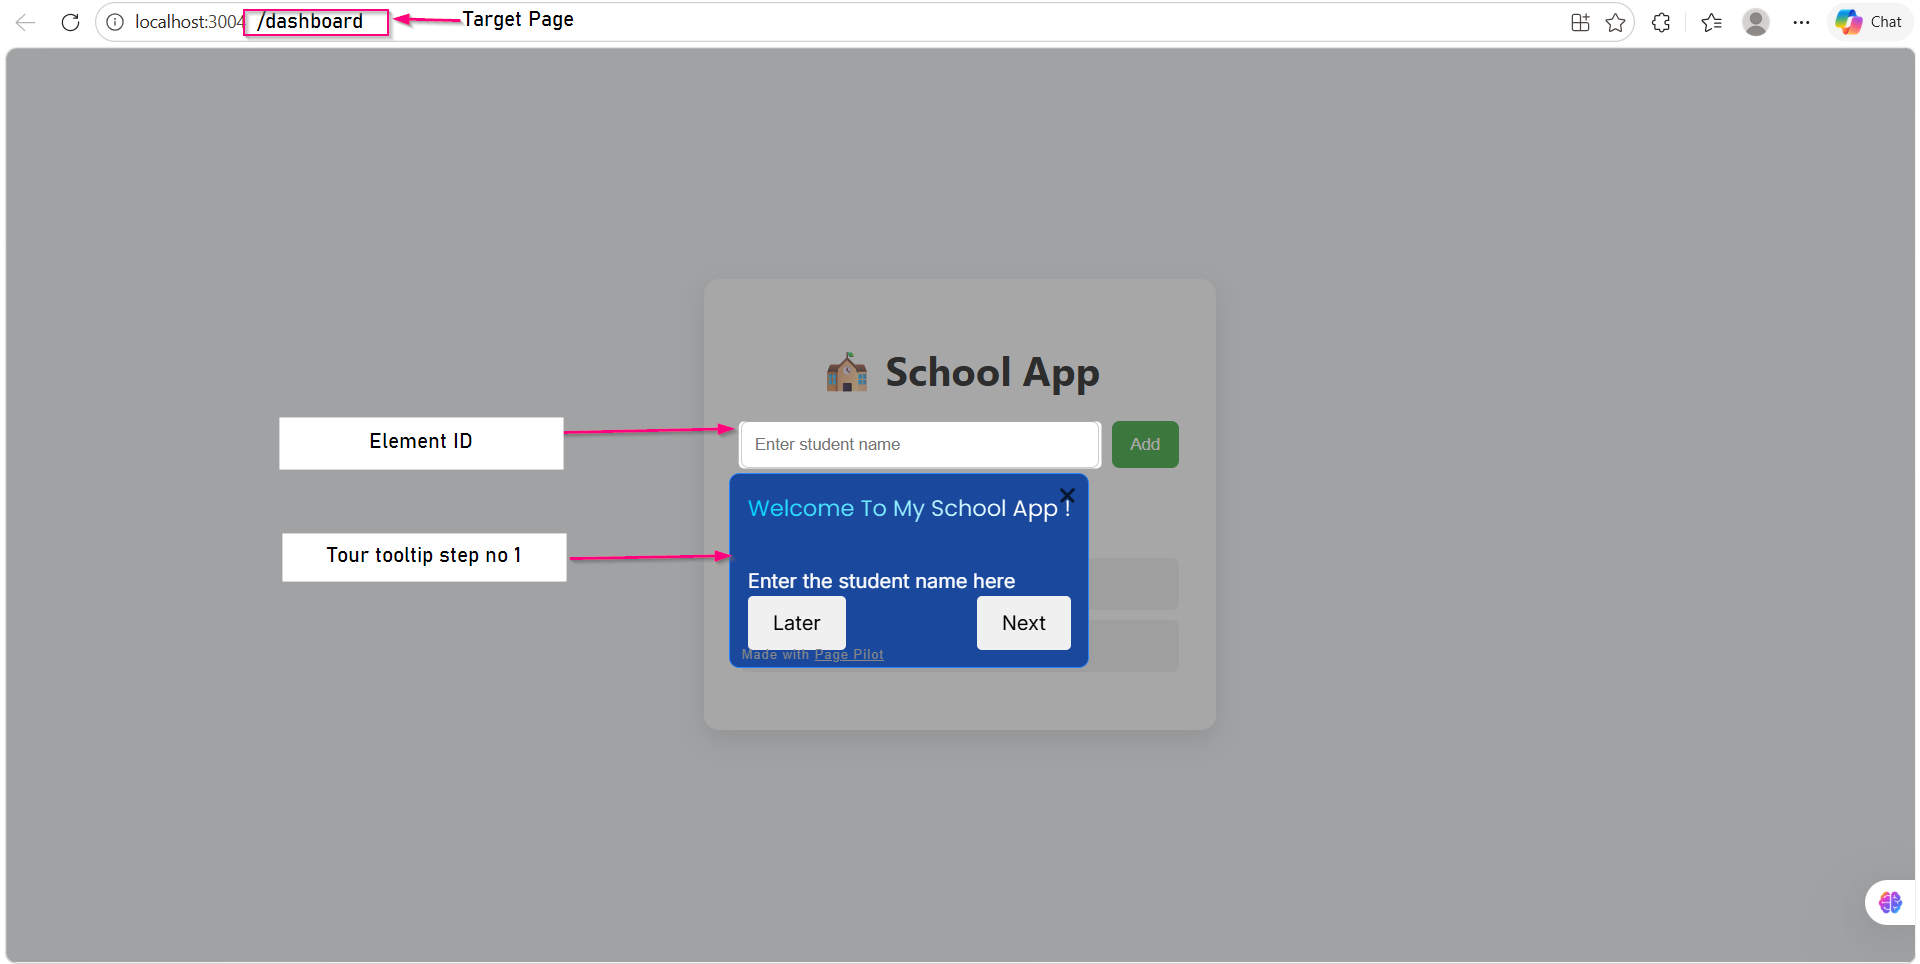
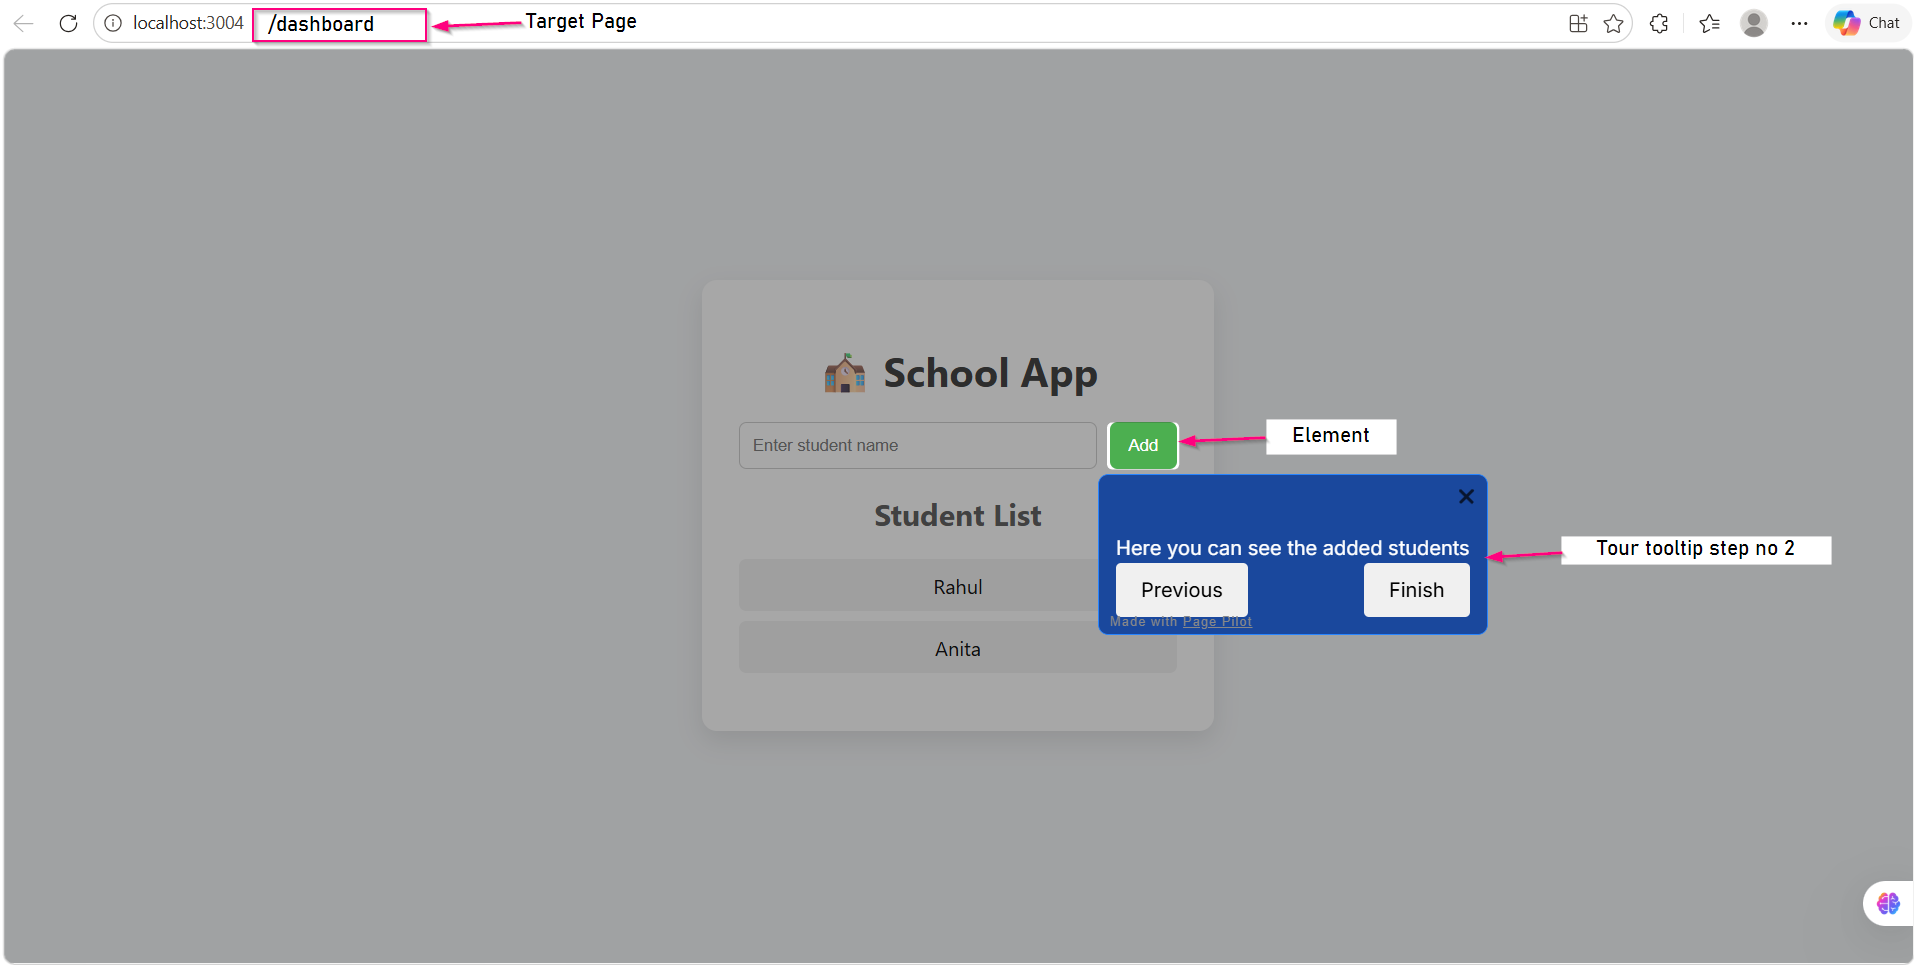
Screen- Tour step 1 and 2 Published post Integration on Web App
This method provides:
- Better control in dynamic applications
- Support for multi-page routing
- Seamless integration with frameworks like React
In this method
- PagePilot is integrated by installing the npm package
- Initialization code is added to the website application’s(web app) or Project front end source code (such as a React component)
- Tooltip configuration and publishing are handled from the PagePilot dashboard
Supported Use Cases
This integration method is suitable for:
- Applications built using React or Angular
- Dynamic web applications with client-side rendering
- Single Page Applications (SPAs)
- Multi-page applications requiring route-based behavior
Prerequisites
Before integrating PagePilot using NPM method, ensure:
Project Setup
- Install Node.js (npm is included with Node.js)
- A React (or similar) project should be already created.Here in screenshot Project folder name is school app under react app.
- Run required commands in the terminal
Frontend Access
- Access to the web application’s frontend source code
- Ability to modify component files (e.g., App.js)
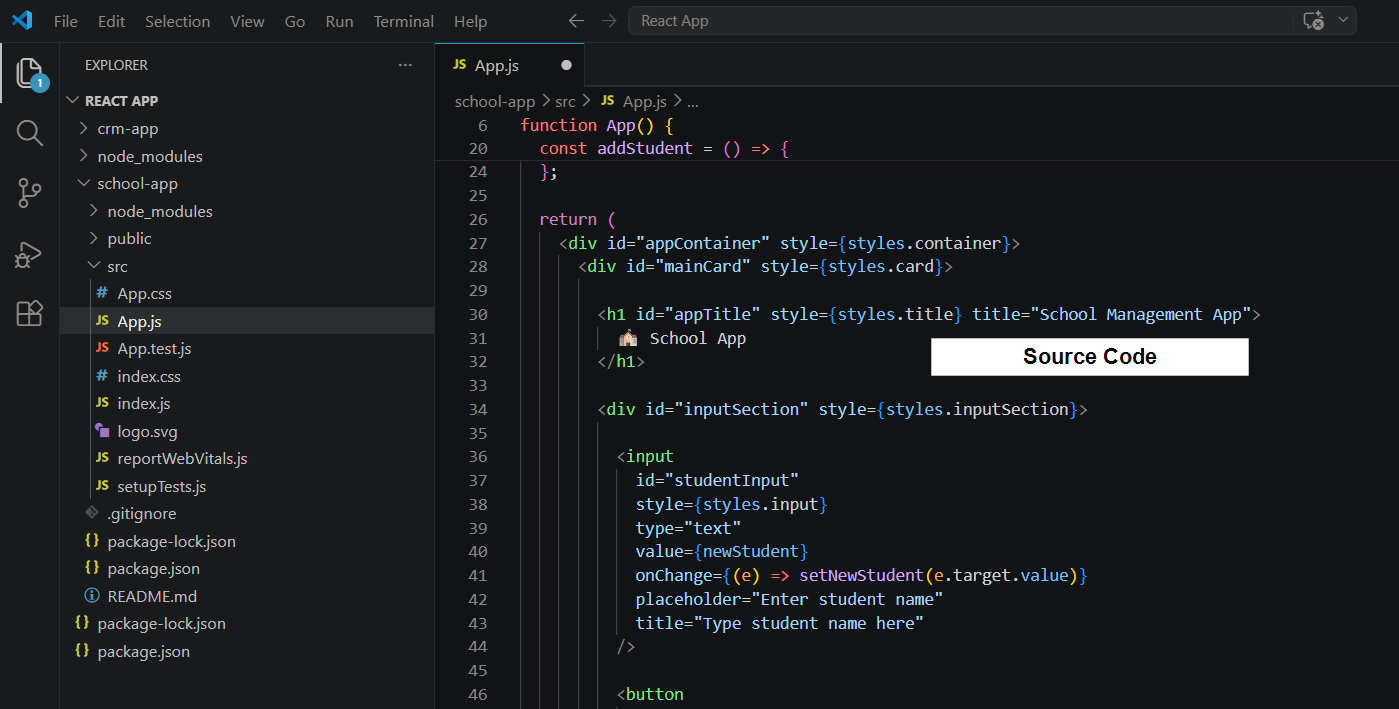
Screen- source code of web App (Project)
Screen- Source Code of web App
PagePilot Workspace
- Workspace/application created in PagePilot
- Application ID auto-generated and available
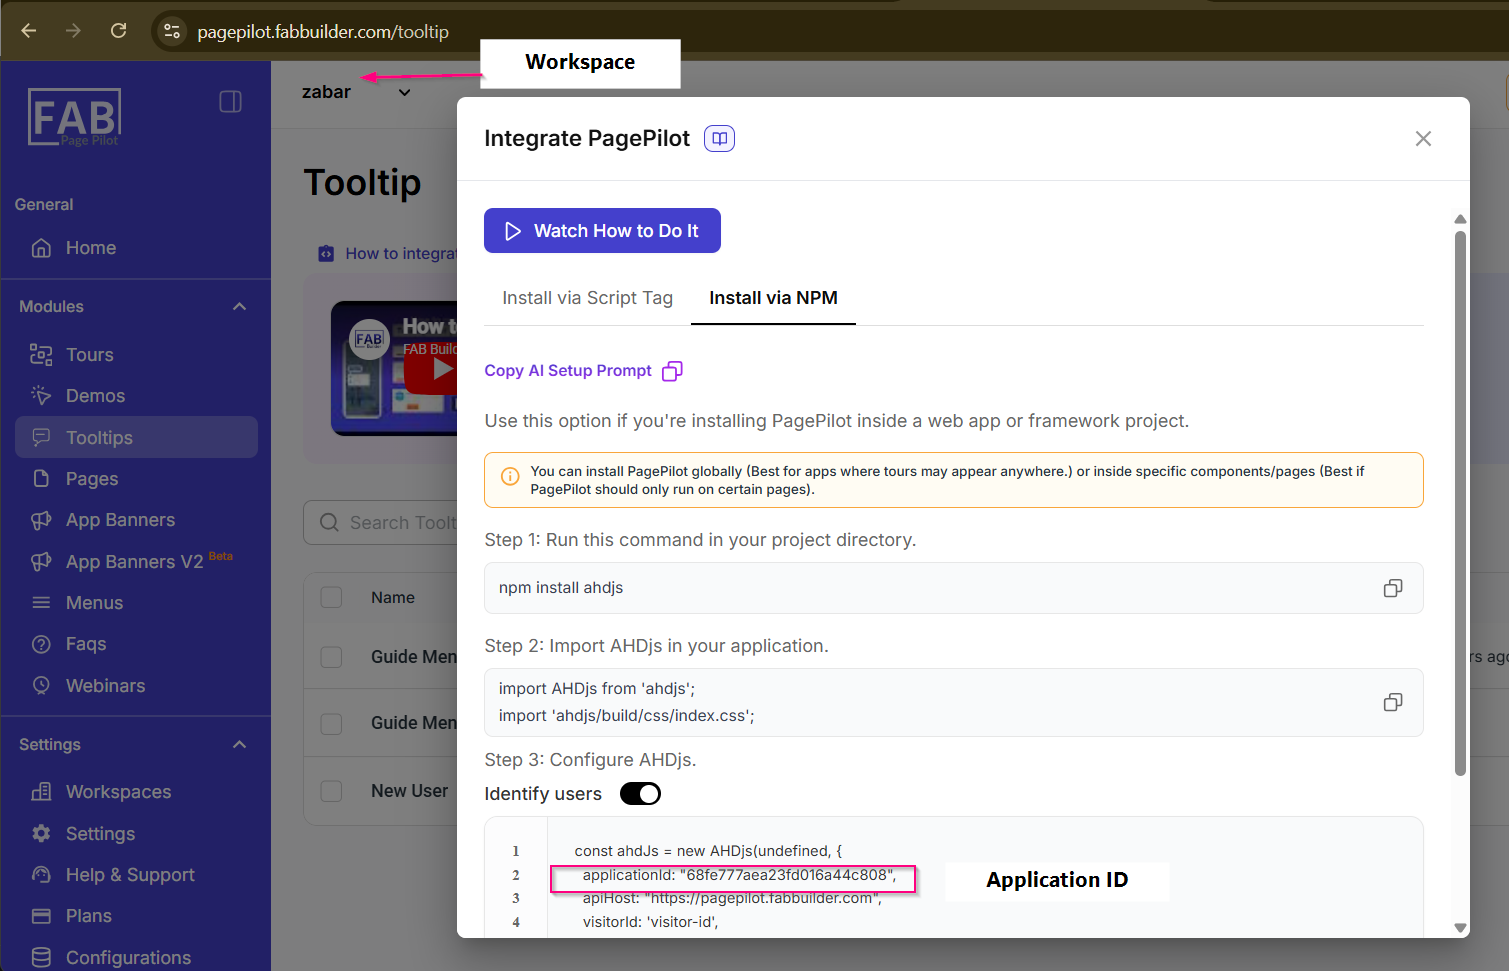
Screen- workspacee and Application Id
Access to A Created Tour
- Ensure that the tour is created in the PagePilot dashboard before starting the integration process.
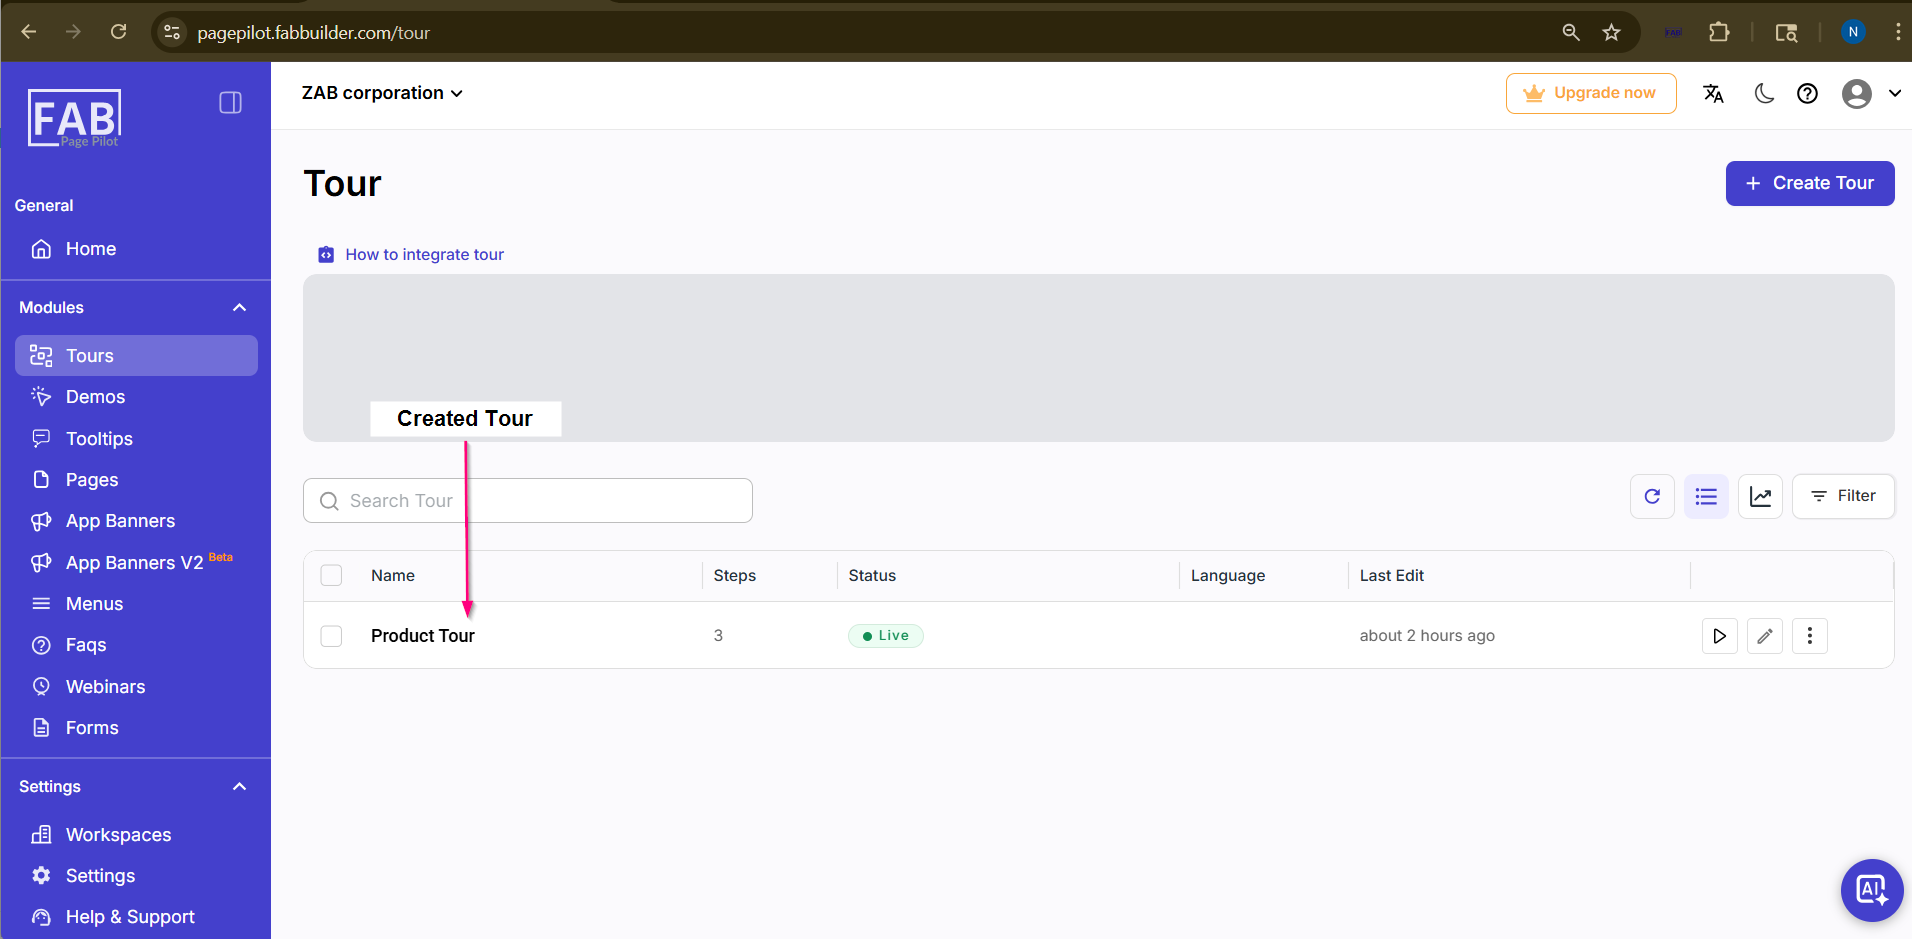
Screen- Created Tour
- Tooltip already created in PagePilot dashboard
Target Elements and Target Page
For puplishing the tooltip successfully user must have the follwing details.
- UI elements must have unique ID/class
- webapp url contains the taget page details
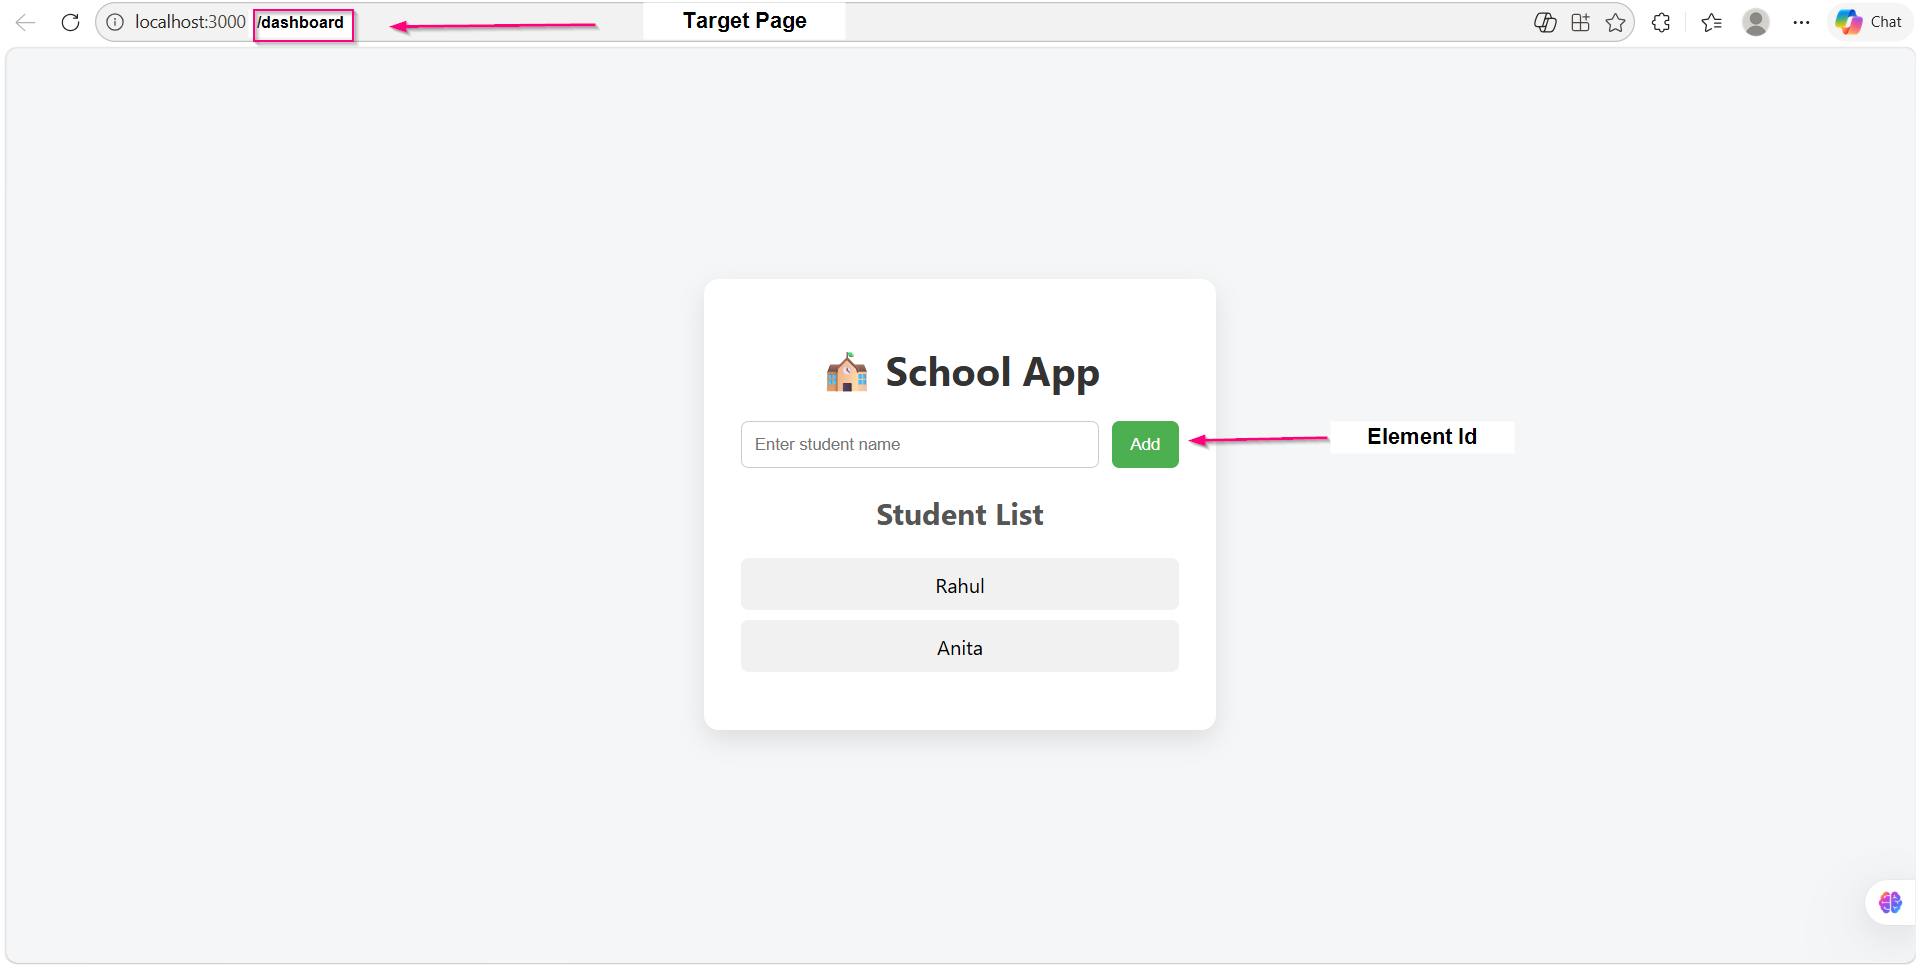
Screen - Details of Target Page and Element ID on web app page
PagePilot Dashboard Access
- Access to configure and publish tour
PagePilot Integration
After creating and setting up the application (e.g., a React project) in Visual Studio Code, the user must install the PagePilot package, add the required script, run the application, and perform validation to ensure successful integration.
Install PagePilot Package
1.Navigate to the Tour module in PagePilot
2. click Integrate Tour
3. select Install via NPM and copy the installation command.
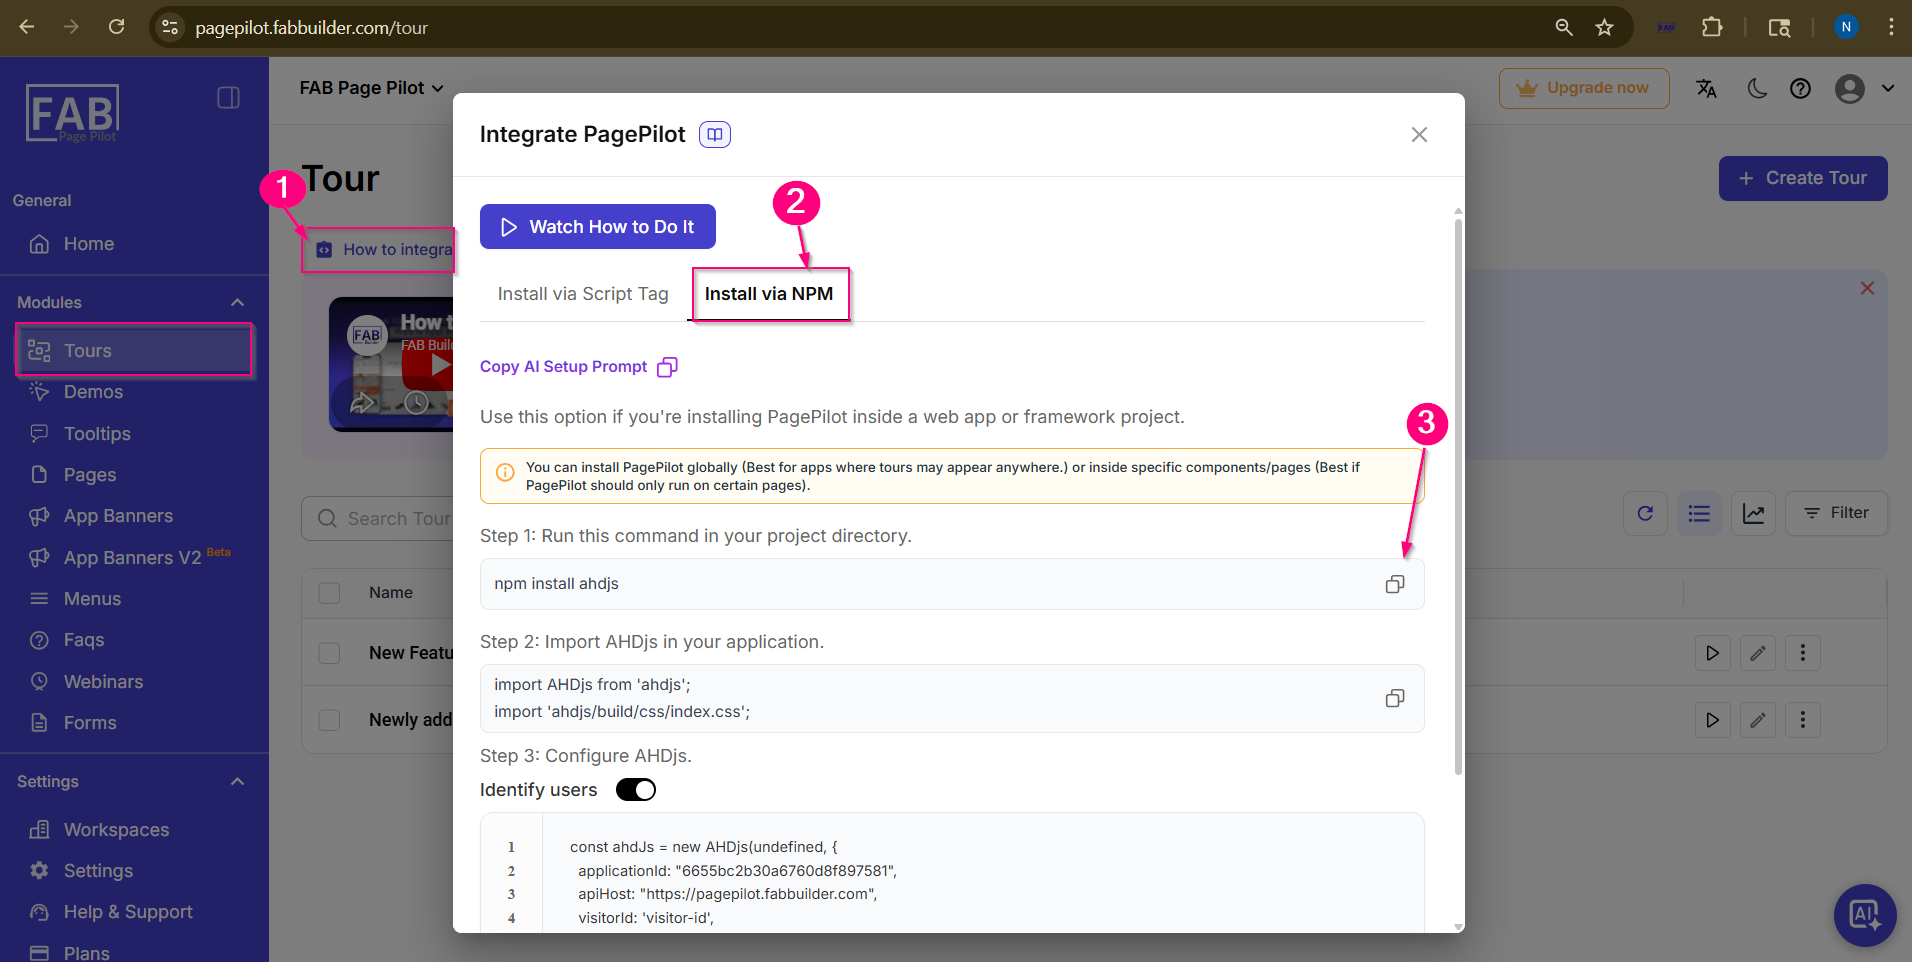
Screen - Steps to Copy NPM Package
4.Open the project terminal( on vs tool) and run the command: npm install ahdjs
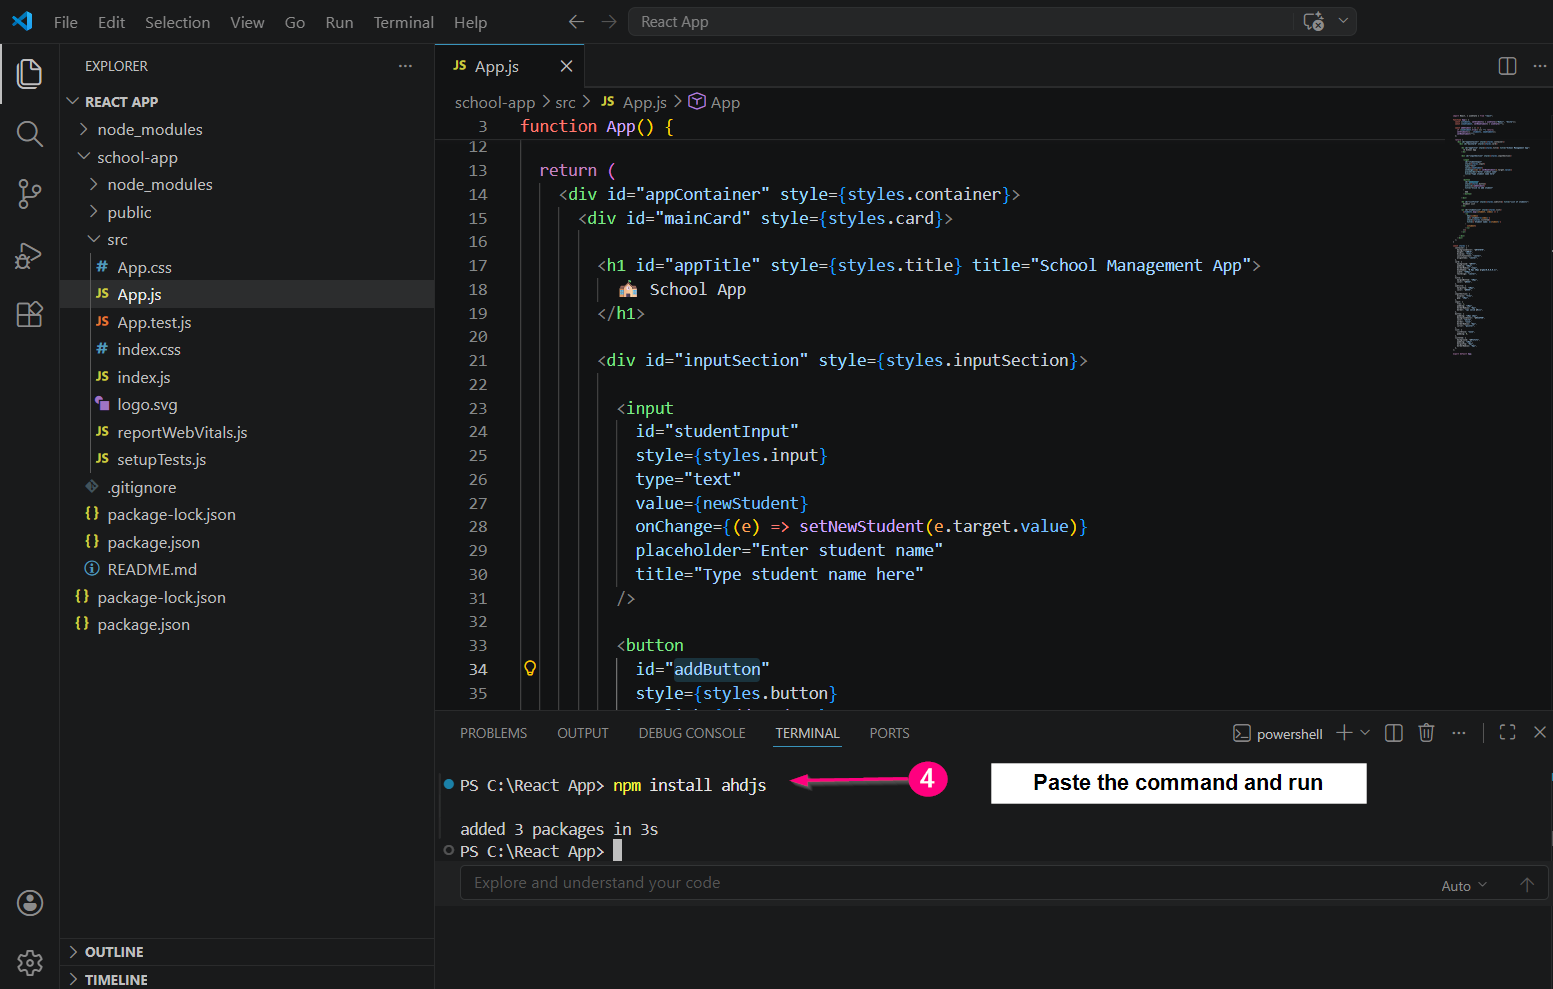
Screen- Add NPM package
Add Script
5.copy the AHDJ
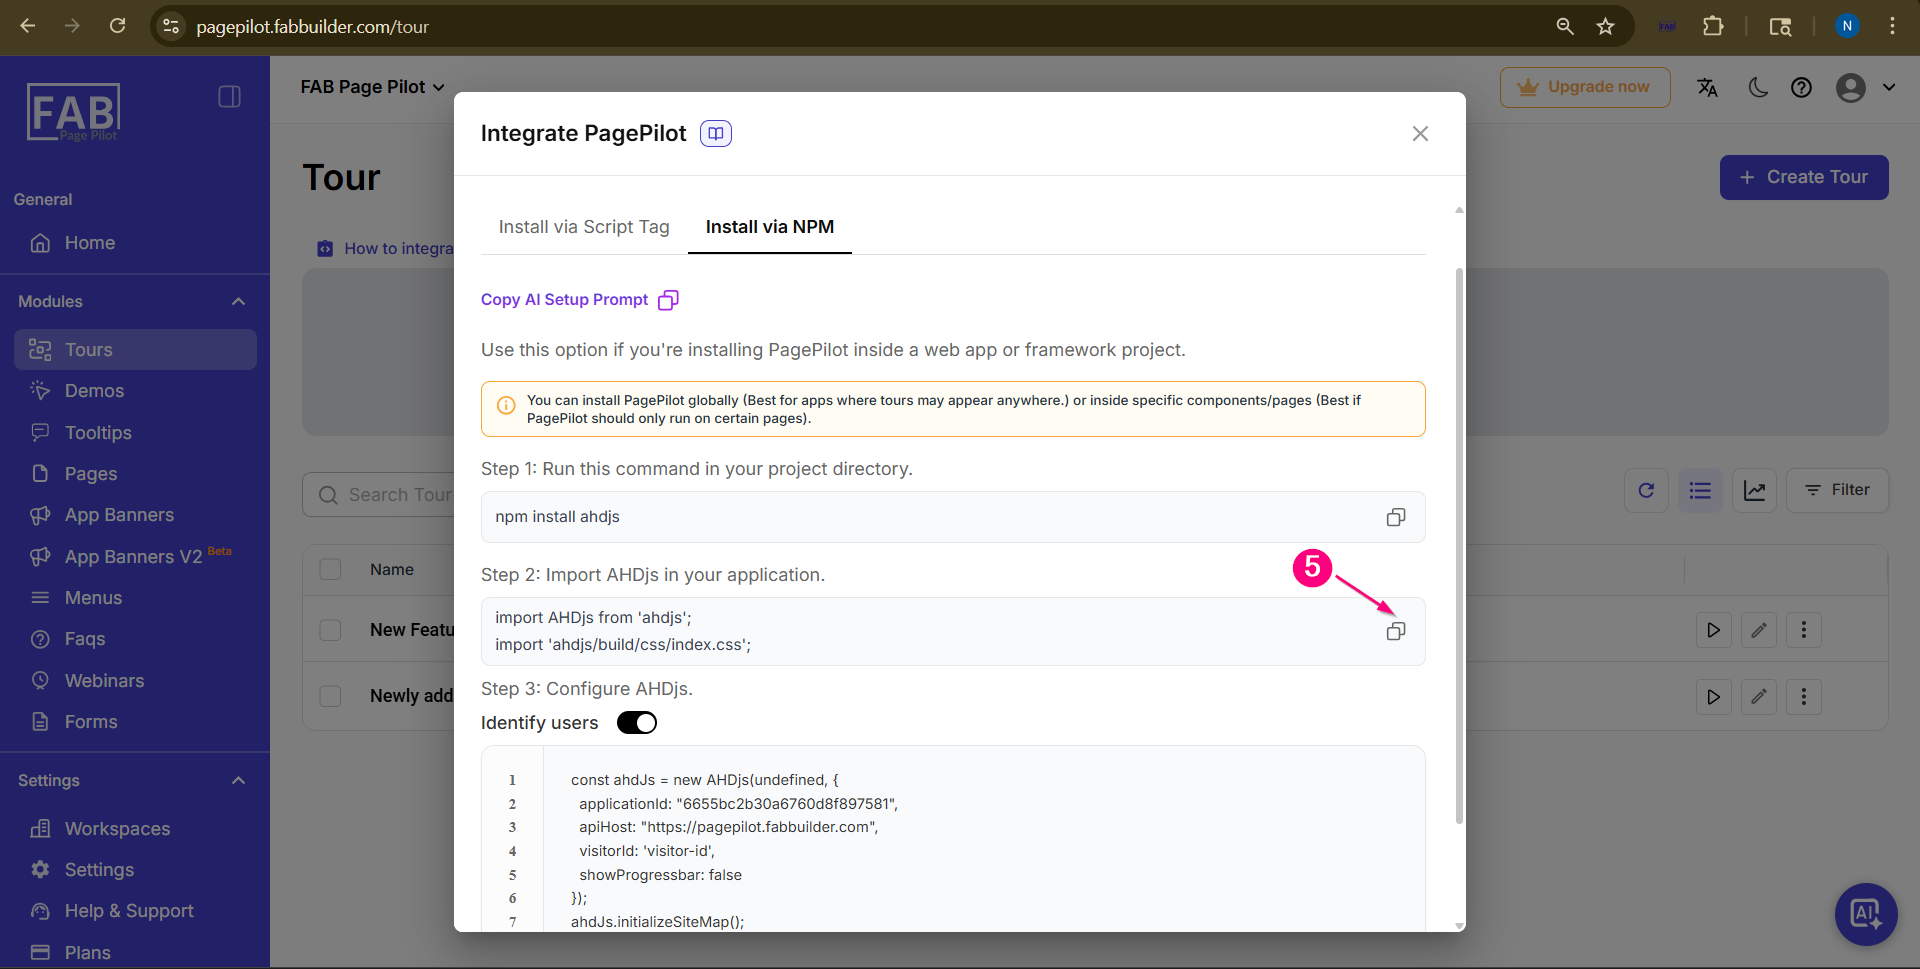
Screen- Copy the AHDJs
6.Import and configure the AHDjs script in your application code using the provided configuration details (Application ID, API host, etc.).
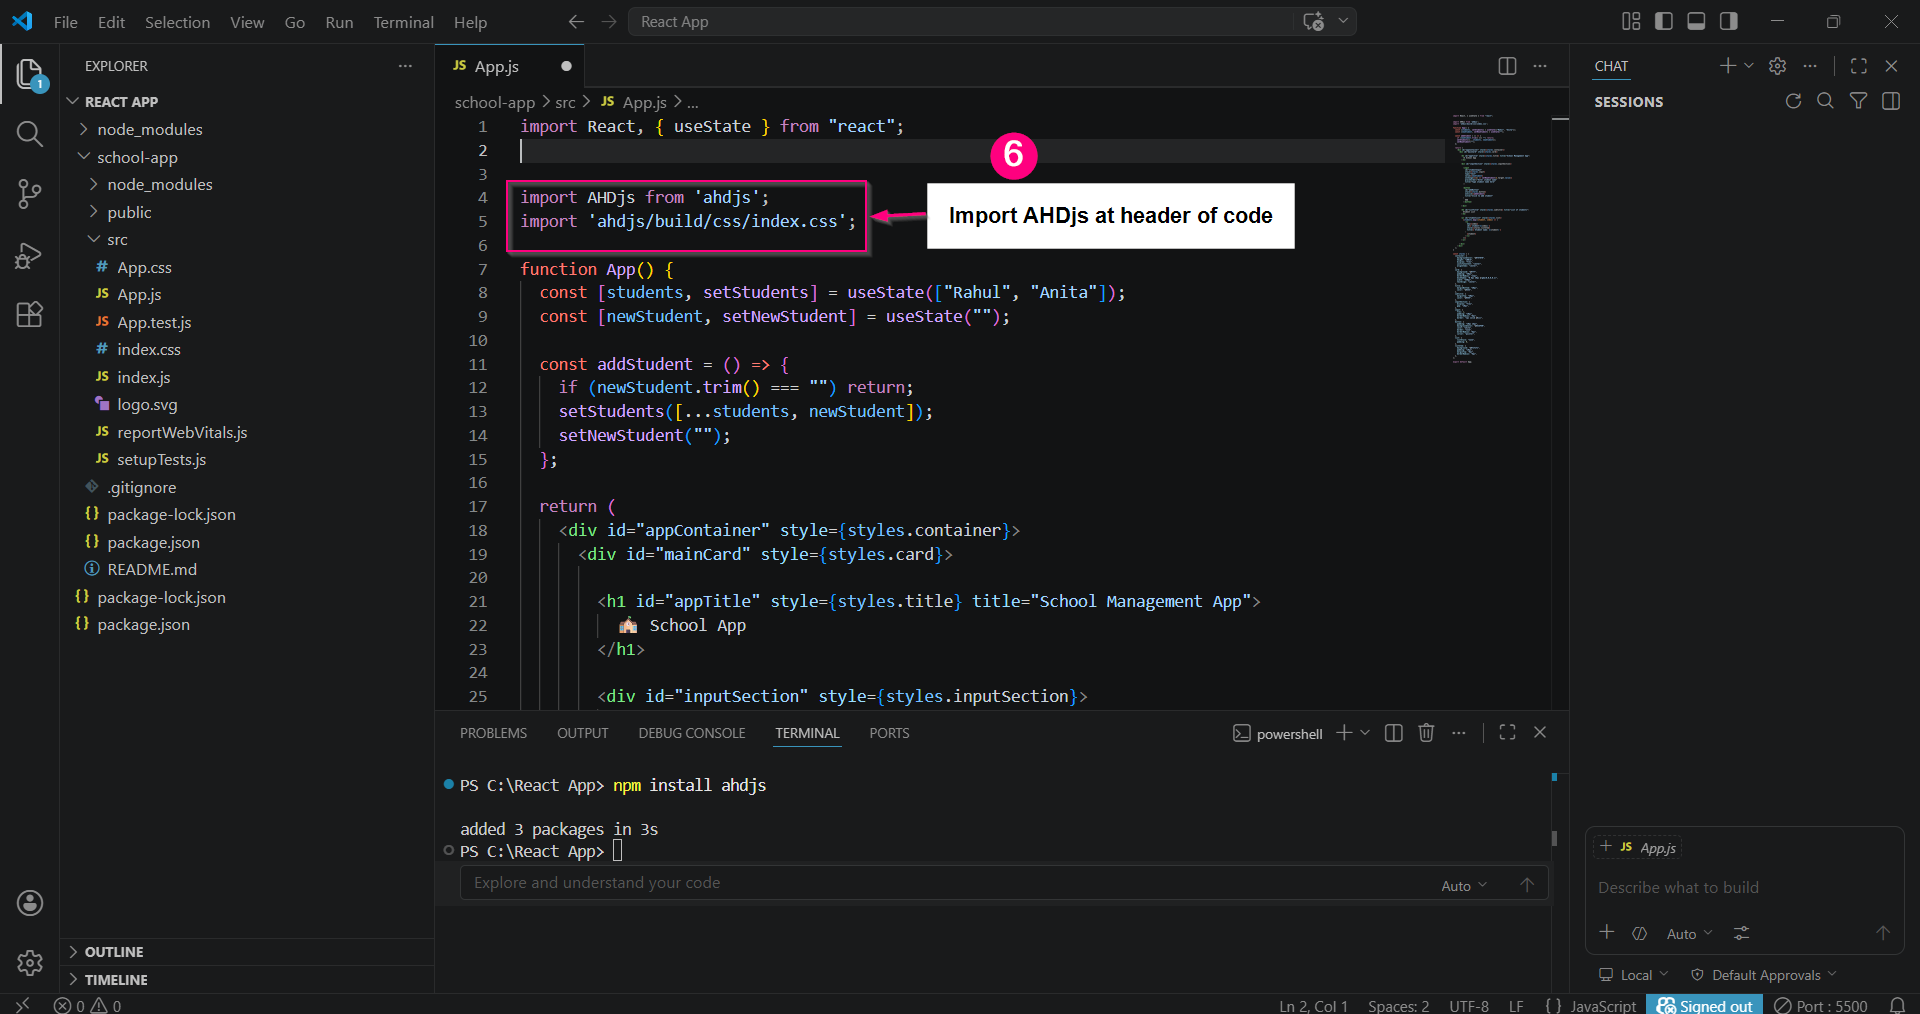
Screen- Import AHDjs
Copy Ahdjs
7.Copy the script
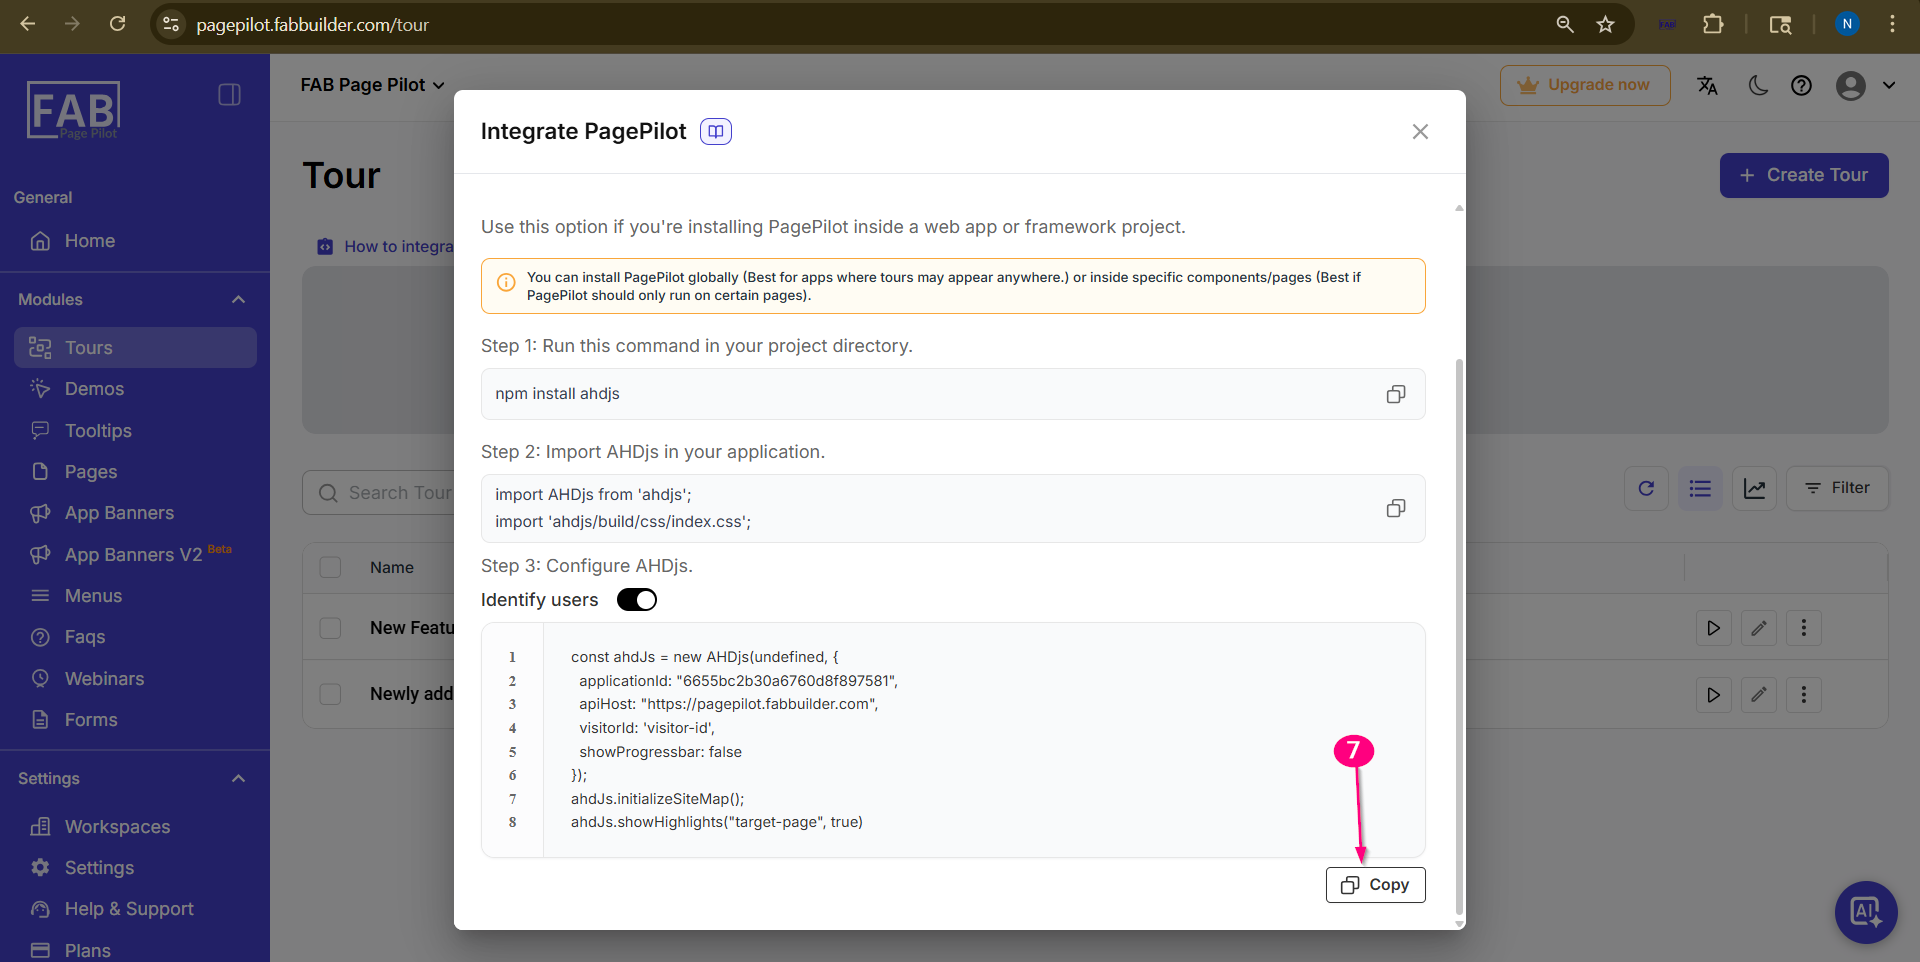
Screen- Copy script
8.Paste it source code inside the function.
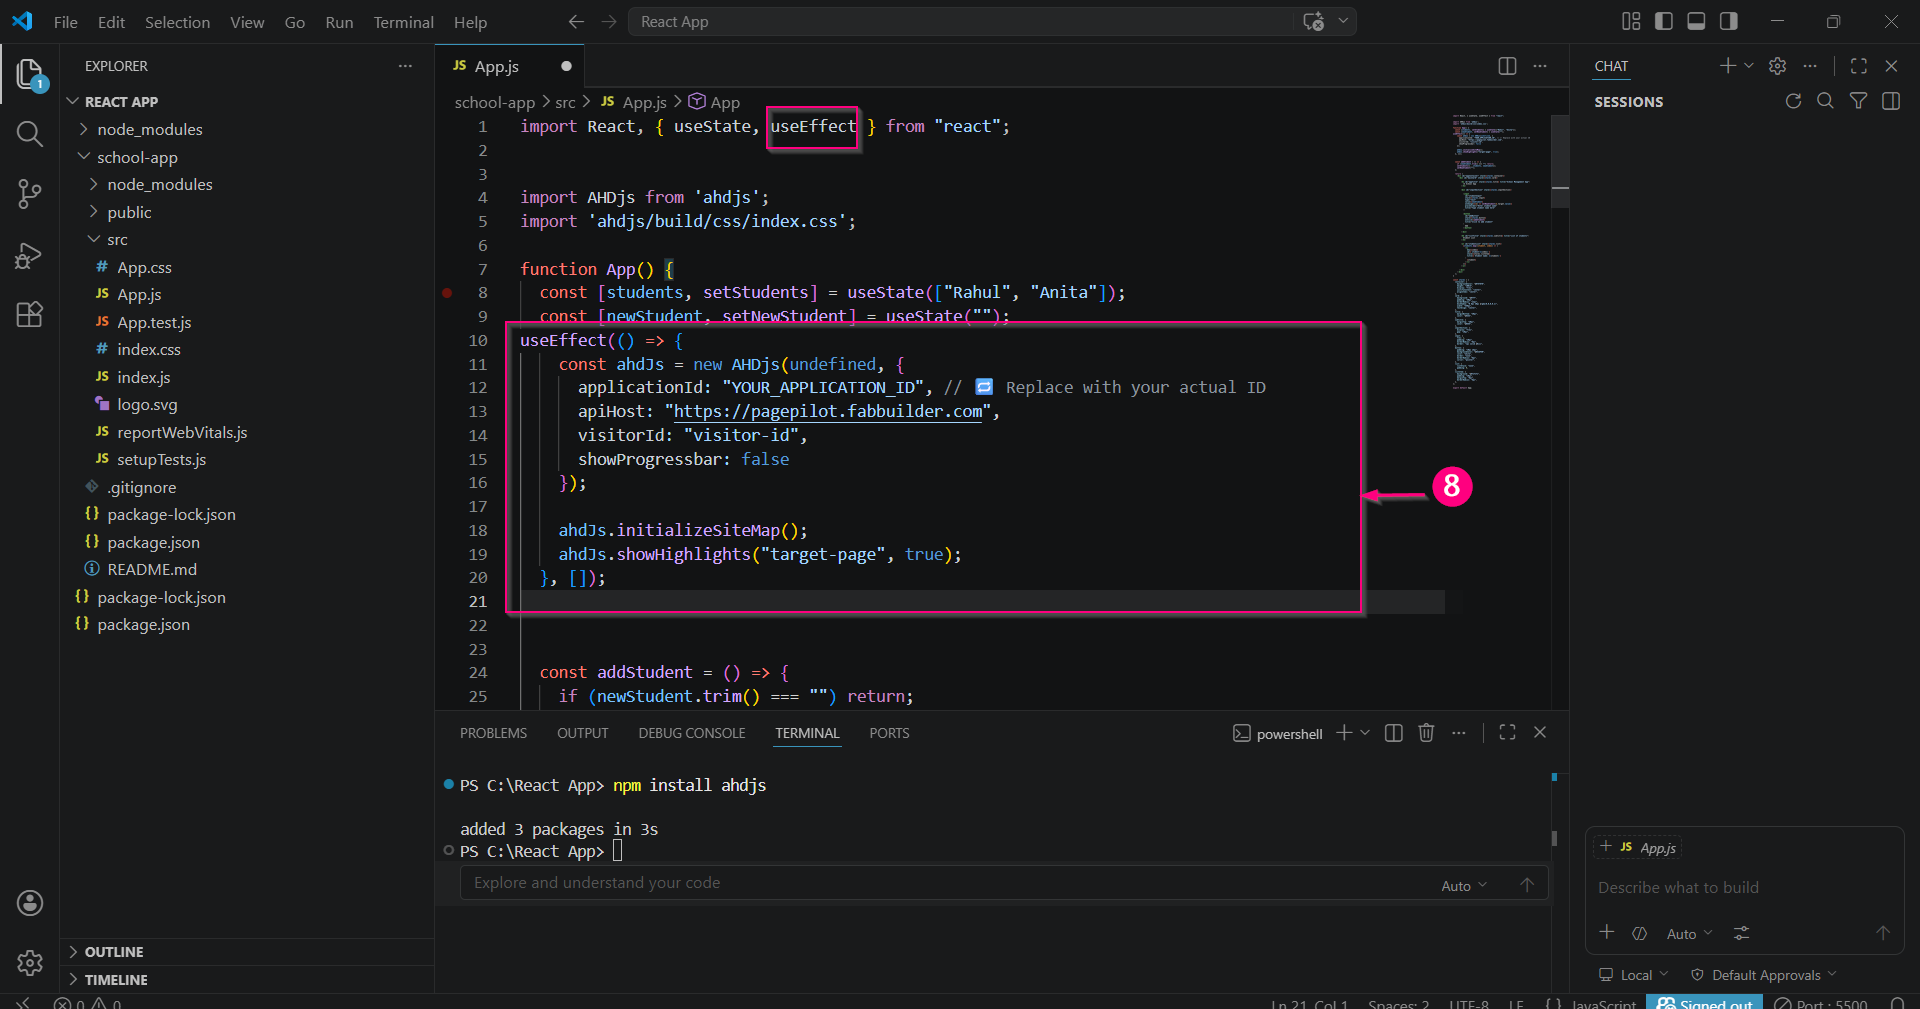
Screen-Add script
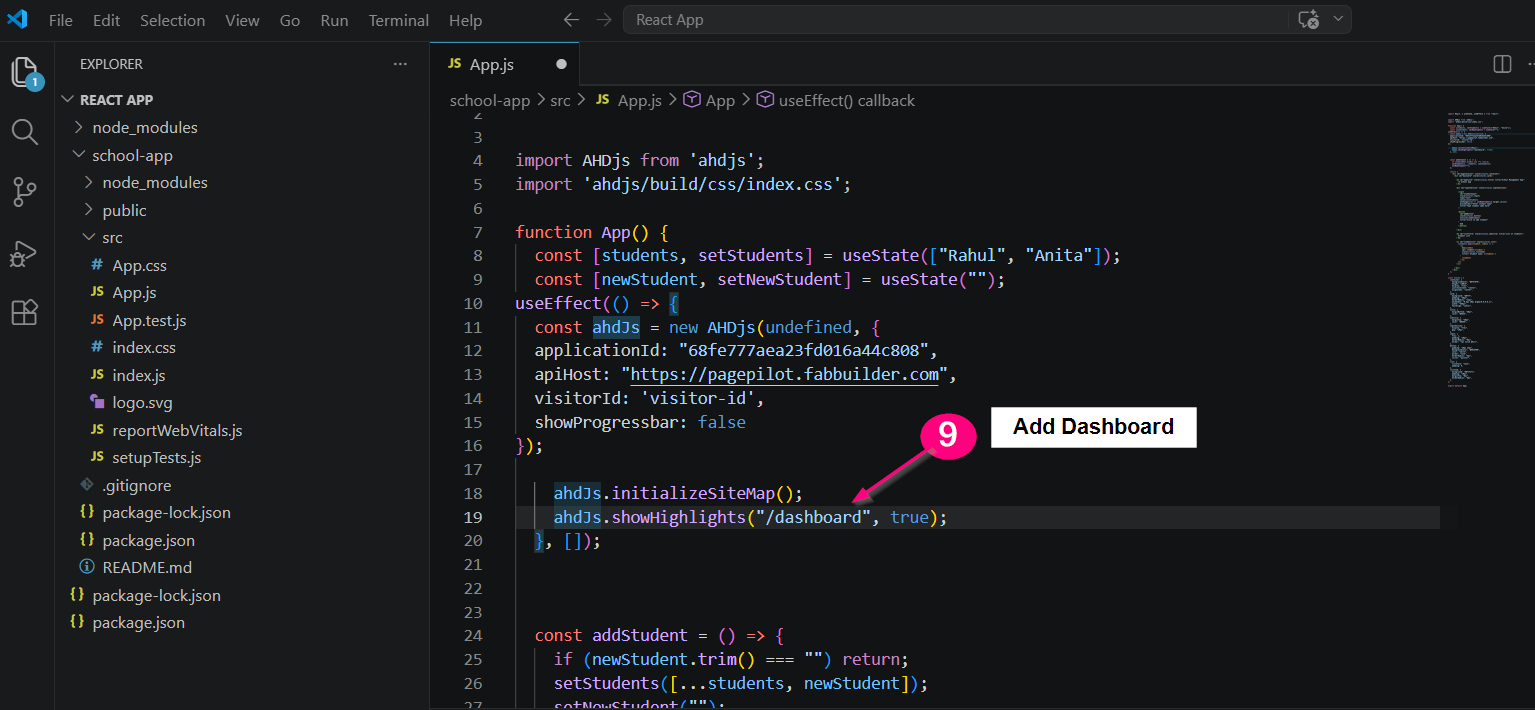
10.Add target page.(Here /dashboard is target page)
Screen-Add target page
Validate Integration
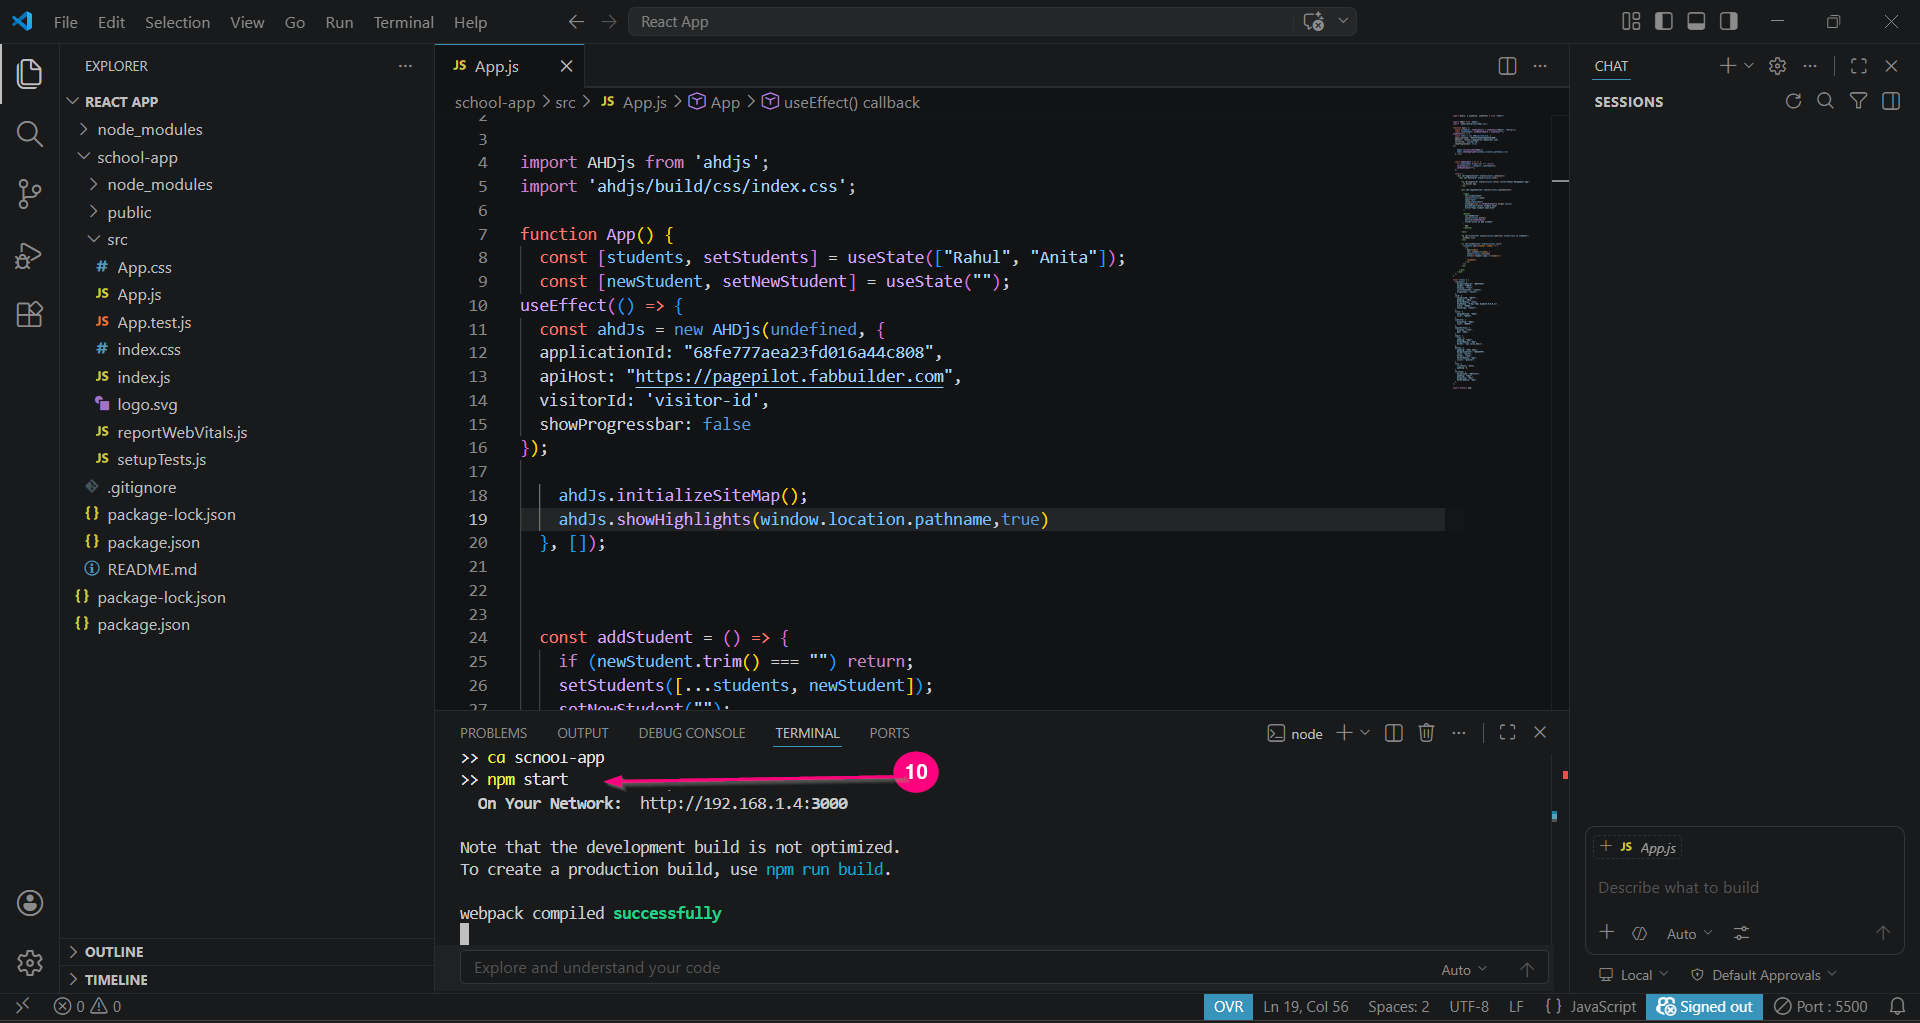
10.Run the application npm start on terminal.it complied sucessfully. User must open browser, go to:http://localhost:3000/dashboard and check your app UI.Now go to PagePilot and test your tour
Screen-Run npm
Configure Tooltip
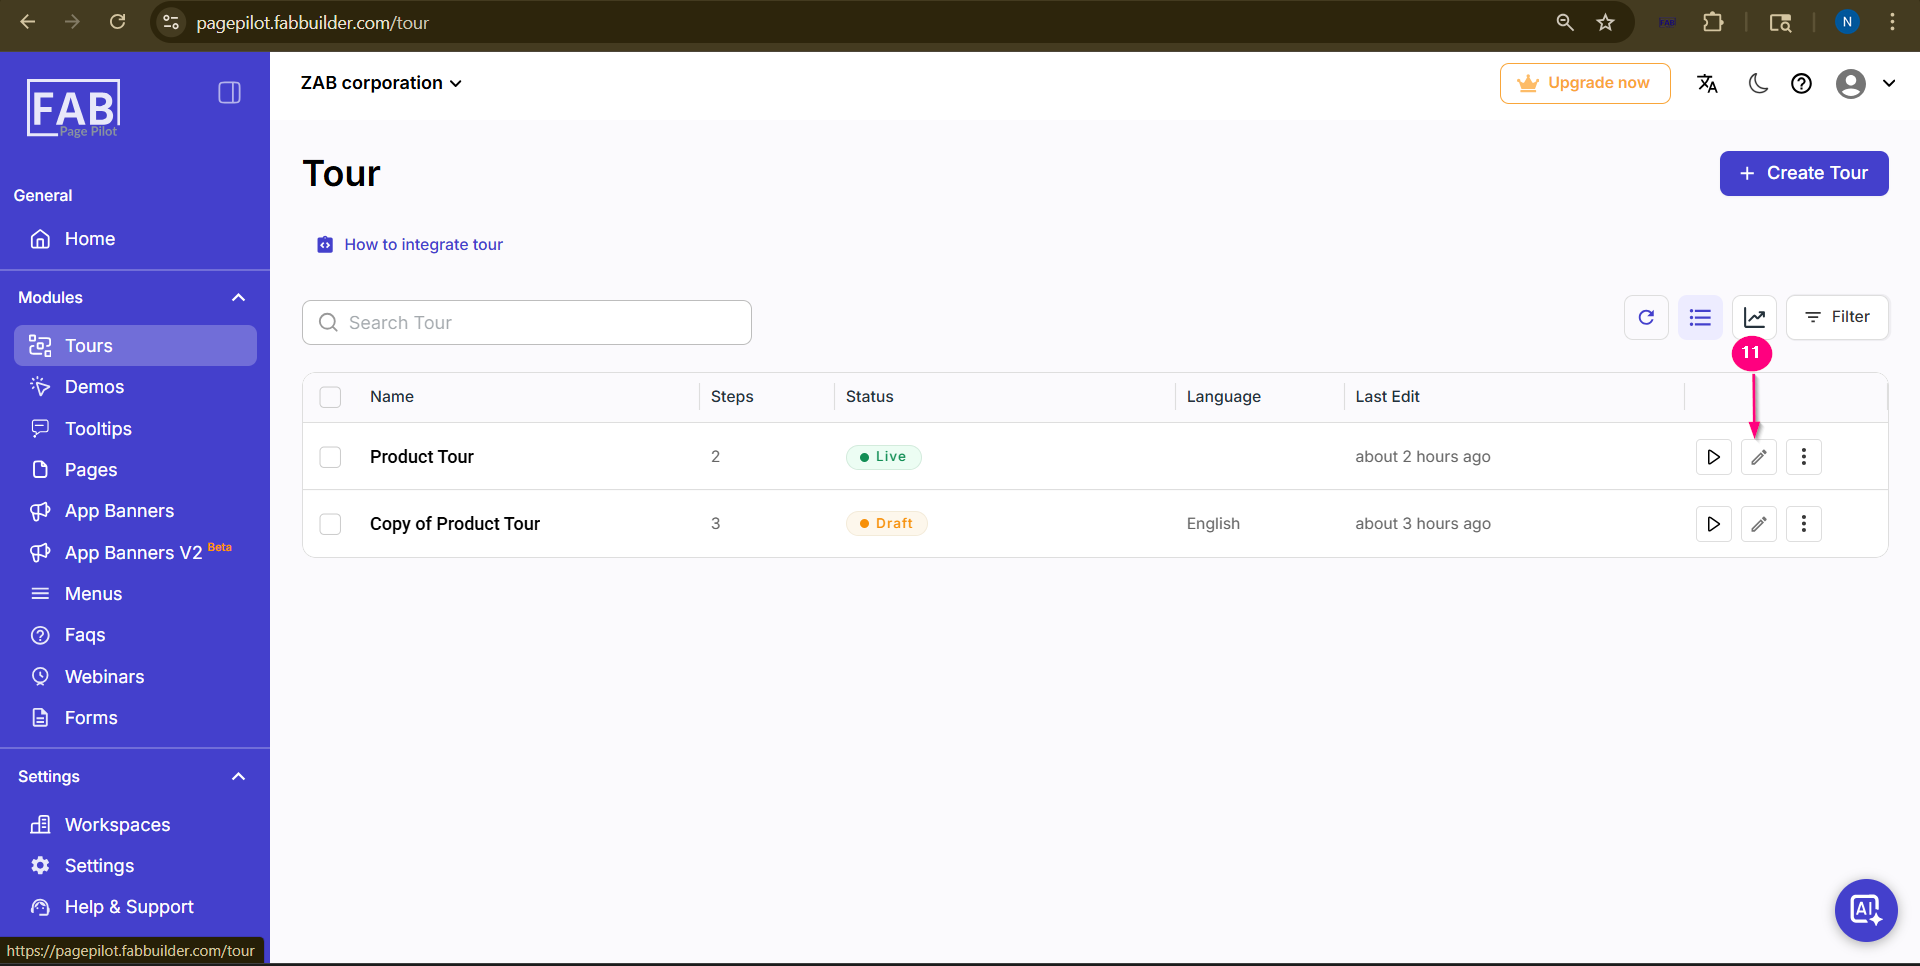
11.Go to PagePilot Dashboard .Click on edit button of created tour
Screen- Select Tour to Add element id and Target Page
Configure Tooltip Behaviour
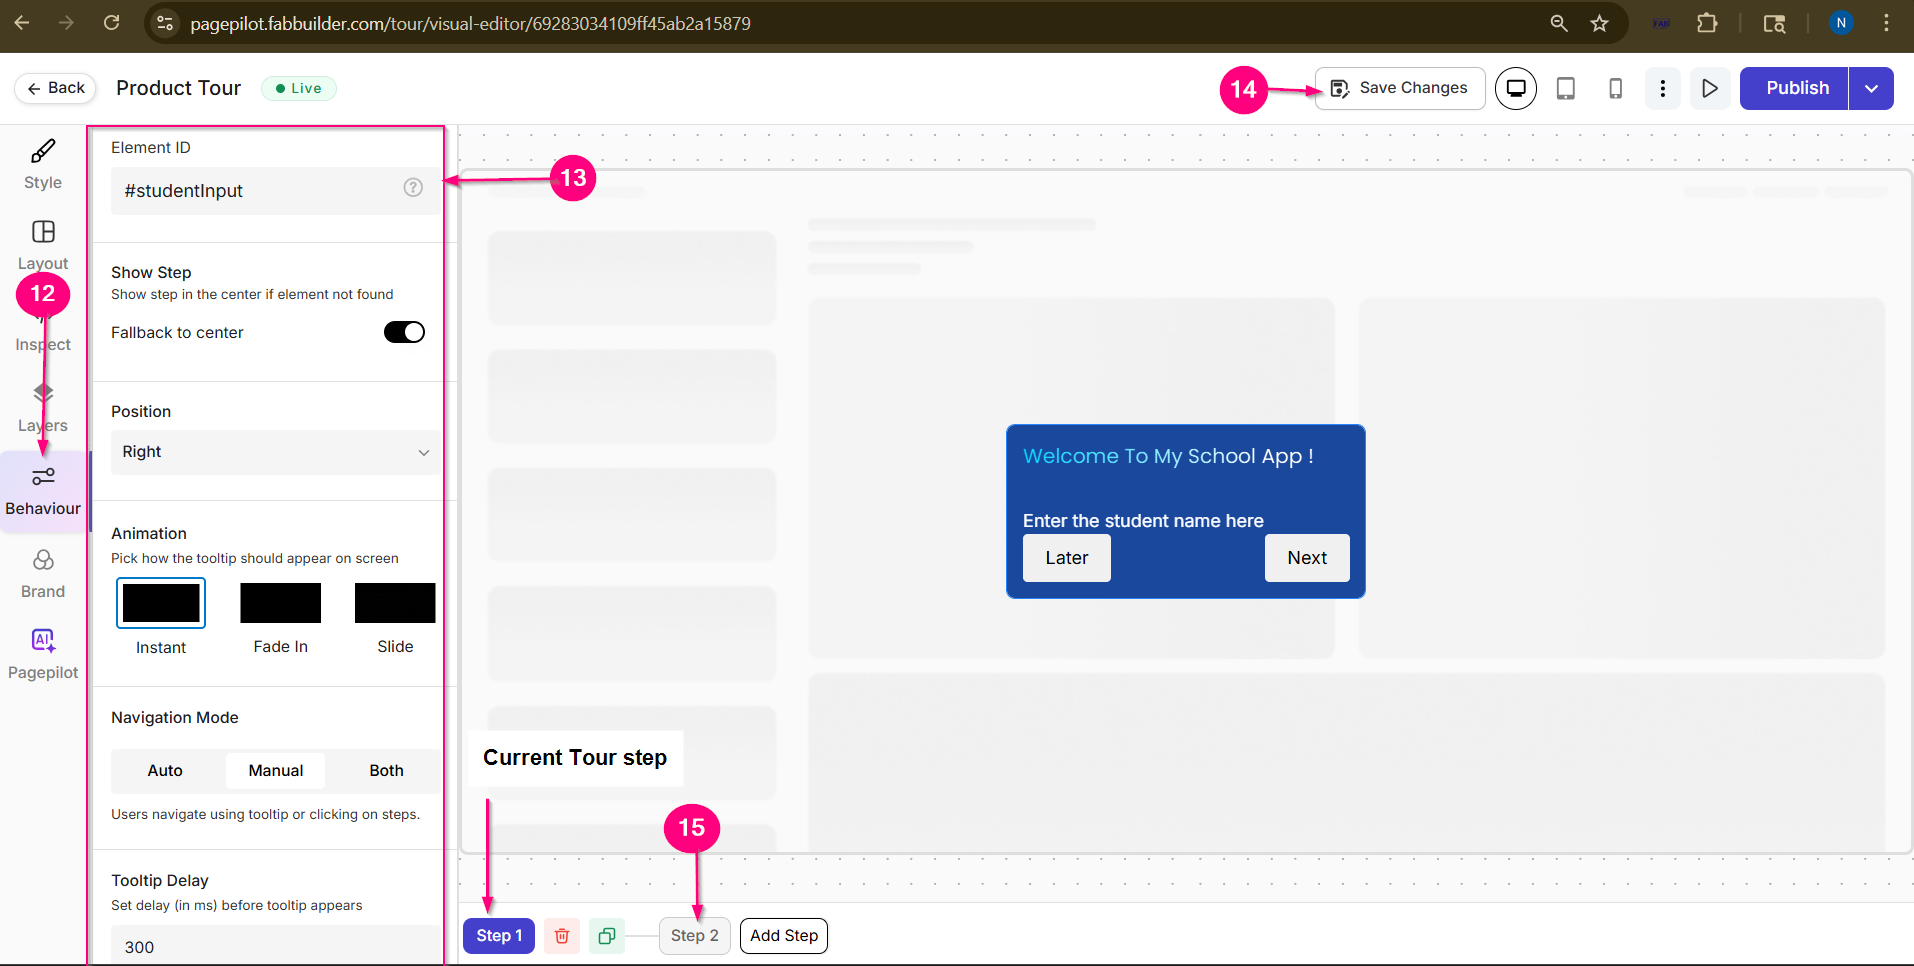
12.Navigate to the Behaviour section to define how the tooltip will be displayed.
Set options such as Position, Trigger Behaviour (e.g., On Hover), and configure Trigger Label and Icons as required.
13.Add Target Element id for tour tooltip step no 1 and other details.
14.Click on save change button .
15.Click on step 2 on tooltip visual editor screen.
Screen- Add Element ID and Configure Tour Tootltip step 1 Placement
16.Navigate to the Behaviour section to define how the tooltip will be displayed.
17.Add Target Element id for tour tooltip step no 2. and other details. User can add more step as required and follow the same step
18.Click on save change button .
19.Click Publish.Ensure status is Active
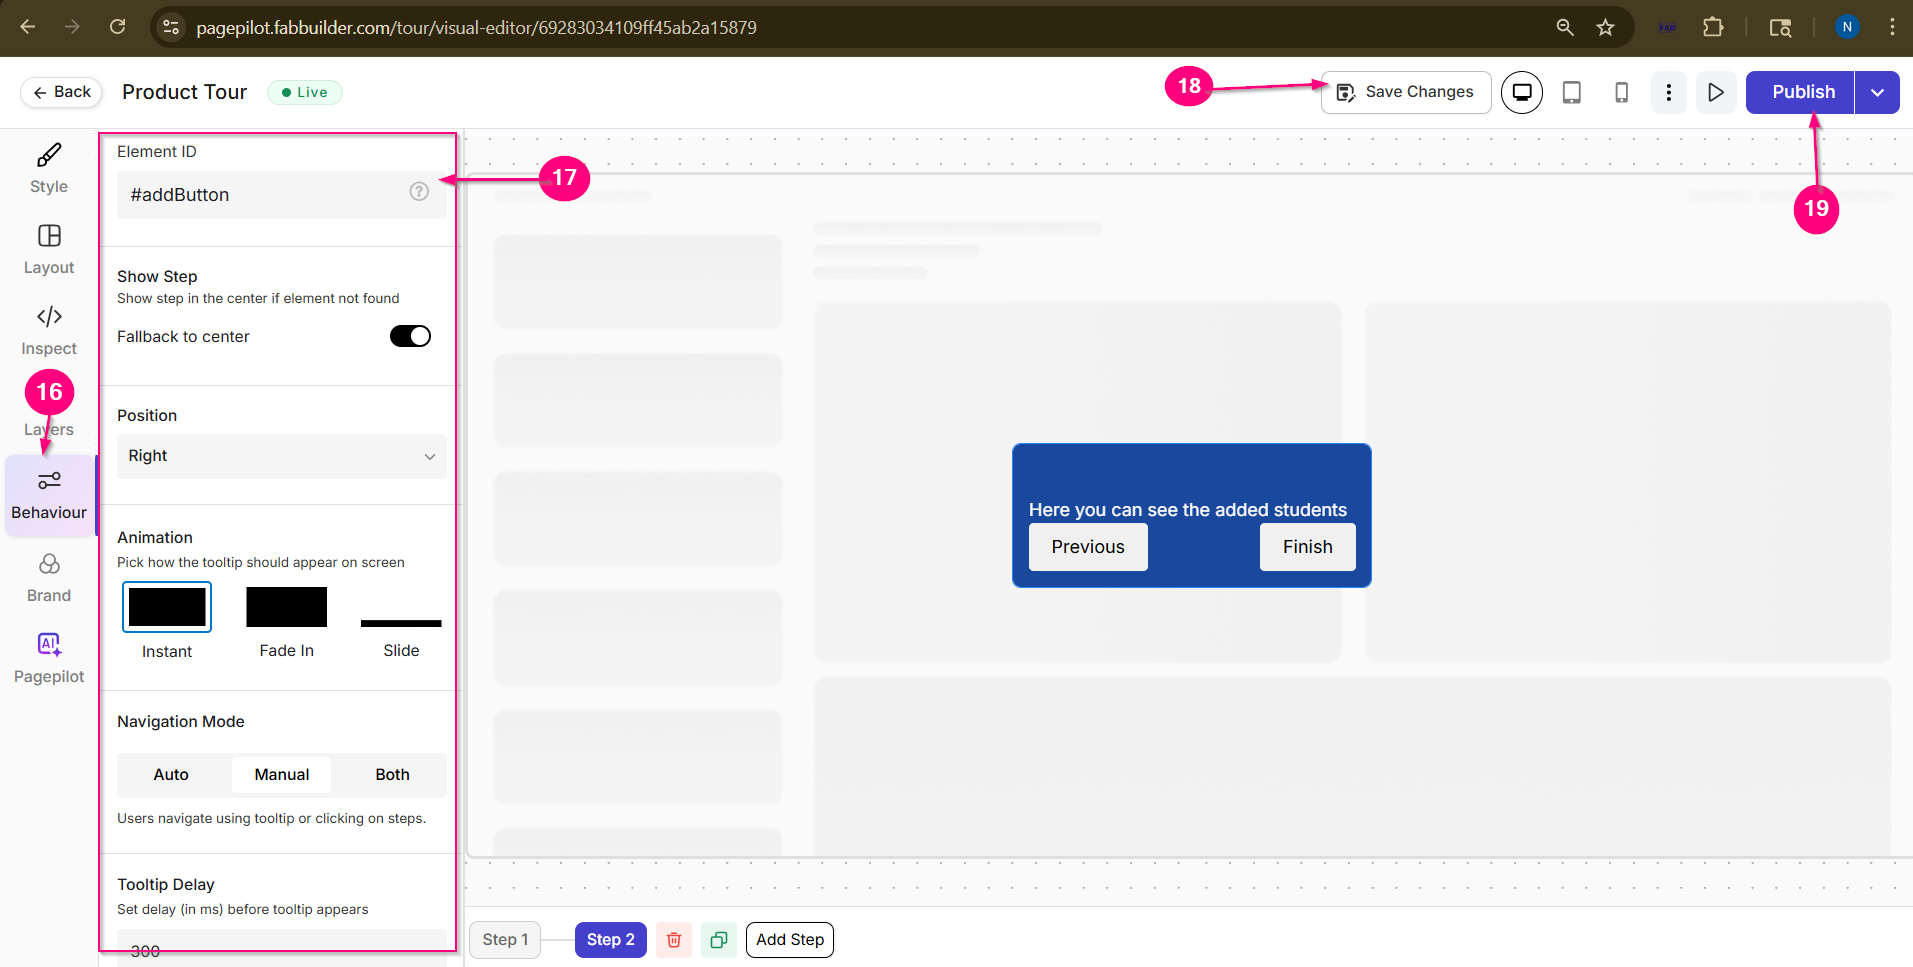
Screen
20.Add target page details as described in project or web page url with tooltip visibility setting details.
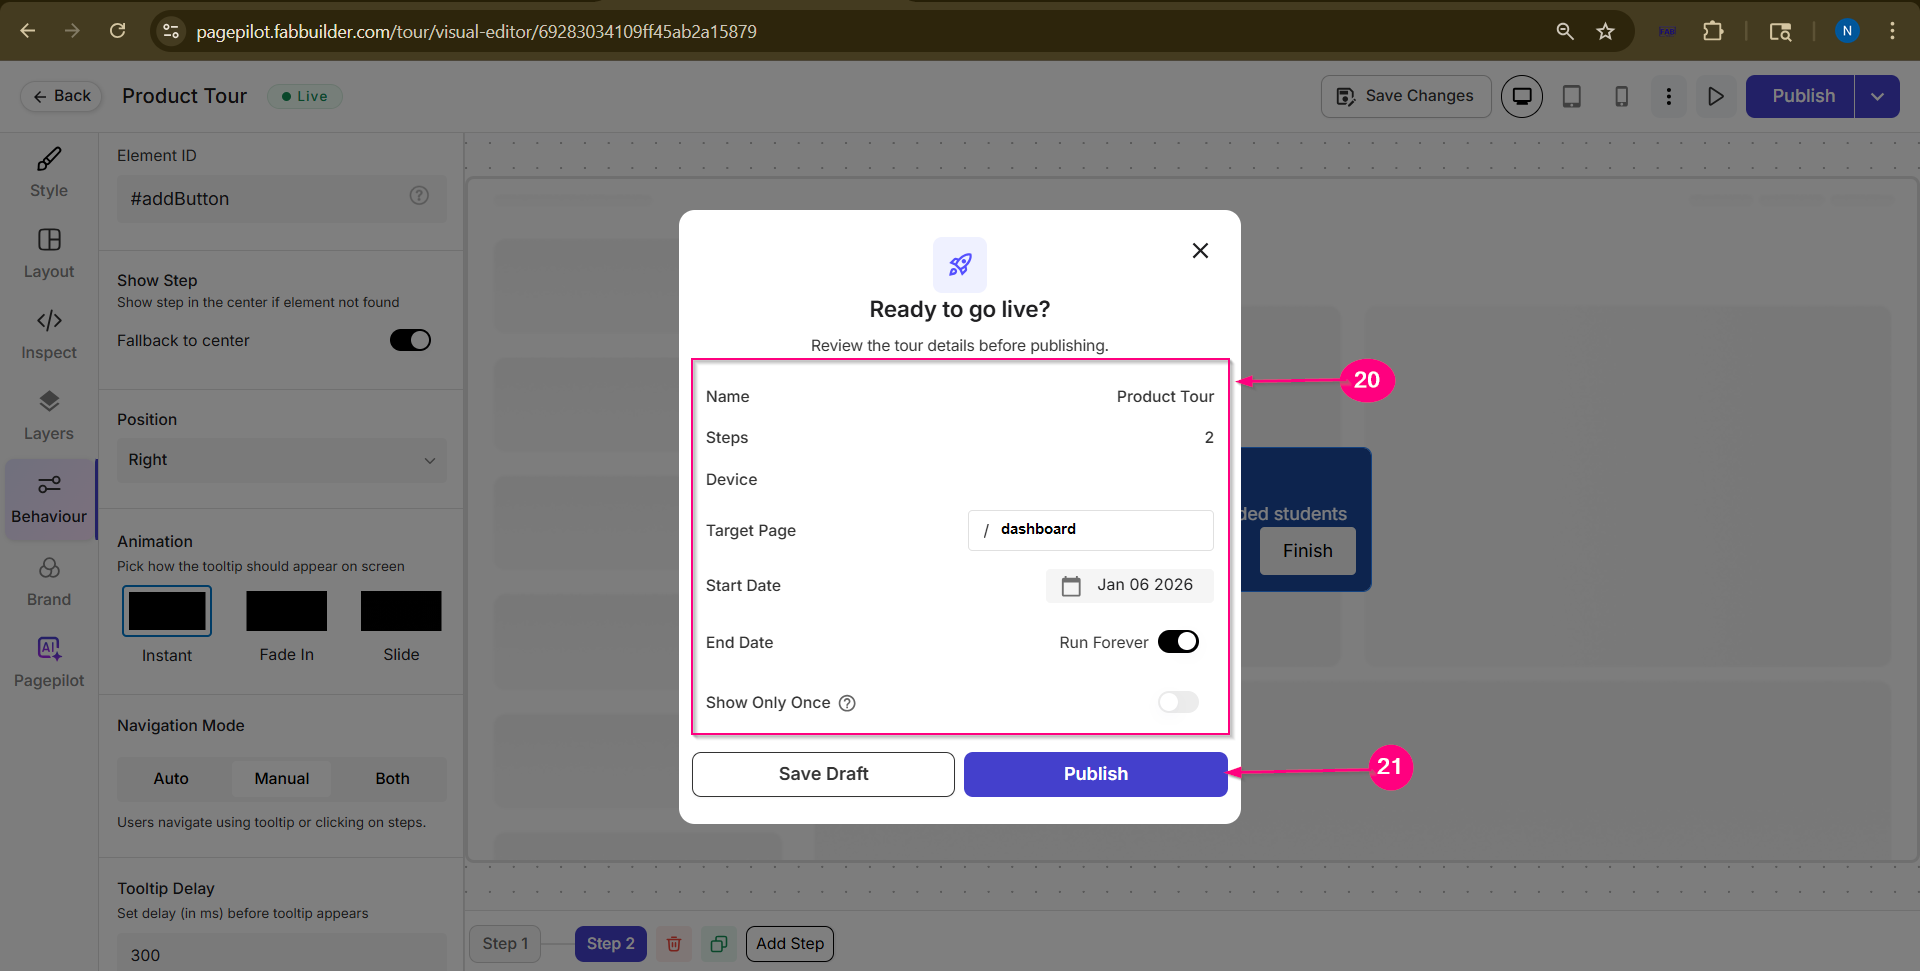
Screen- Add Target Page
21.Click on publish button.
User can view both steps in tour at the starting of the document after successful integration .
Summary
NPM integration involves:
Create Project → Install Package → Add Code → Run App → Configure → Publish
Best for dynamic applications
More flexible and scalable than script tag