Overview
Script Tag integration is the quickest way to connect PagePilot with a web application and display tour that have already been created in PagePilot
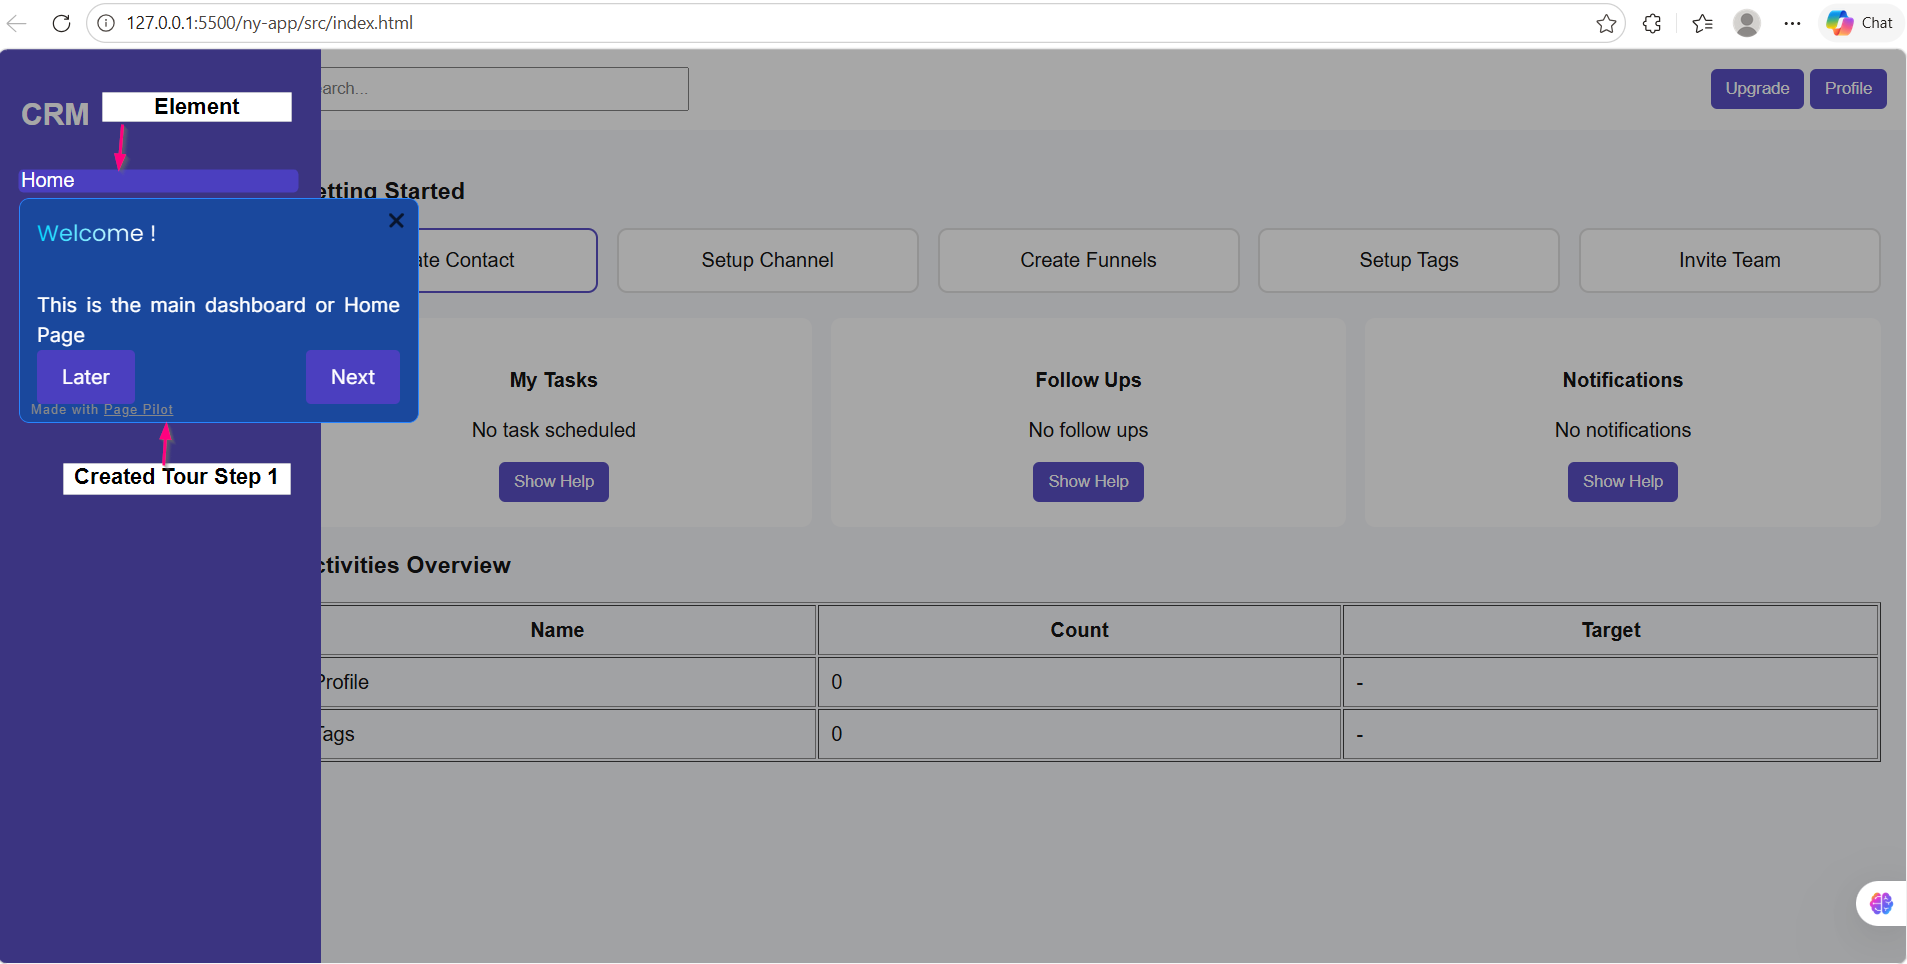
screen- Tour Published successfully post integration
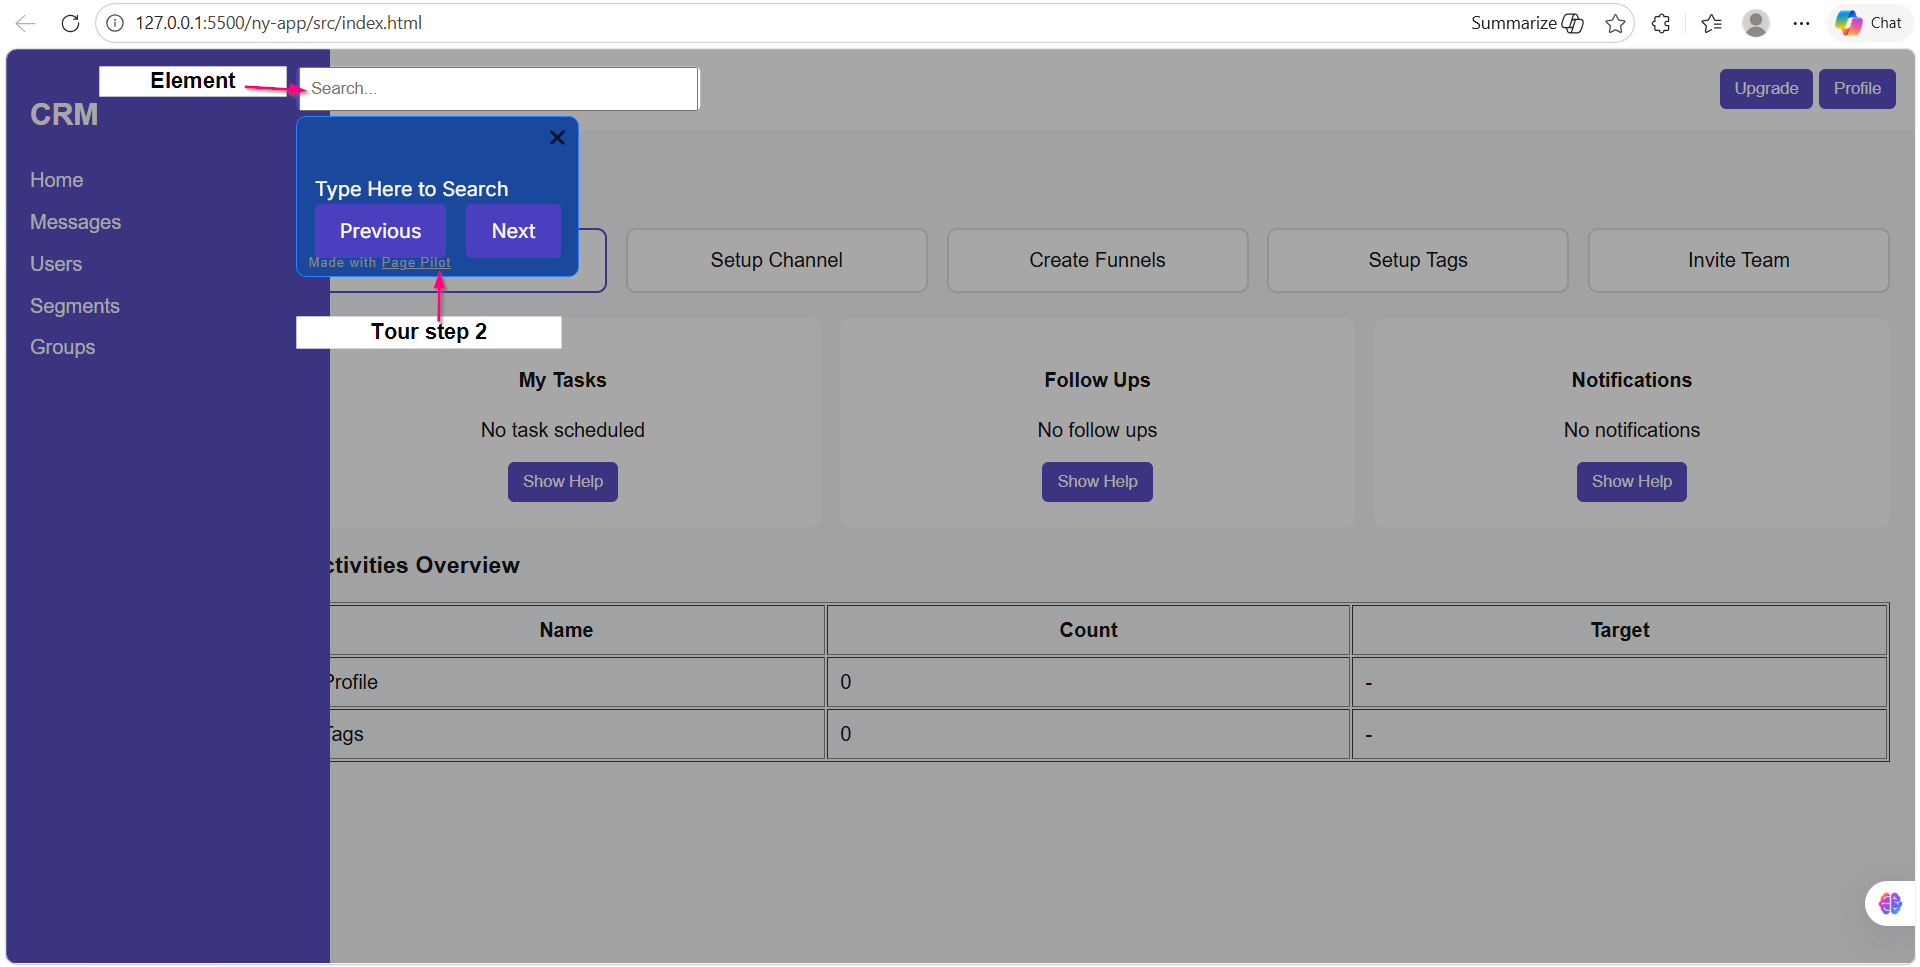
Screen- Tour step 2
Screen- Tour (steps) Published post Integration on Web App at different elements
In this method:
- You only need to copy script (code)from Page Pilot tool andpaste a script into web app HTML file
- No additional JavaScript coding is required
- PagePilot automatically loads and manages tours
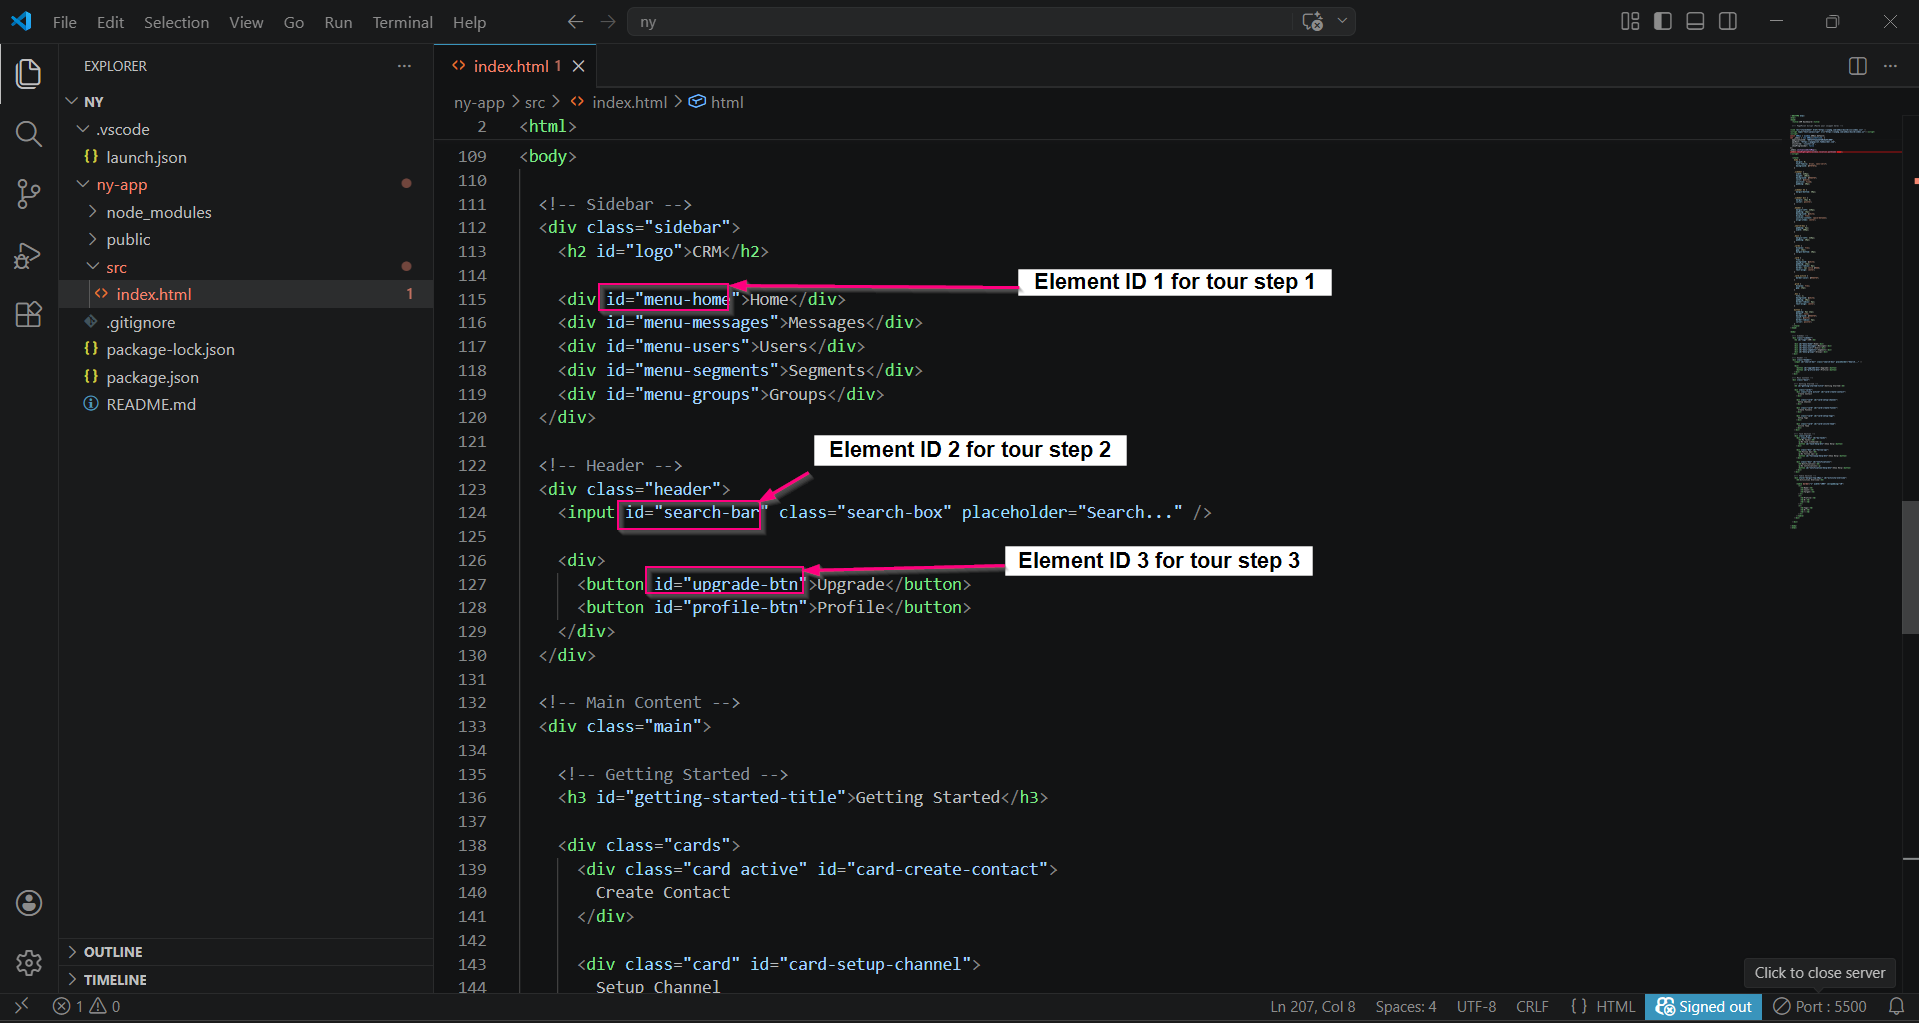
- These will be used as selectors for tour
Screen- Element Id /Identifier
Target Page Details
User should have details of target page to publish tour.user can get those details on web page url

Screen- Targel Page on web Page url
PagePilot Dashboard Access
- Access to configure and publish tour
Integration Steps
Access PagePilot Integration
Log in to your applicationhttps://pagepilot.fabbuilder
- Navigate to PagePilot Module
- Select the workspace(Here ZAB corporation is selected) where tooltip is created.
- ClickIntegrate PagePilot
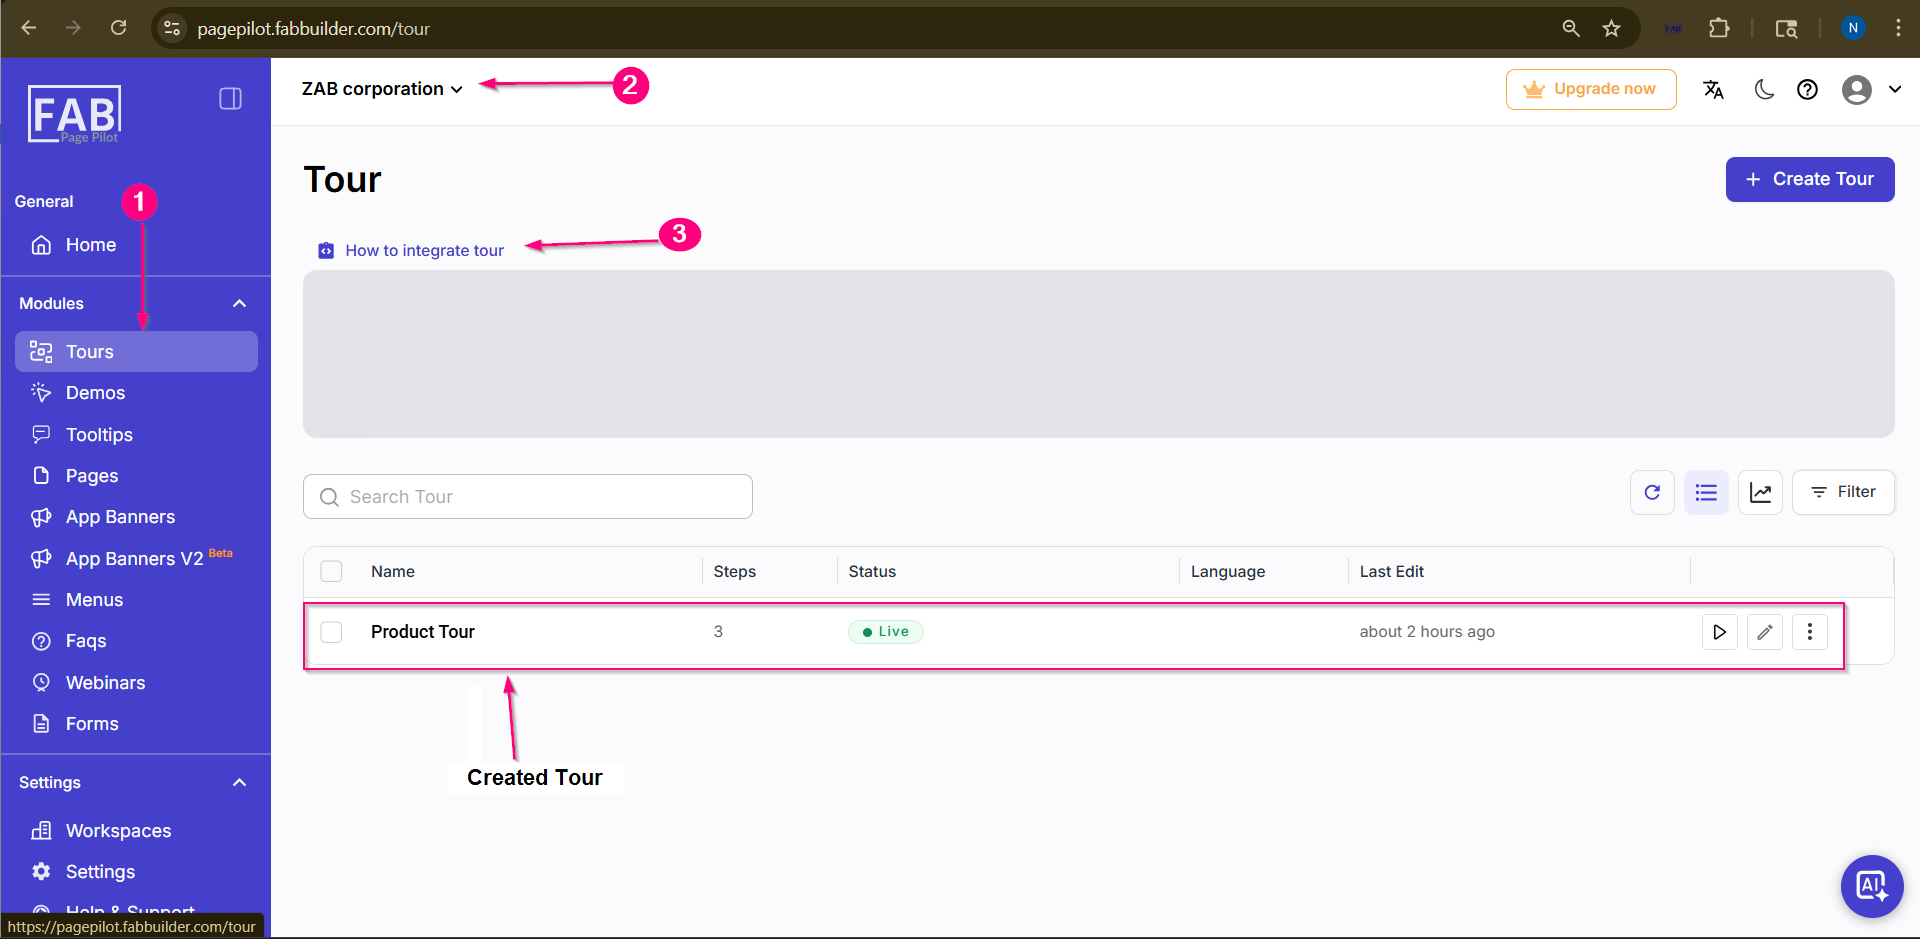
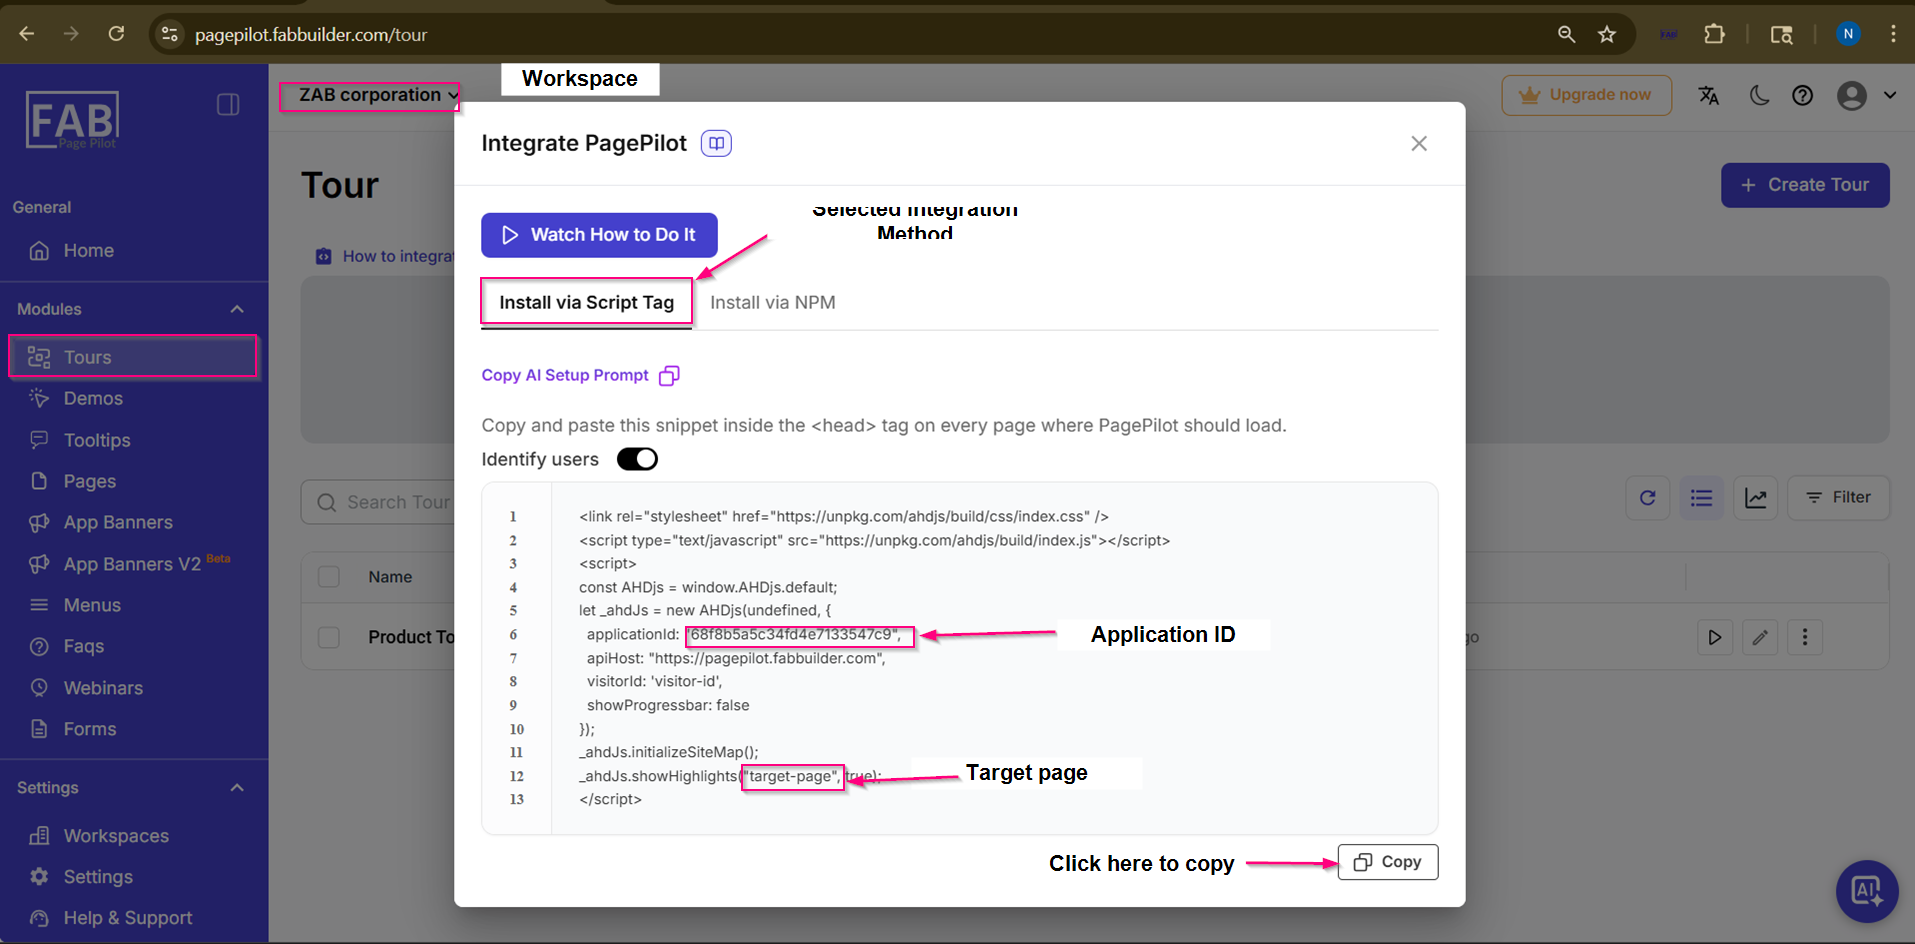
Screen- Steps to copy script
Copy Script Tag
4.Locate theScript Tag code.
5.ClickCopy Script.
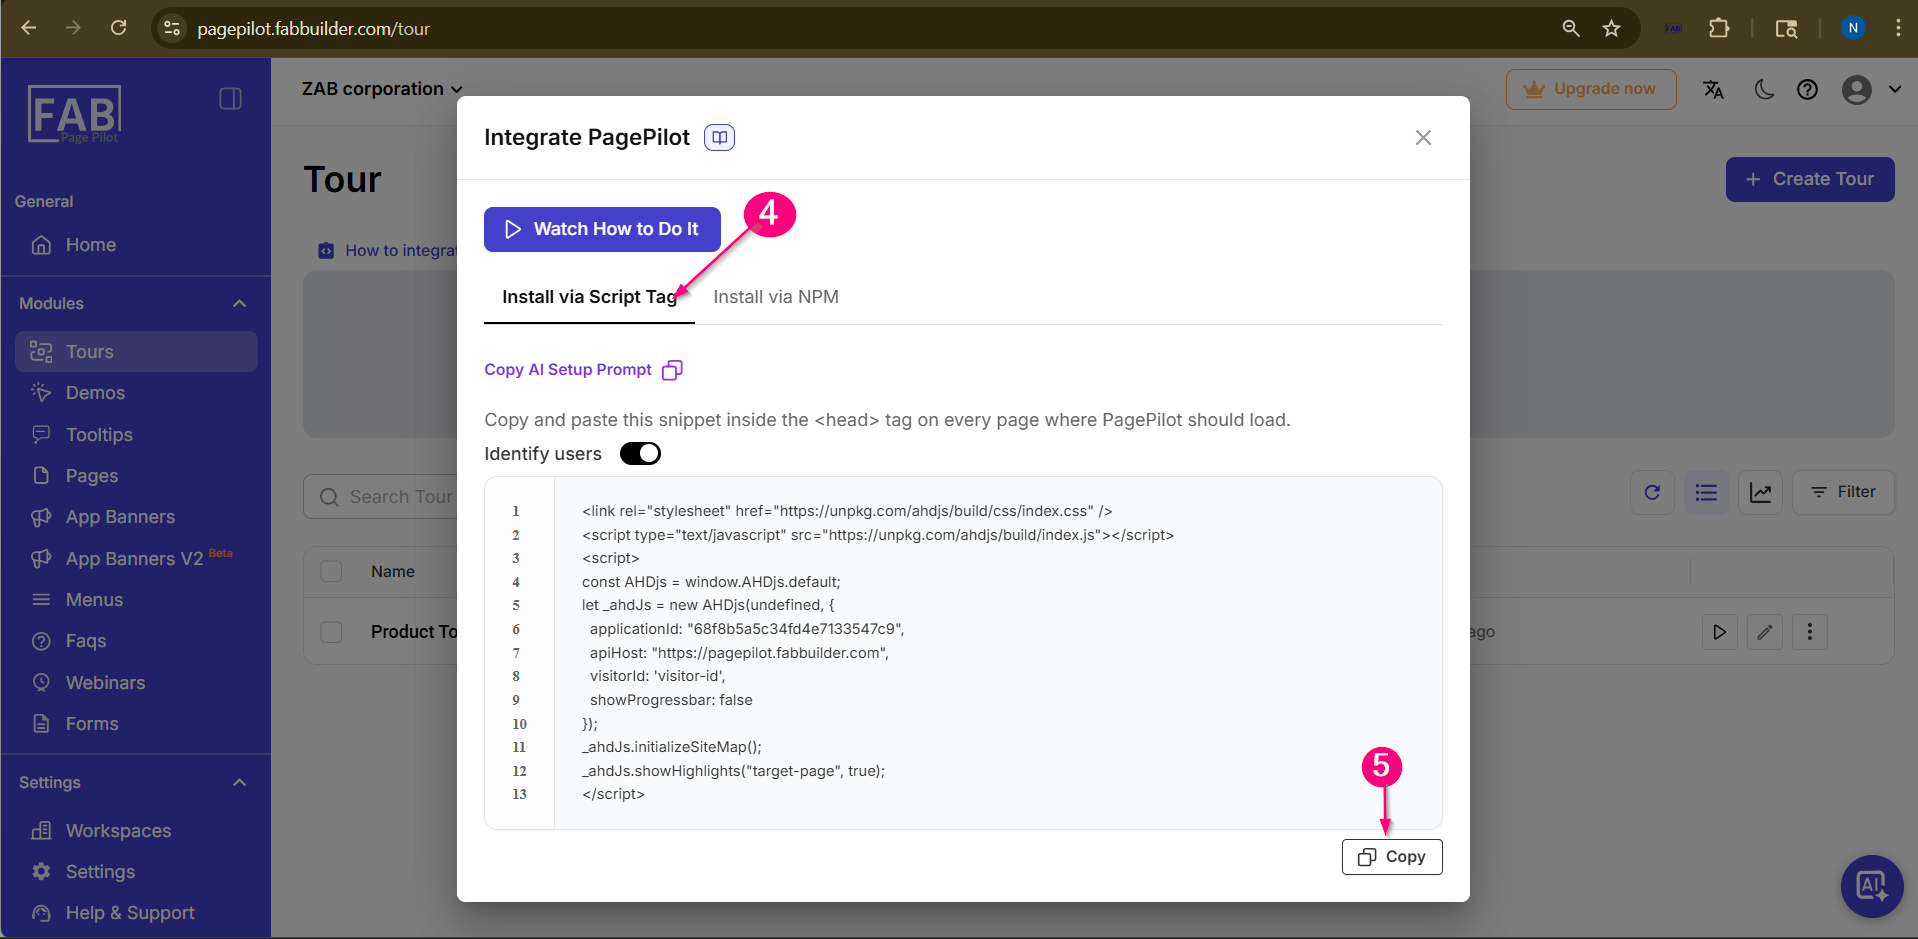
Screen- Select method and copy script
This script connects your website with PagePilot
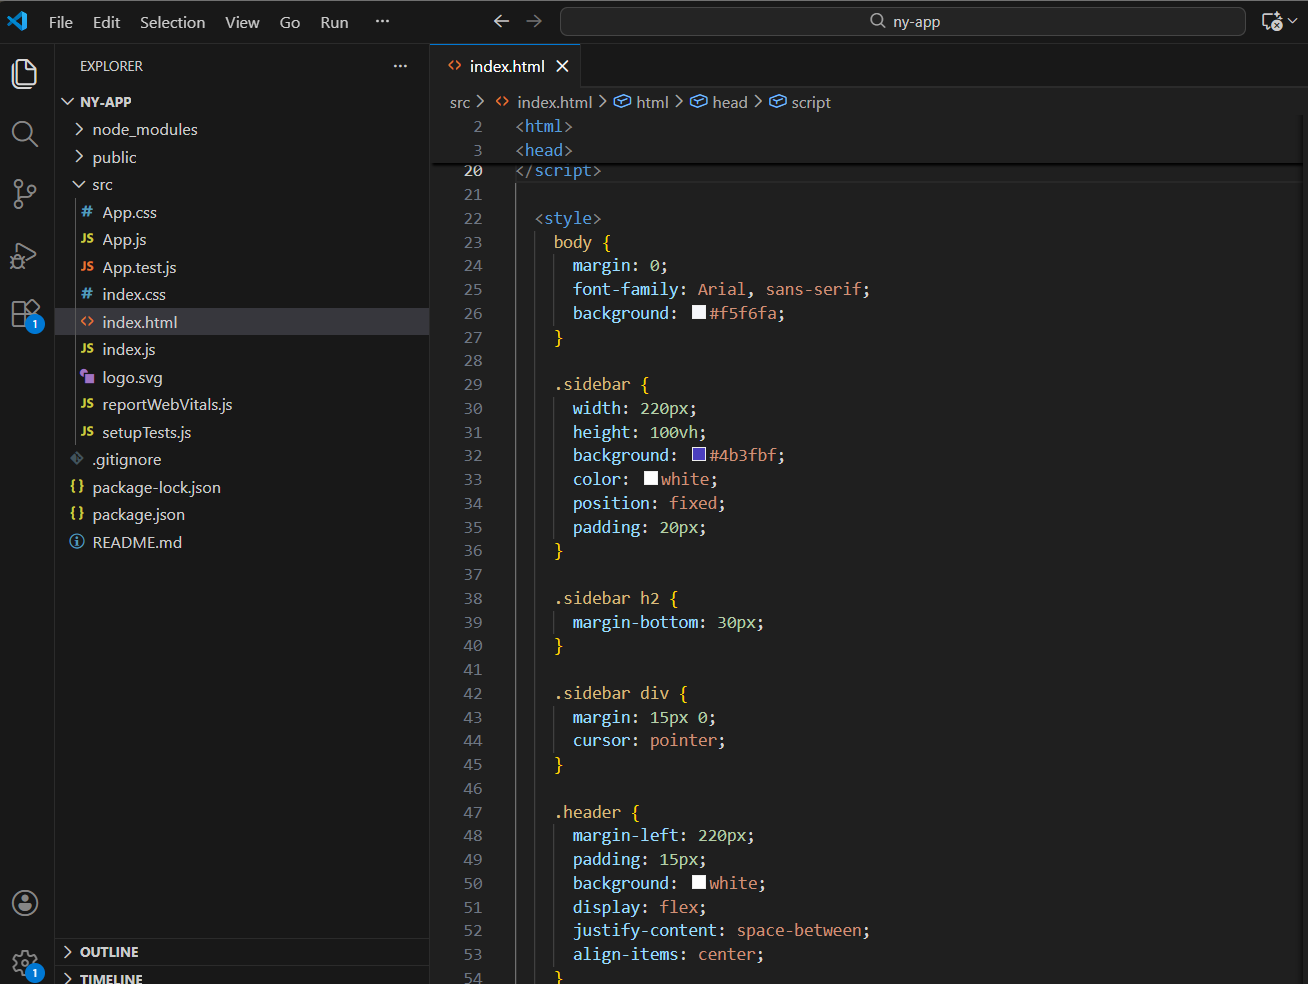
Add Script to HTML on VS code
6.Open your HTML file (e.g., index.html)
7.Paste the script inside the <head> section
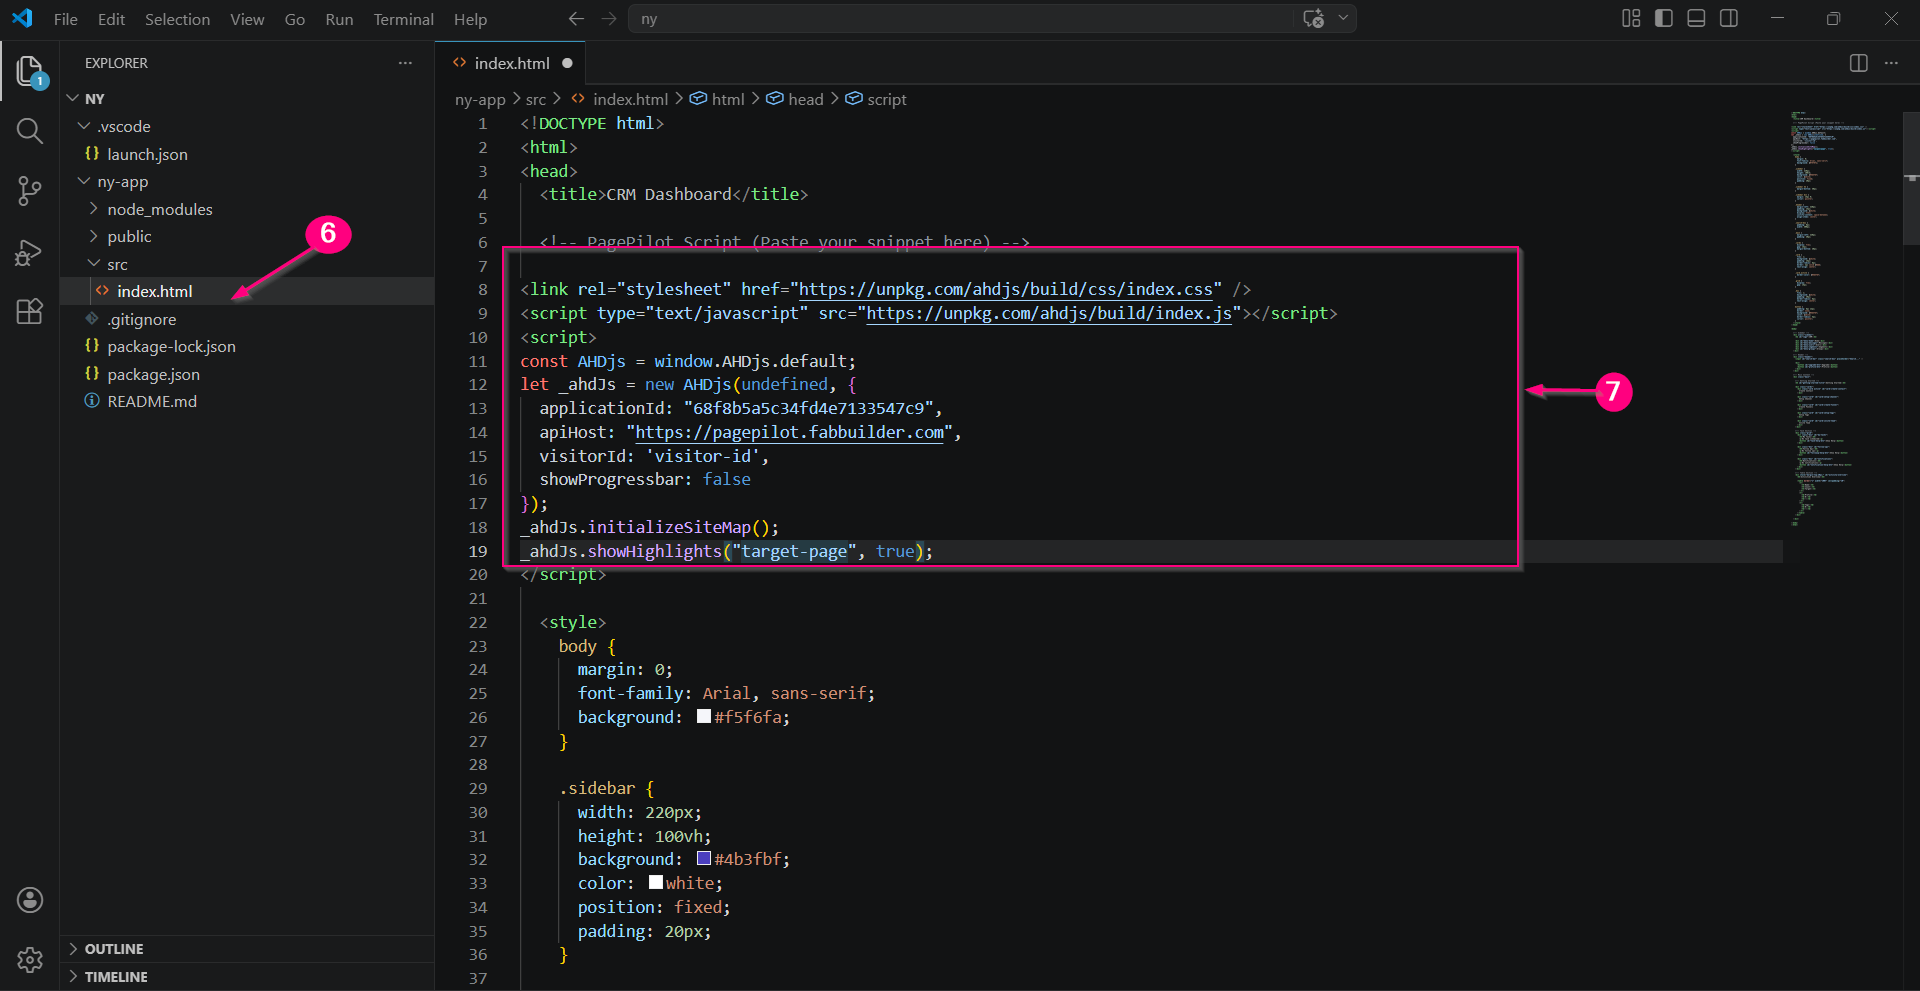
Screen- Select web app File and paste script on Head
8.Save the file
9.Open your website in browser
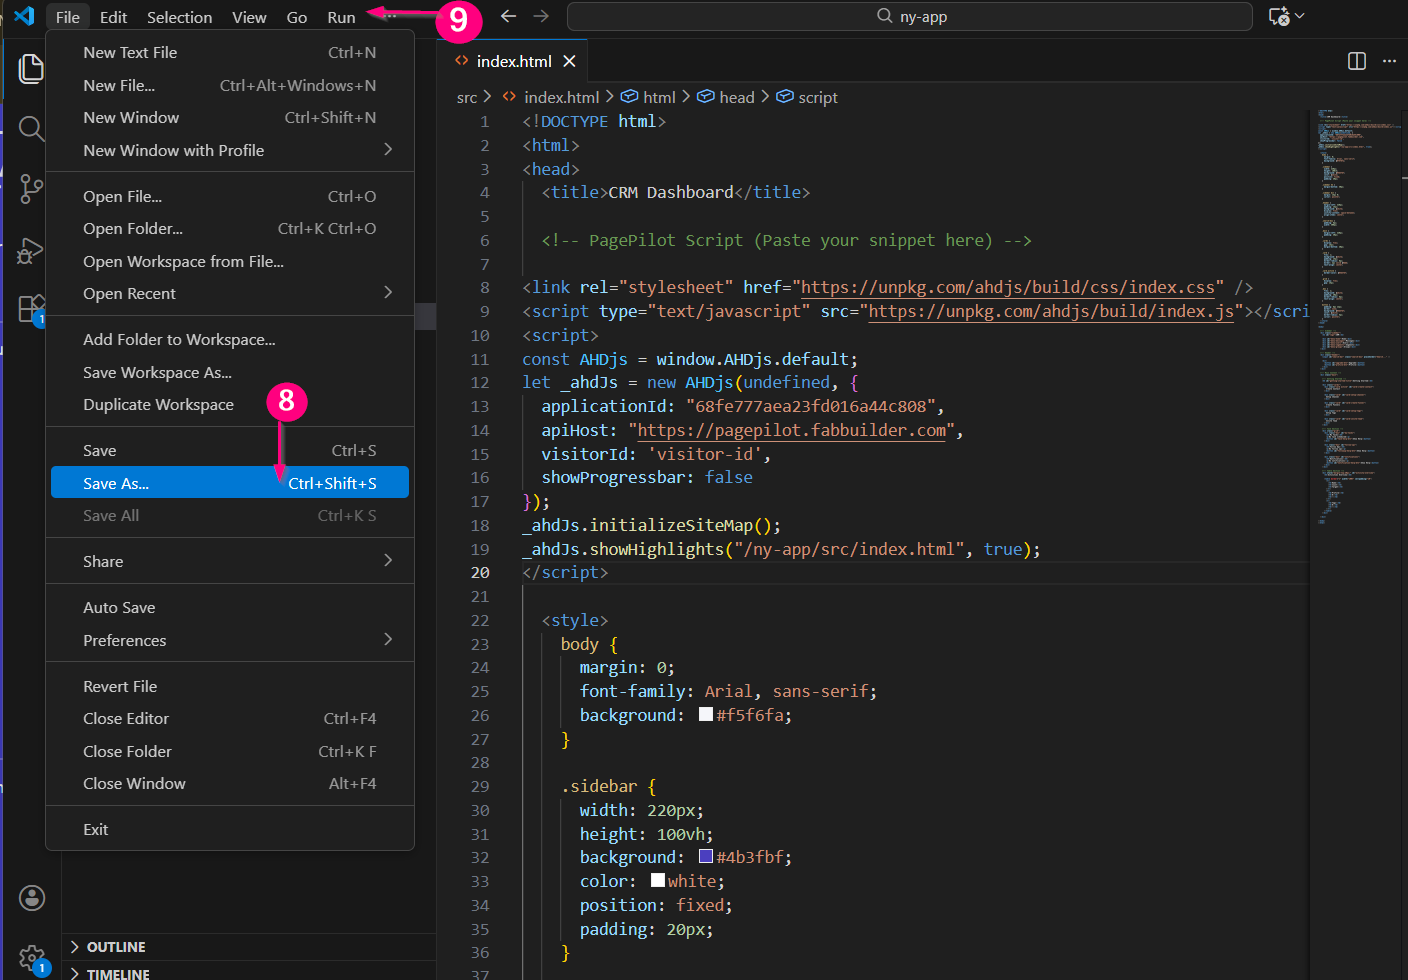
Screen- Save and Run Project on Browser
No success message is shown after integration, so the user can verify it by creating and publishing a tour.
Configure Tour
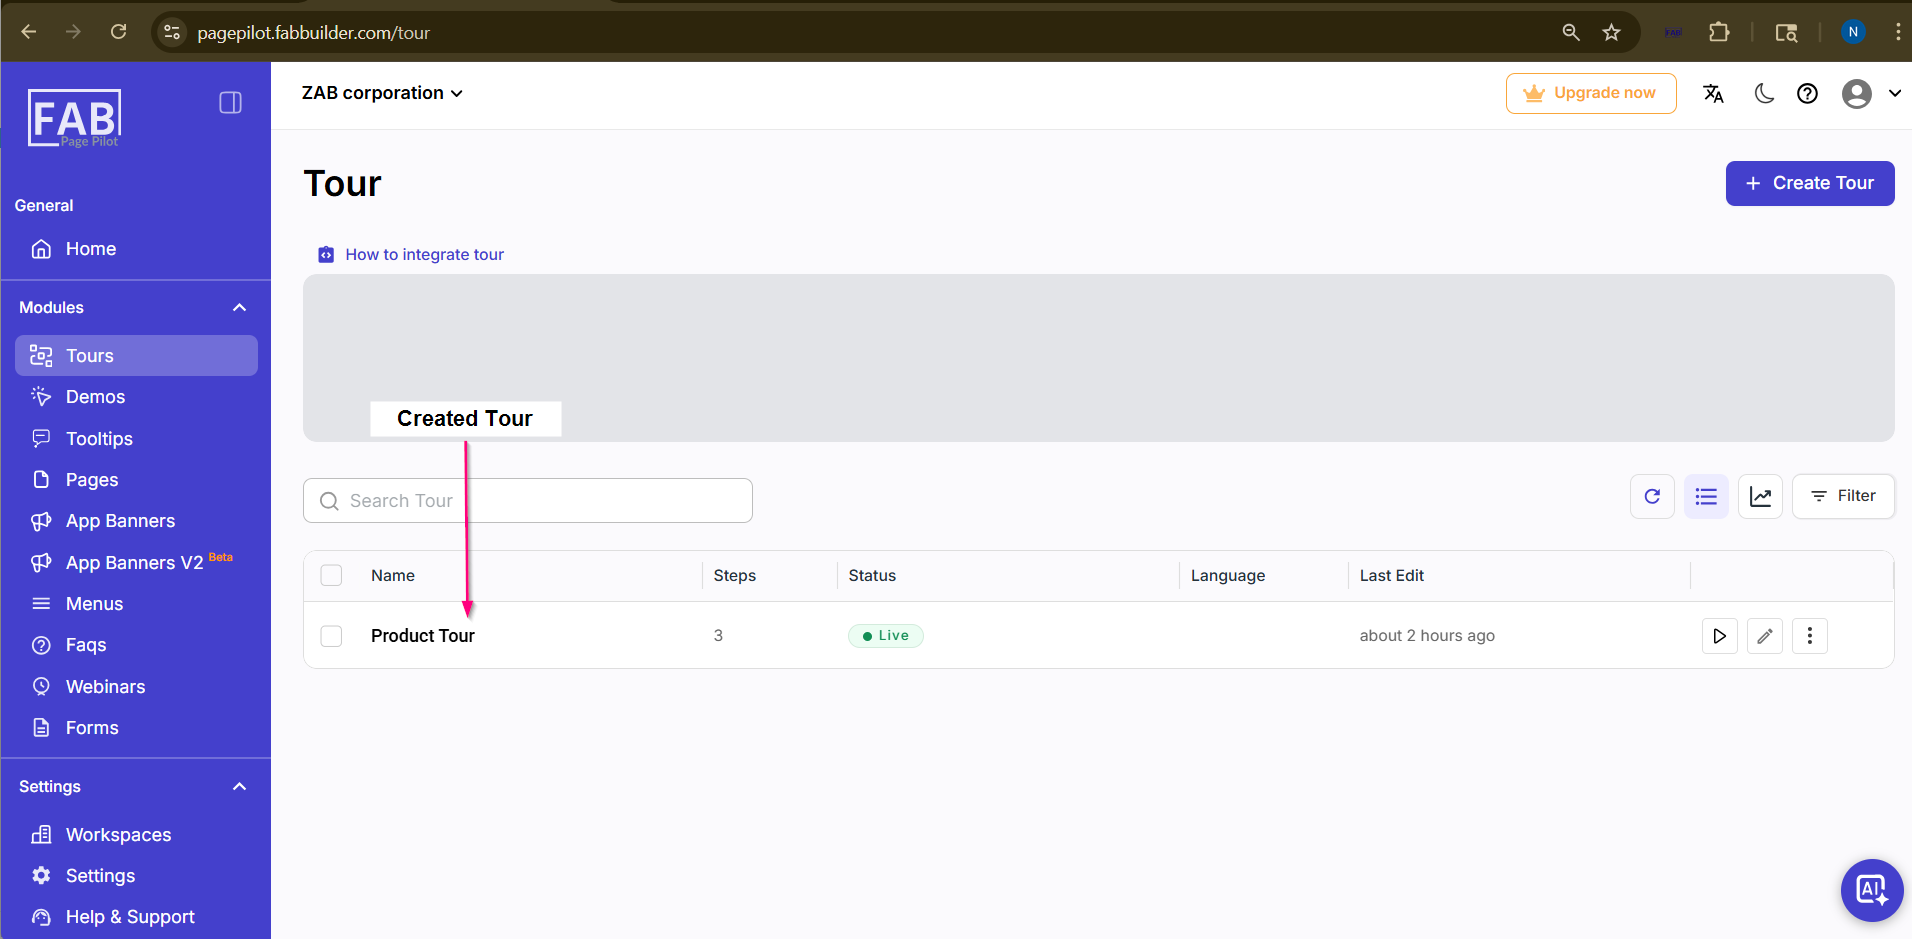
10.Go toPagePilot Dashboard .Create if not created or edit a tour. Here we click on edit button of created tour.
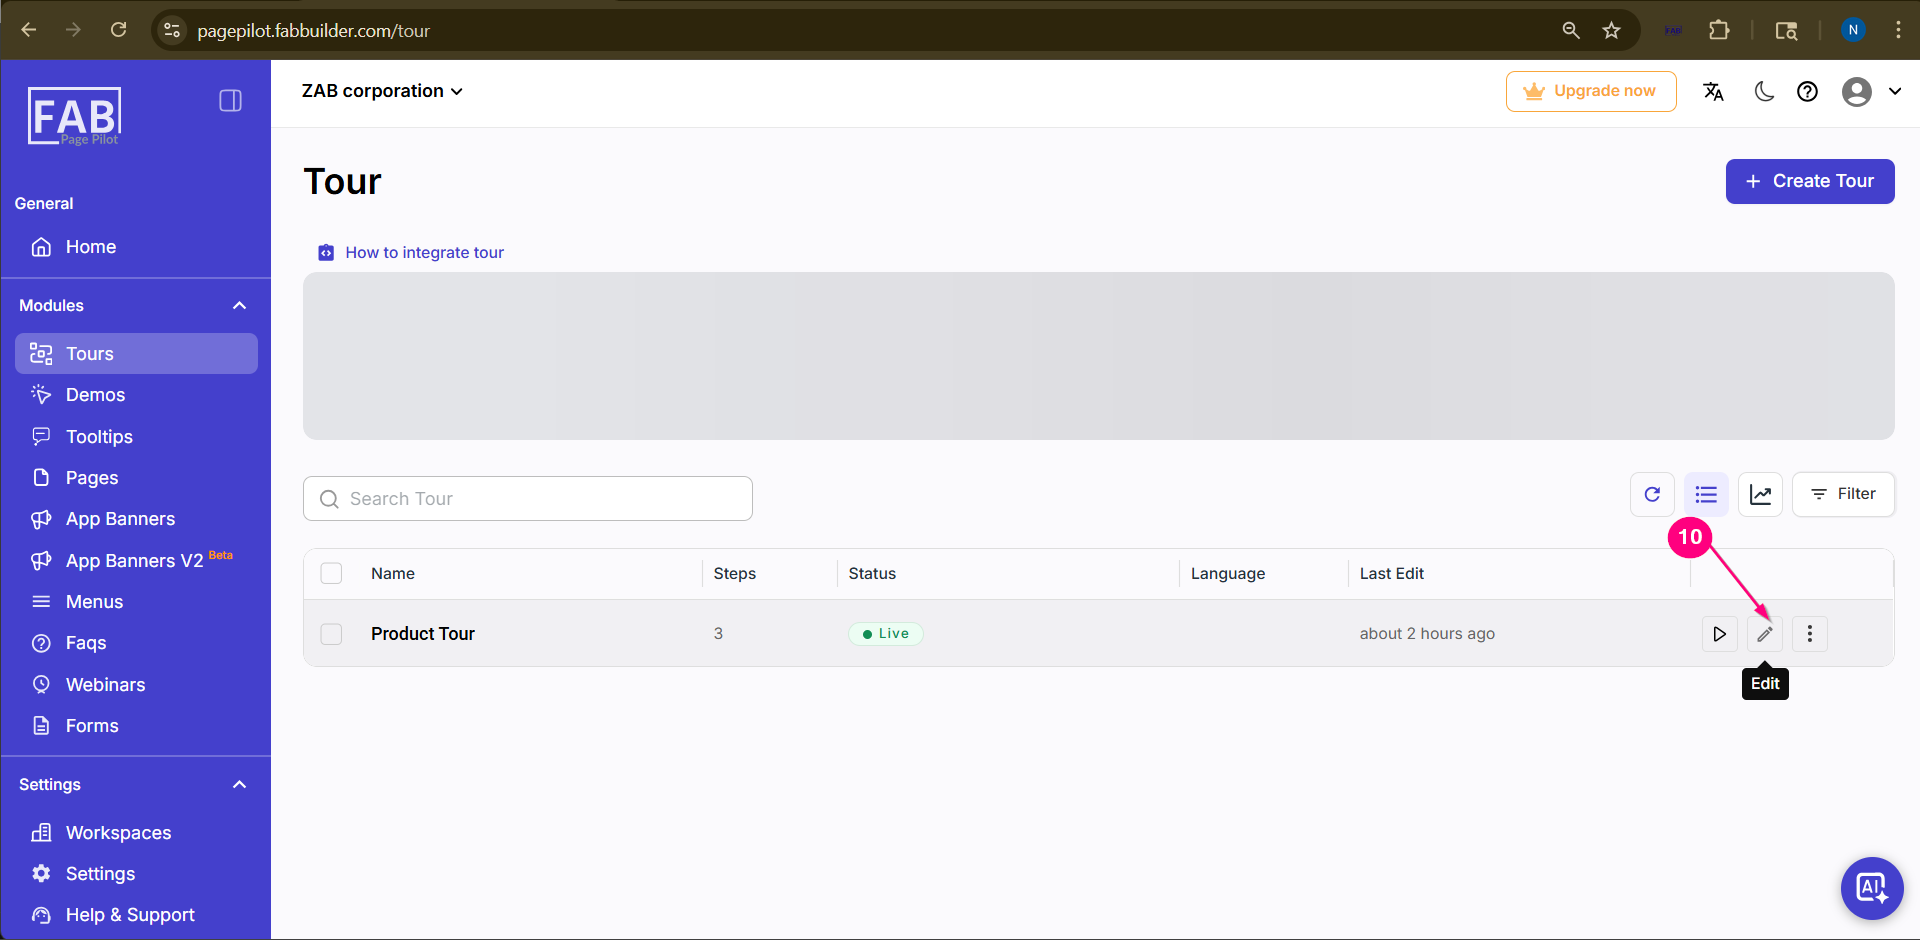
Screen - Steps to Edit the Tour details
11.click on behavoiur tab
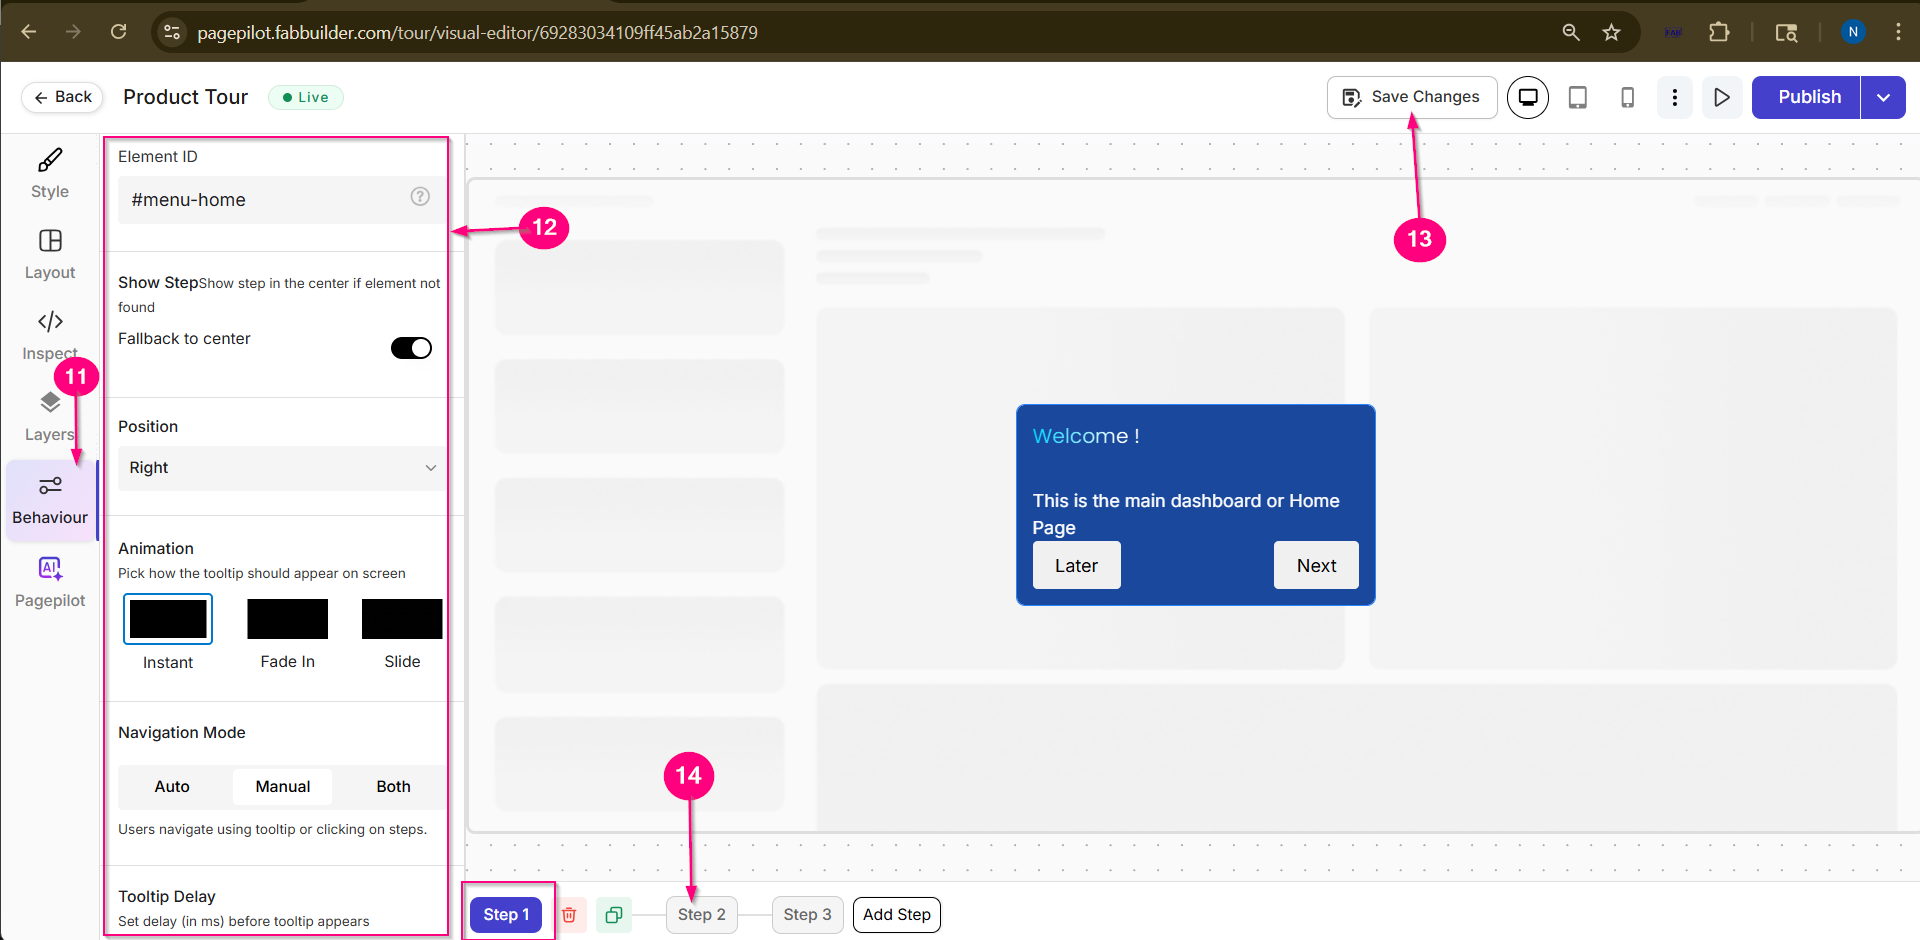
Screen- Add element id and configure other details in tour step 1
12.Target Element→ e.g., #menu-home and configure the tooltip details of tour step1
13.click on save change .
14.Click on step 2
This will redirect the step 2 tour step screen .User must follow same step to add element id in step 2 and configure other details og tour step2
15.click on behavoiur tab
-
16Target Element→ e.g., #search-bar configure the tooltip details of tour step2
17..Click on save change .
18..Click on step 3 .
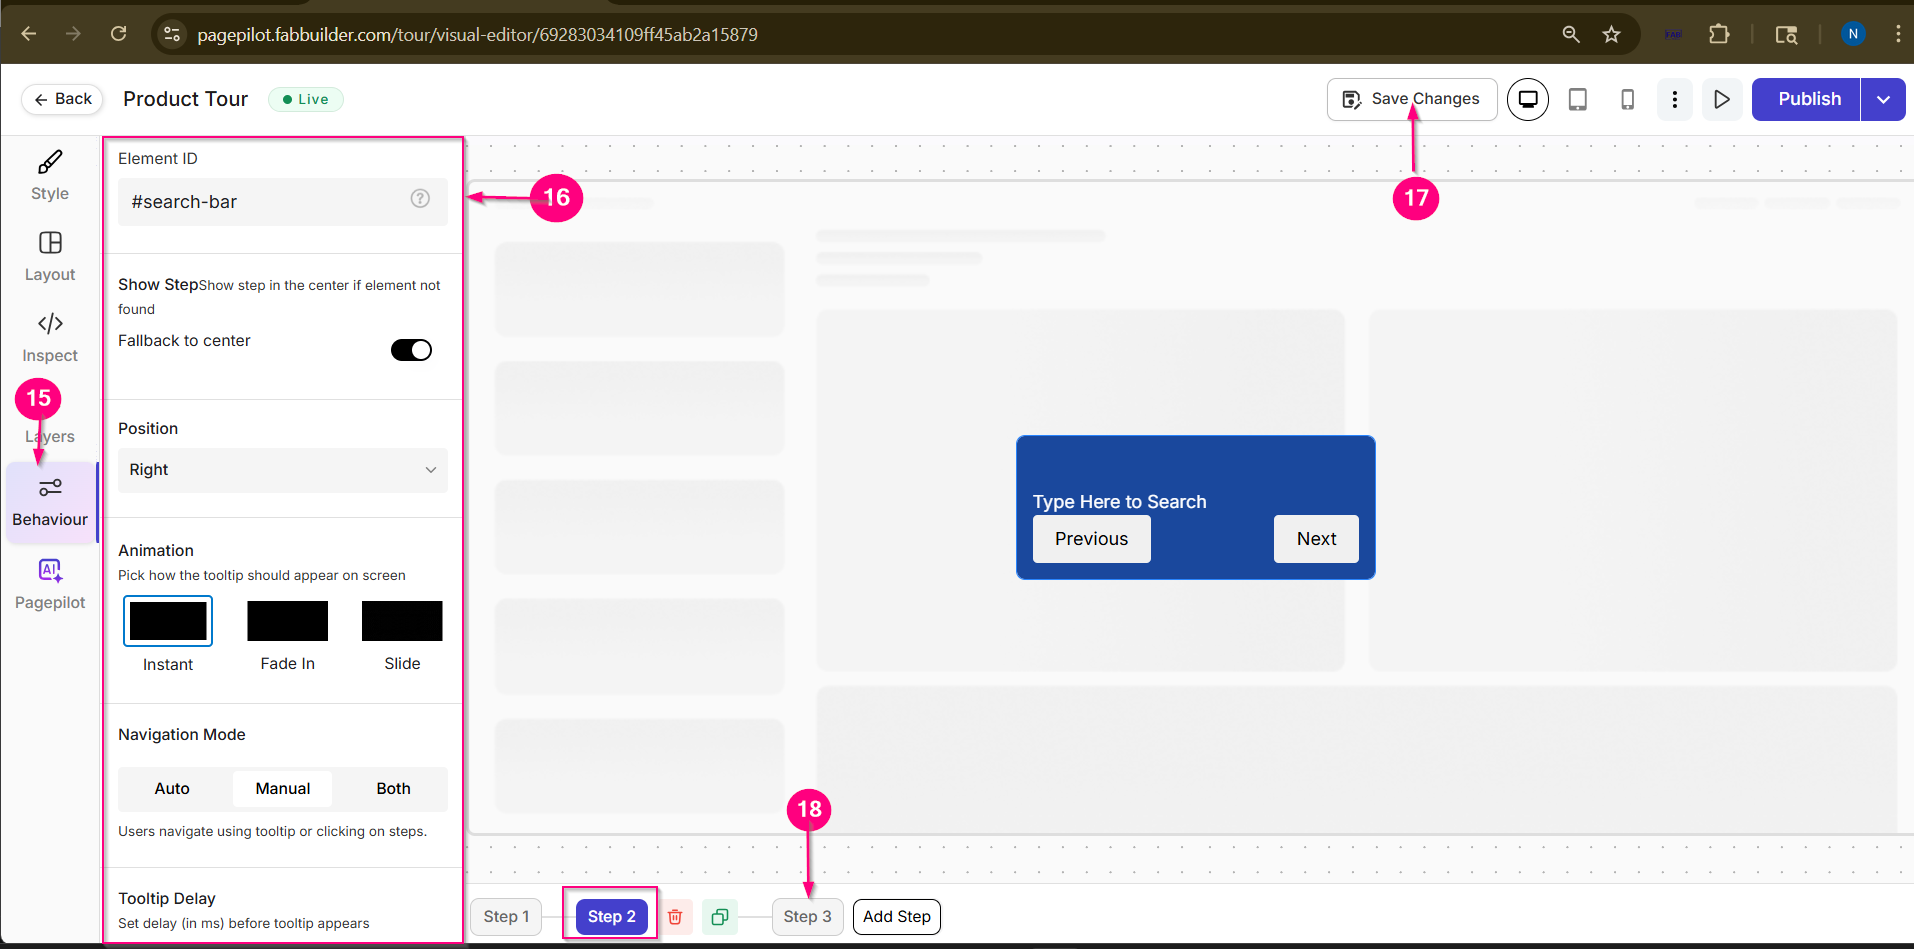
Screen-Screen- Add element id and configure other details in tour step 2
19.click on behavoiur tab
20.Target Element→ e.g., #upgrade-btn and configure the tooltip details of tour step3
21.Click on save button.
22.Click on Publish button.
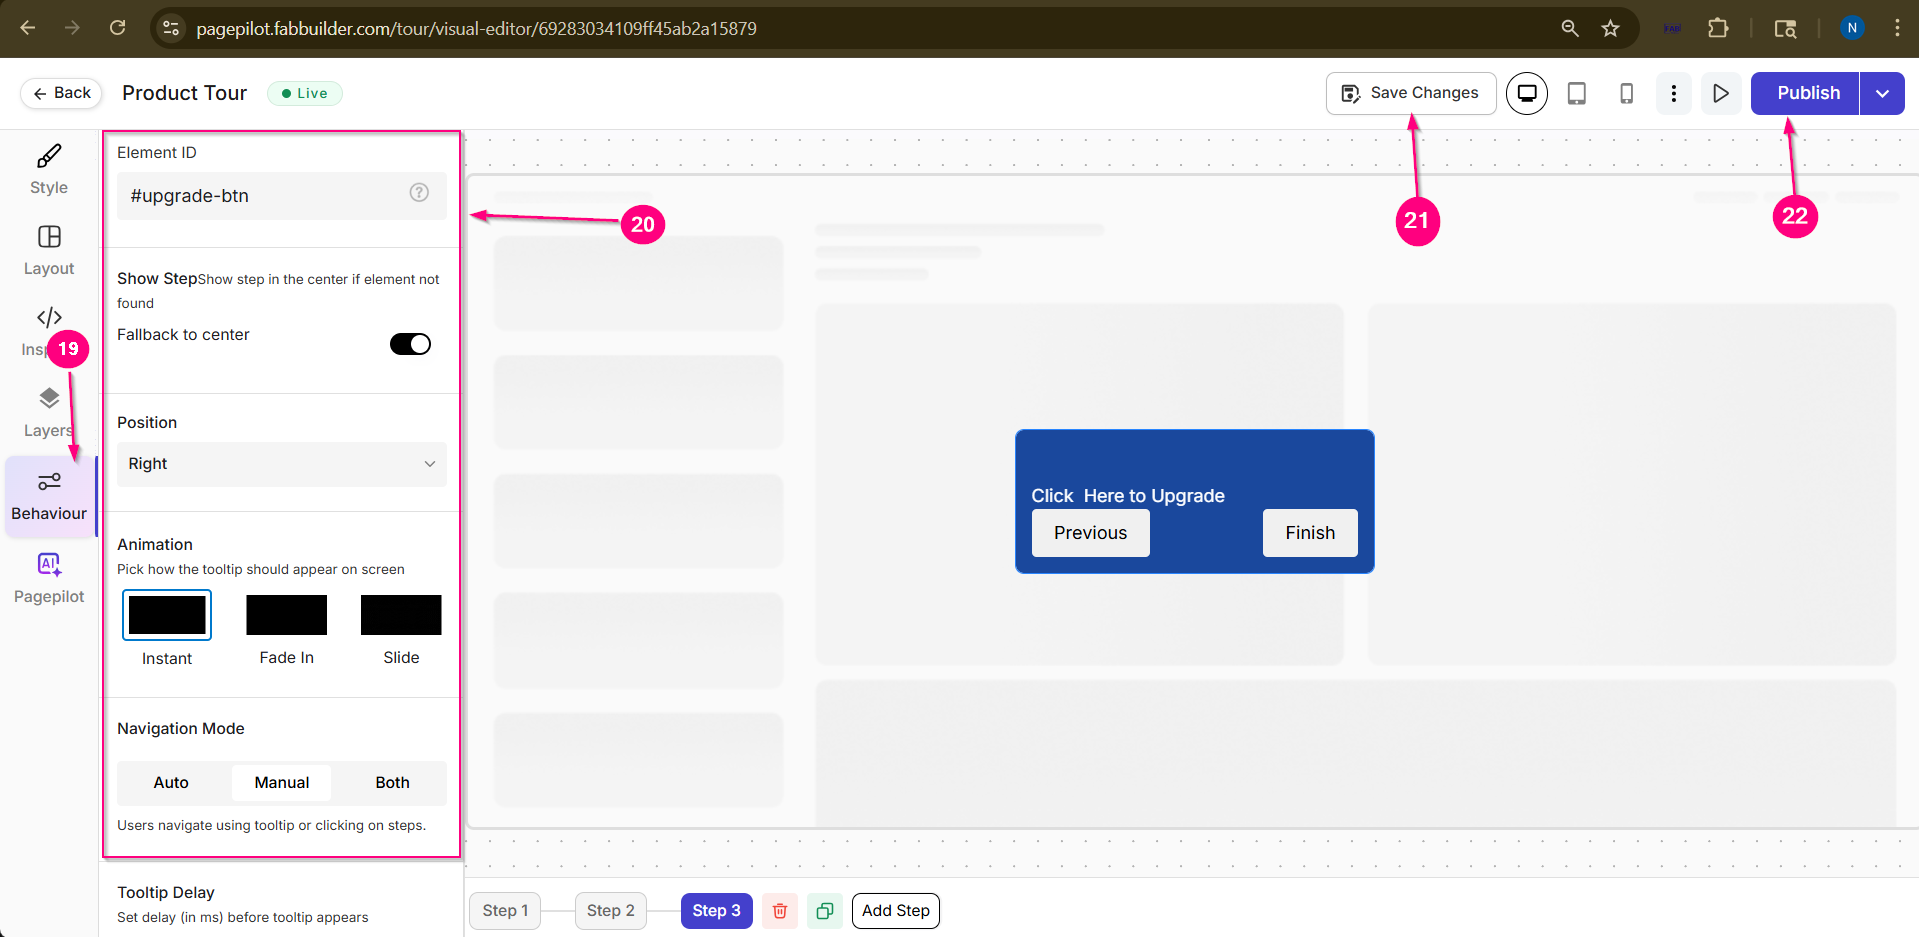
Screen- Add element id and configure other details in tour step 3
23.Add target page details from project or web page url with other details.
Screen- Select web app File and paste script on Head
24.Click on publish button.
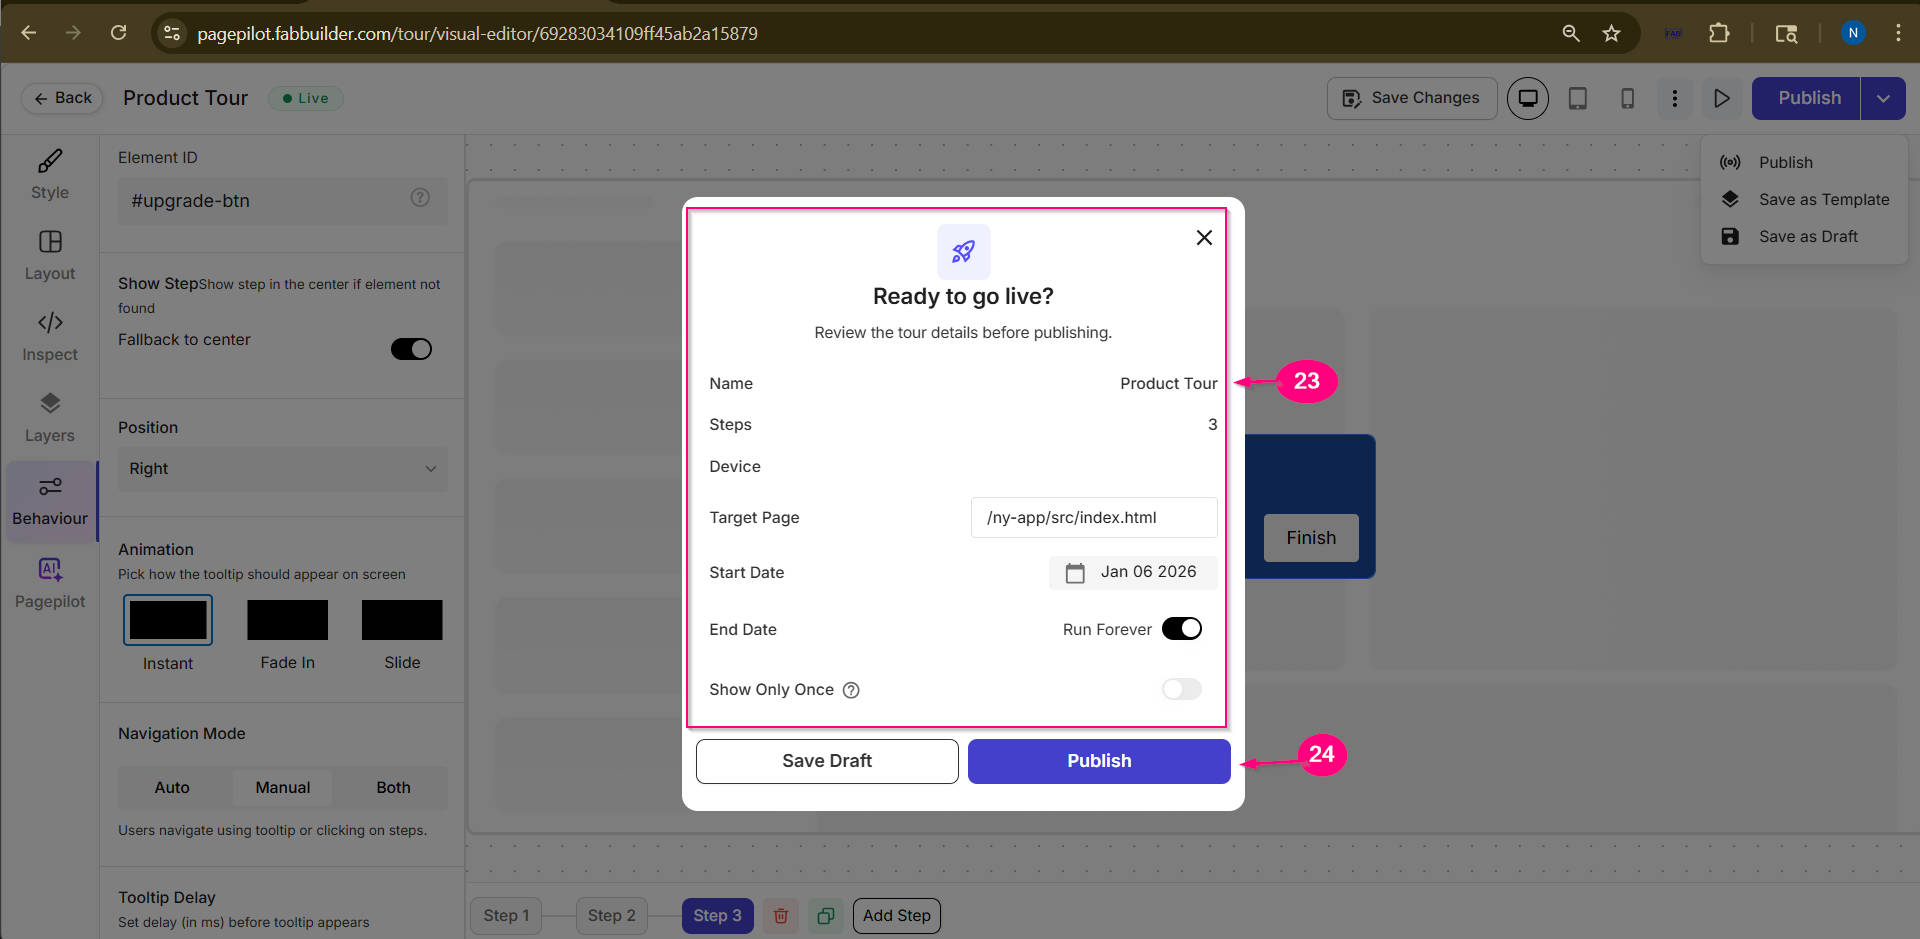
Screen- Add element id and configure other details in tour step 2
Screen- Tour Published successfully Post Integration on Wep App.
User must click on next button on tour tooltip step 1 to proceed to next step 2 and 3 of tour as shown in starting on this page.
Validate Integration
- Refresh your web page
- Verify tooltip appears on target element
Important Notes
- Script only enables PagePilot — tooltips are configured in dashboard
- Target element must exist in HTML
- Always use correct selector:
- ID → #element-id
- Class → .class-name
- Do not use full URL in target page
- Ideal for static websites